Coloring with Thread Book Showcase

Photo courtesy of The Quilting Company 

Late last year, I was excited to work on a stitching project based on a pattern by Tula Pink that was going to be included in her new embroidery book, Coloring with Thread: Stitching a Whimsical World with Hand Embroidery.

Check out that center Octopus hoop in the picture up there (maybe, just maybe, it was stitched by yours truly!)

If you love Tula Pink’s fabric, then, no doubt, you will be excited to get your hands on a book full of her embroidery patterns!

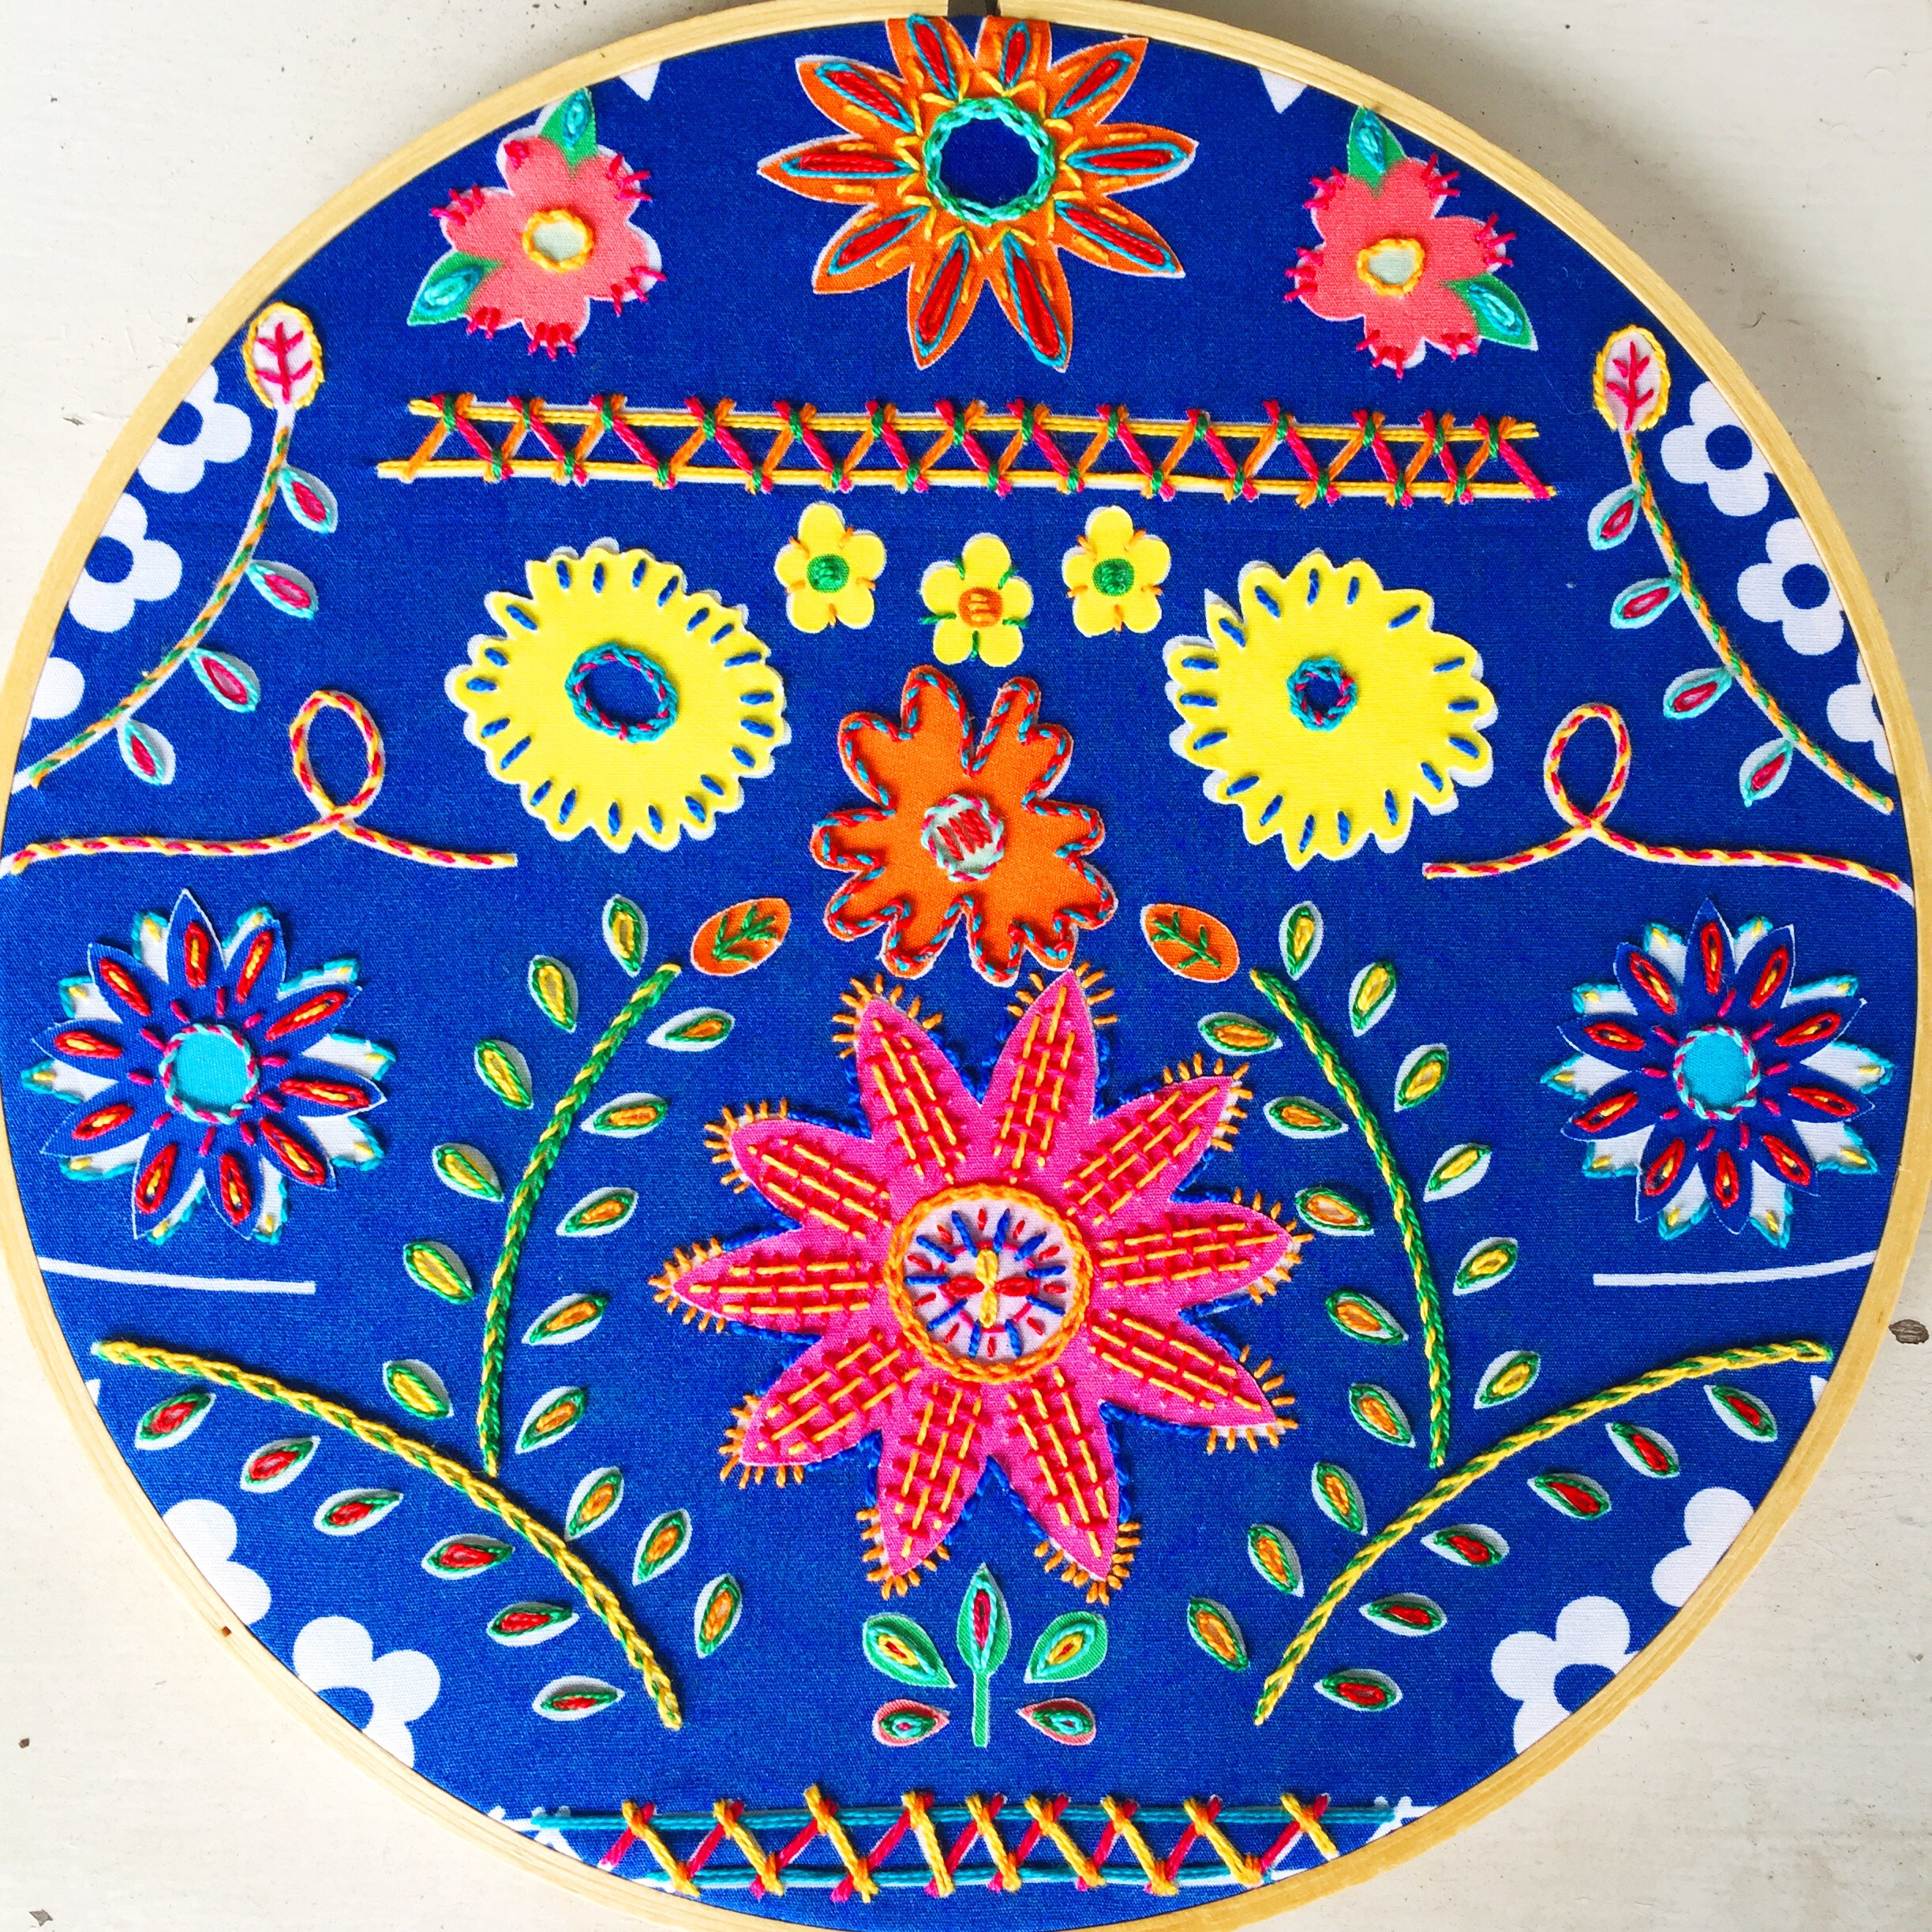
When I was asked to stitch up another pattern from her book as part of the Coloring with Thread blog tour, I couldn’t wait to try Boho-ing up one of her designs: the Double Bunny.

I feel like I need to add this disclaimer before going any further: for my sanity (and yours!), I highly recommend enlarging your chosen patterns before you try this method for yourself. Seriously. Tula Pink designs are gorgeously intricate but cutting so many teeny, tiny fabric pieces might just be enough to push the most patient of fussy cutters to the brink of frustration!

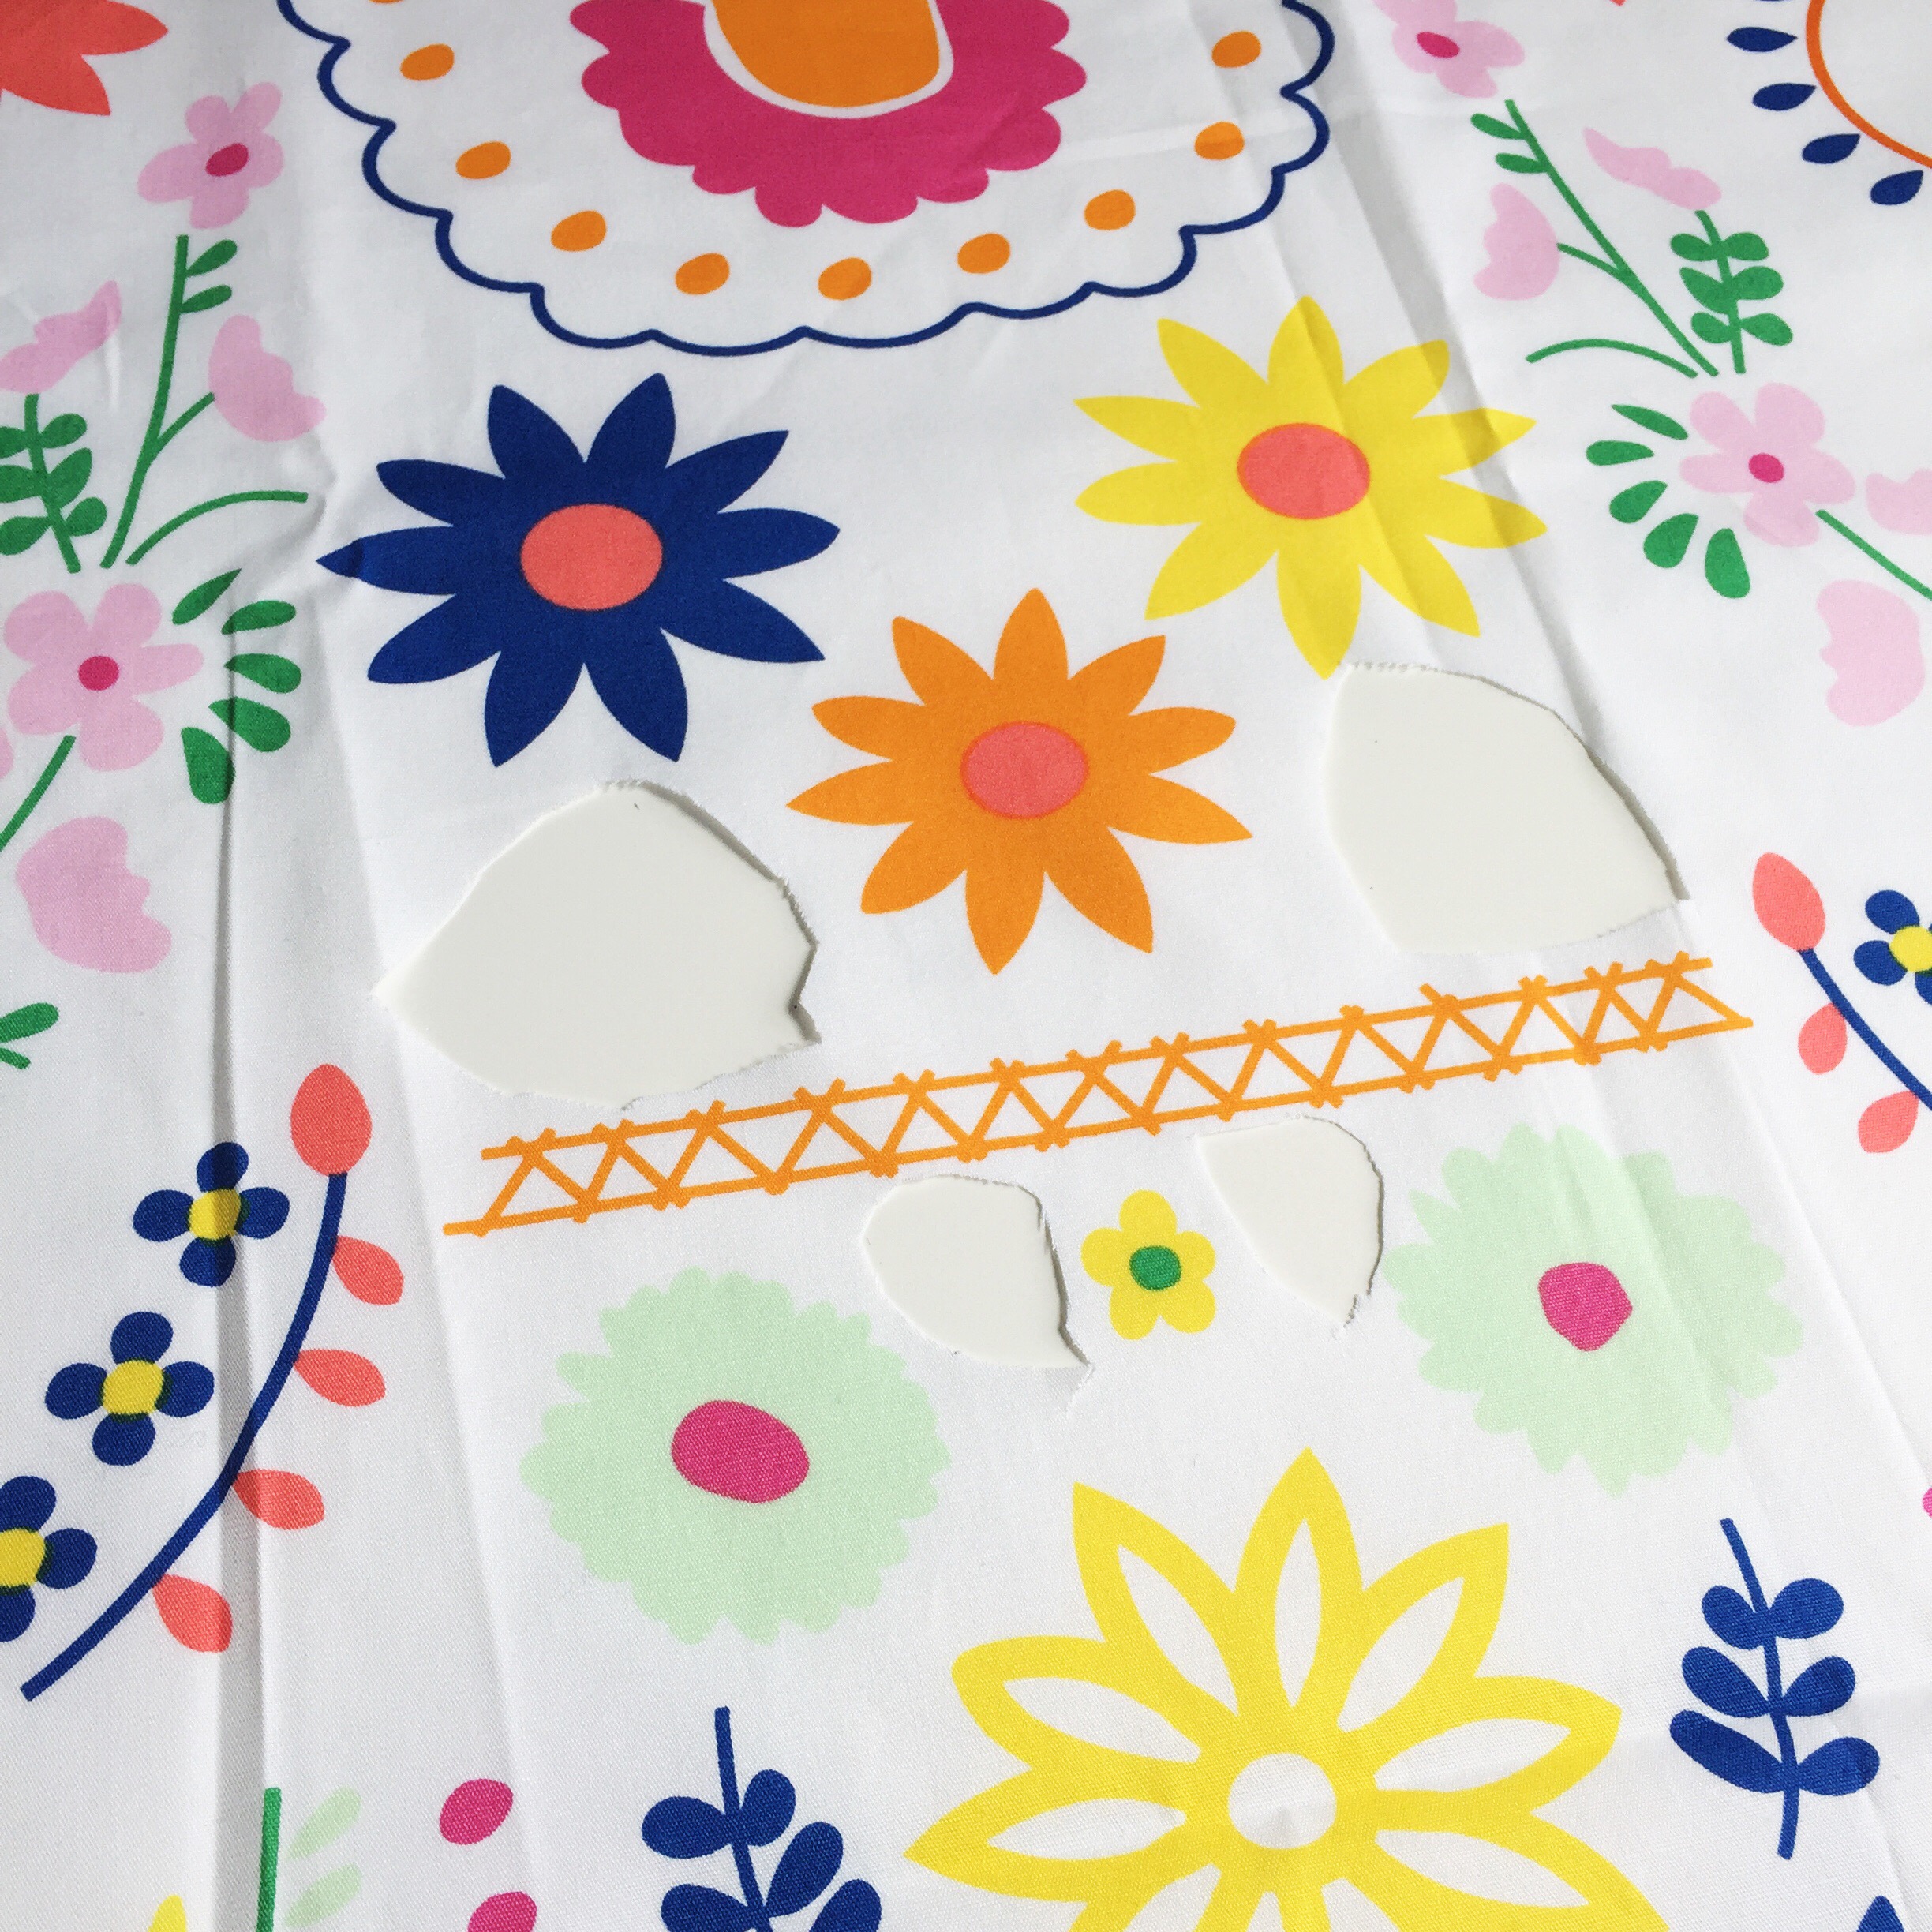
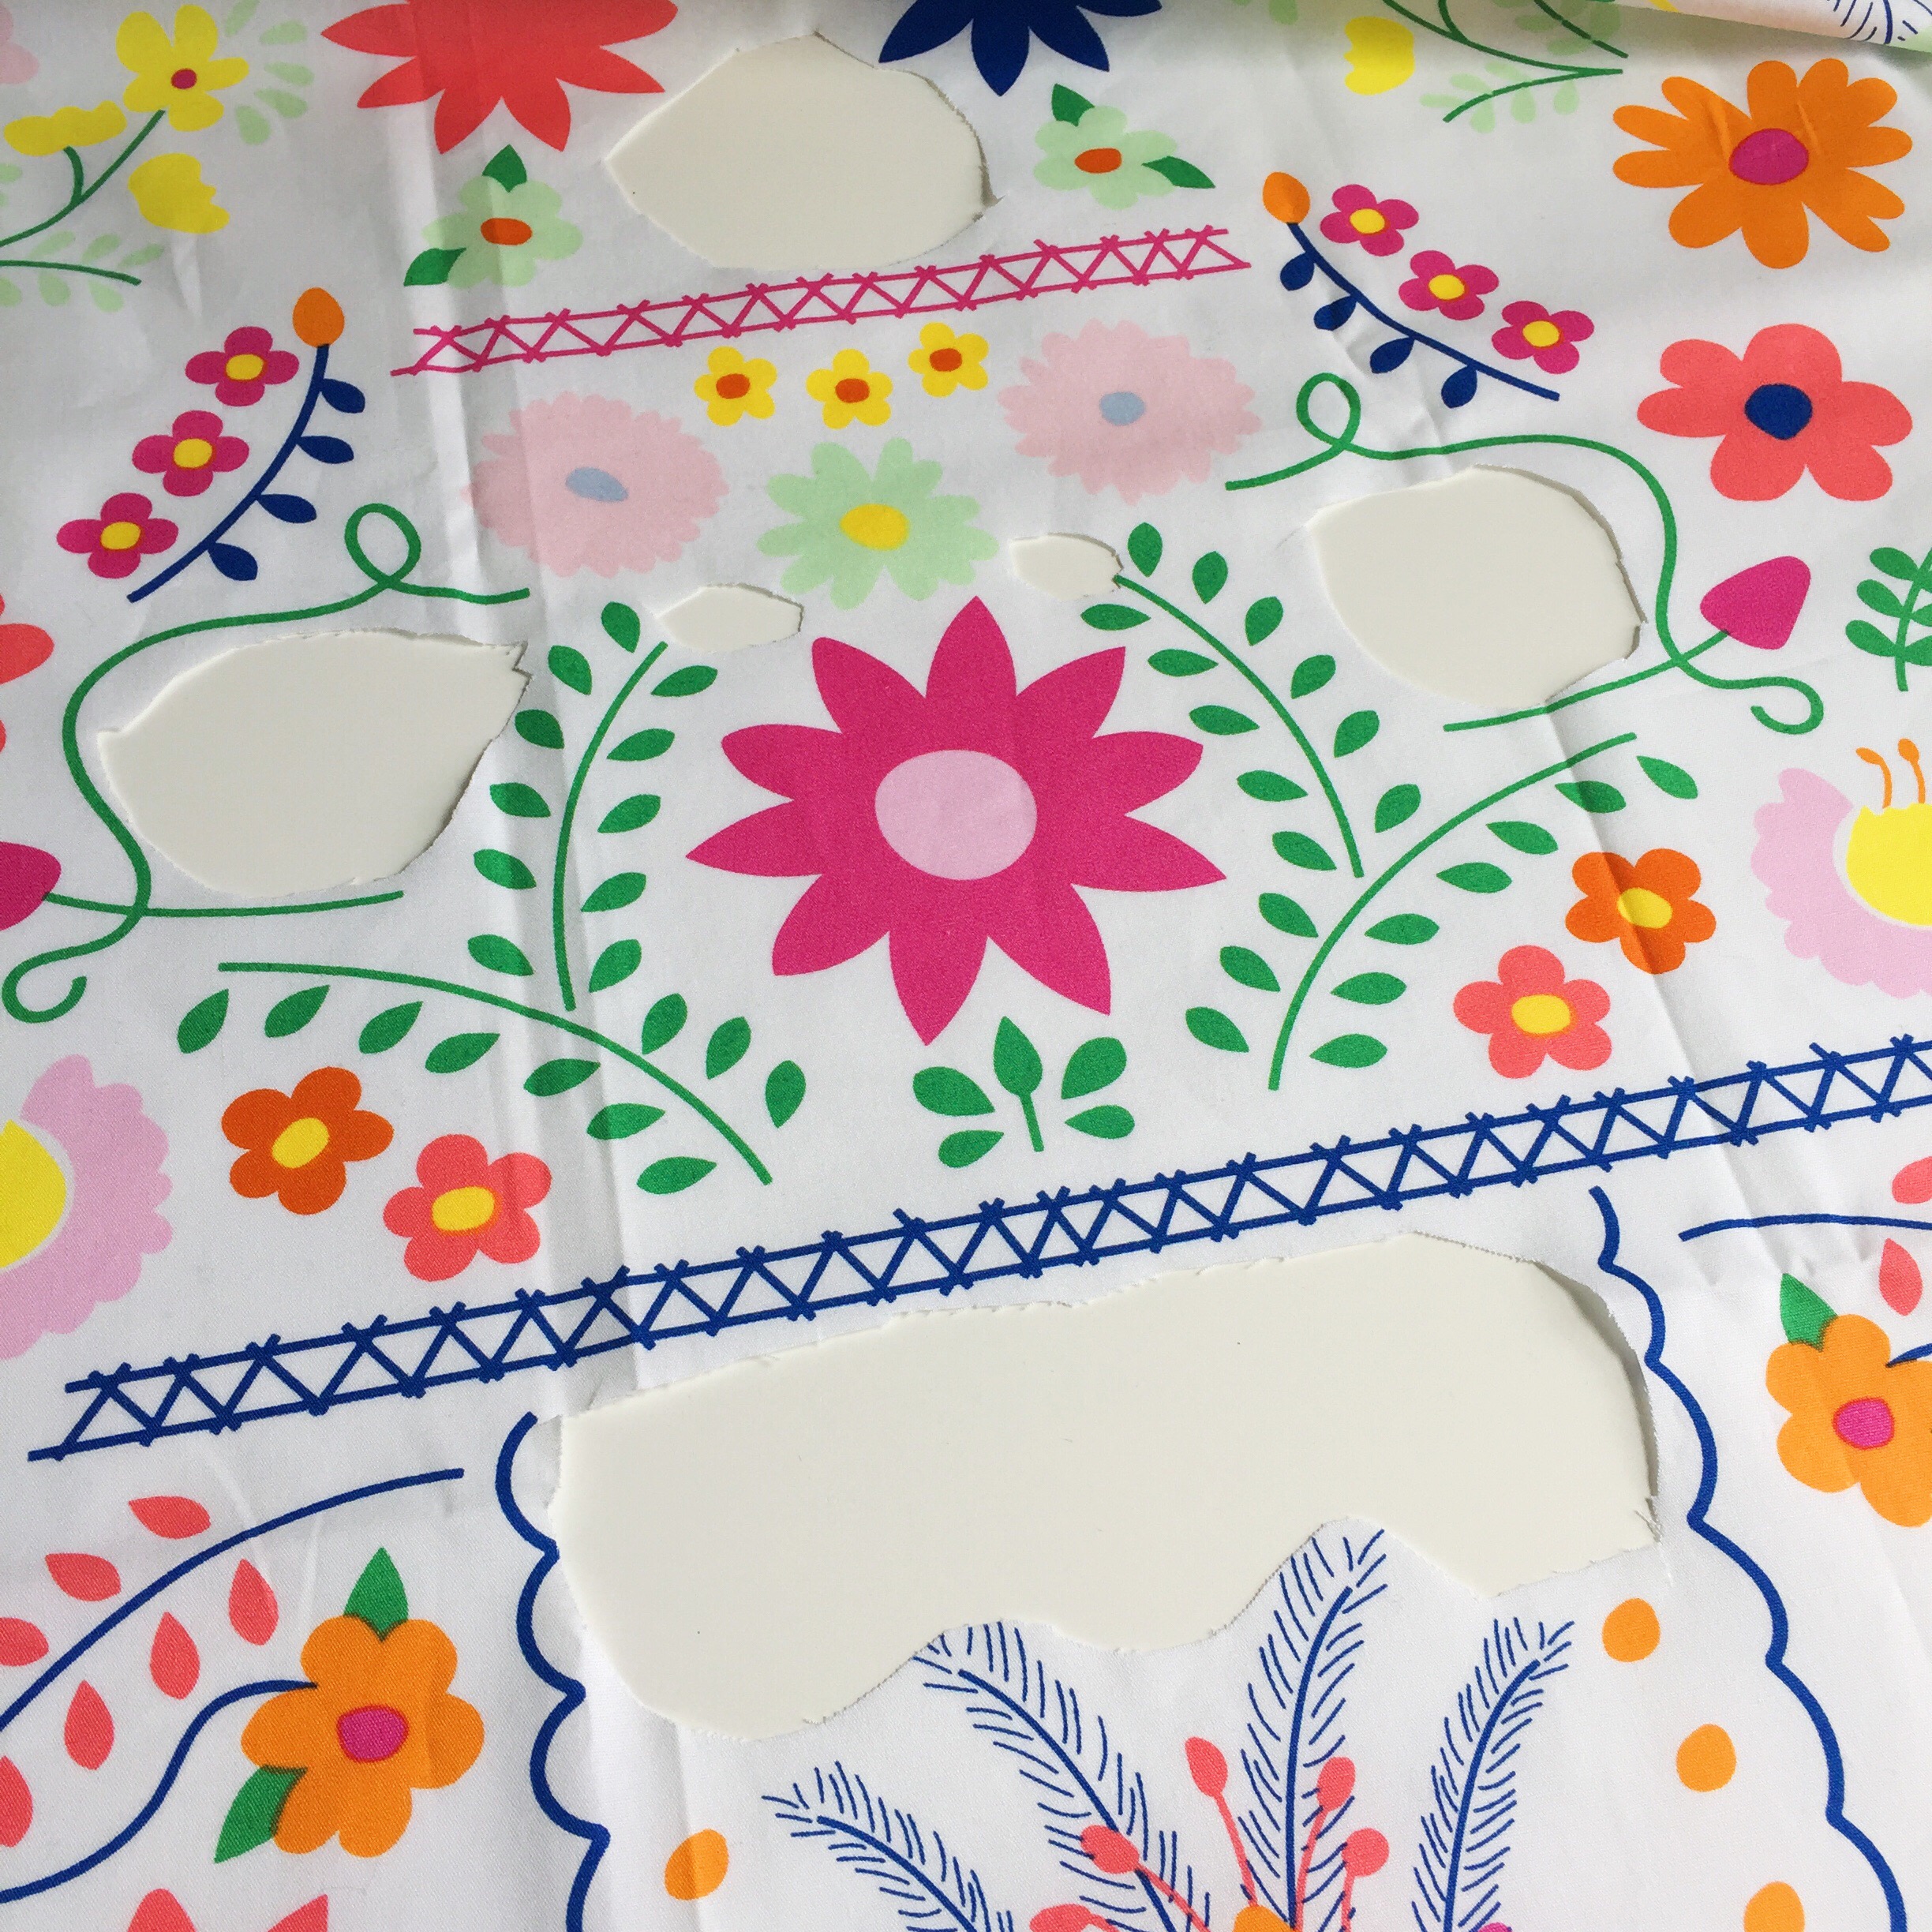
I began with enlarging the Double Bunny pattern.

Enlarging a pattern is incredibly easy if you have an office supply store nearby. Take your pattern in and ask them to make an engineering print in whatever size you need. I enlarged the Double Bunny pattern to 14″ and it fits perfectly in a 14″ hoop.

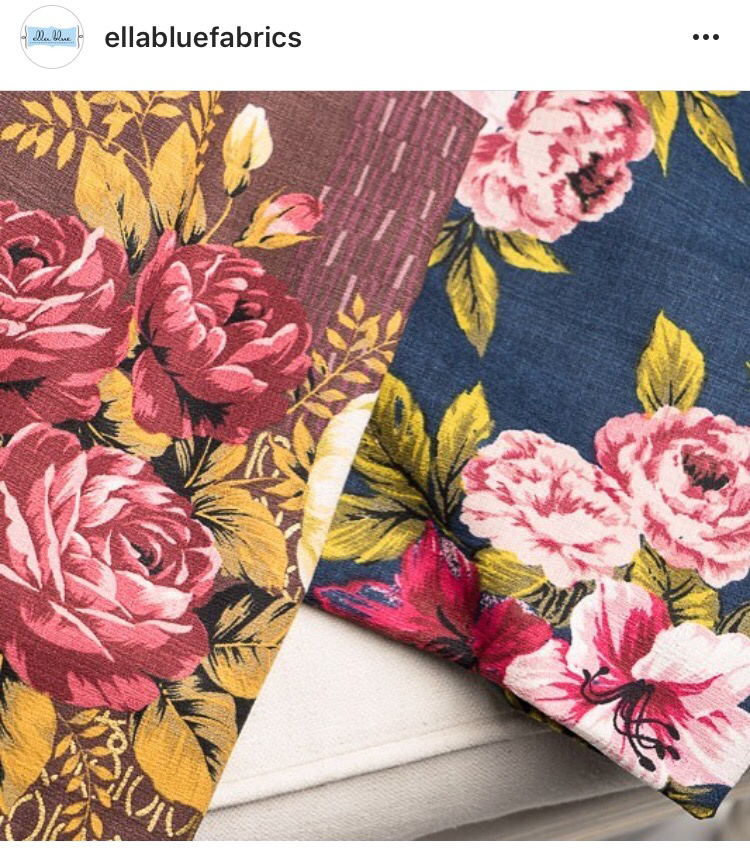
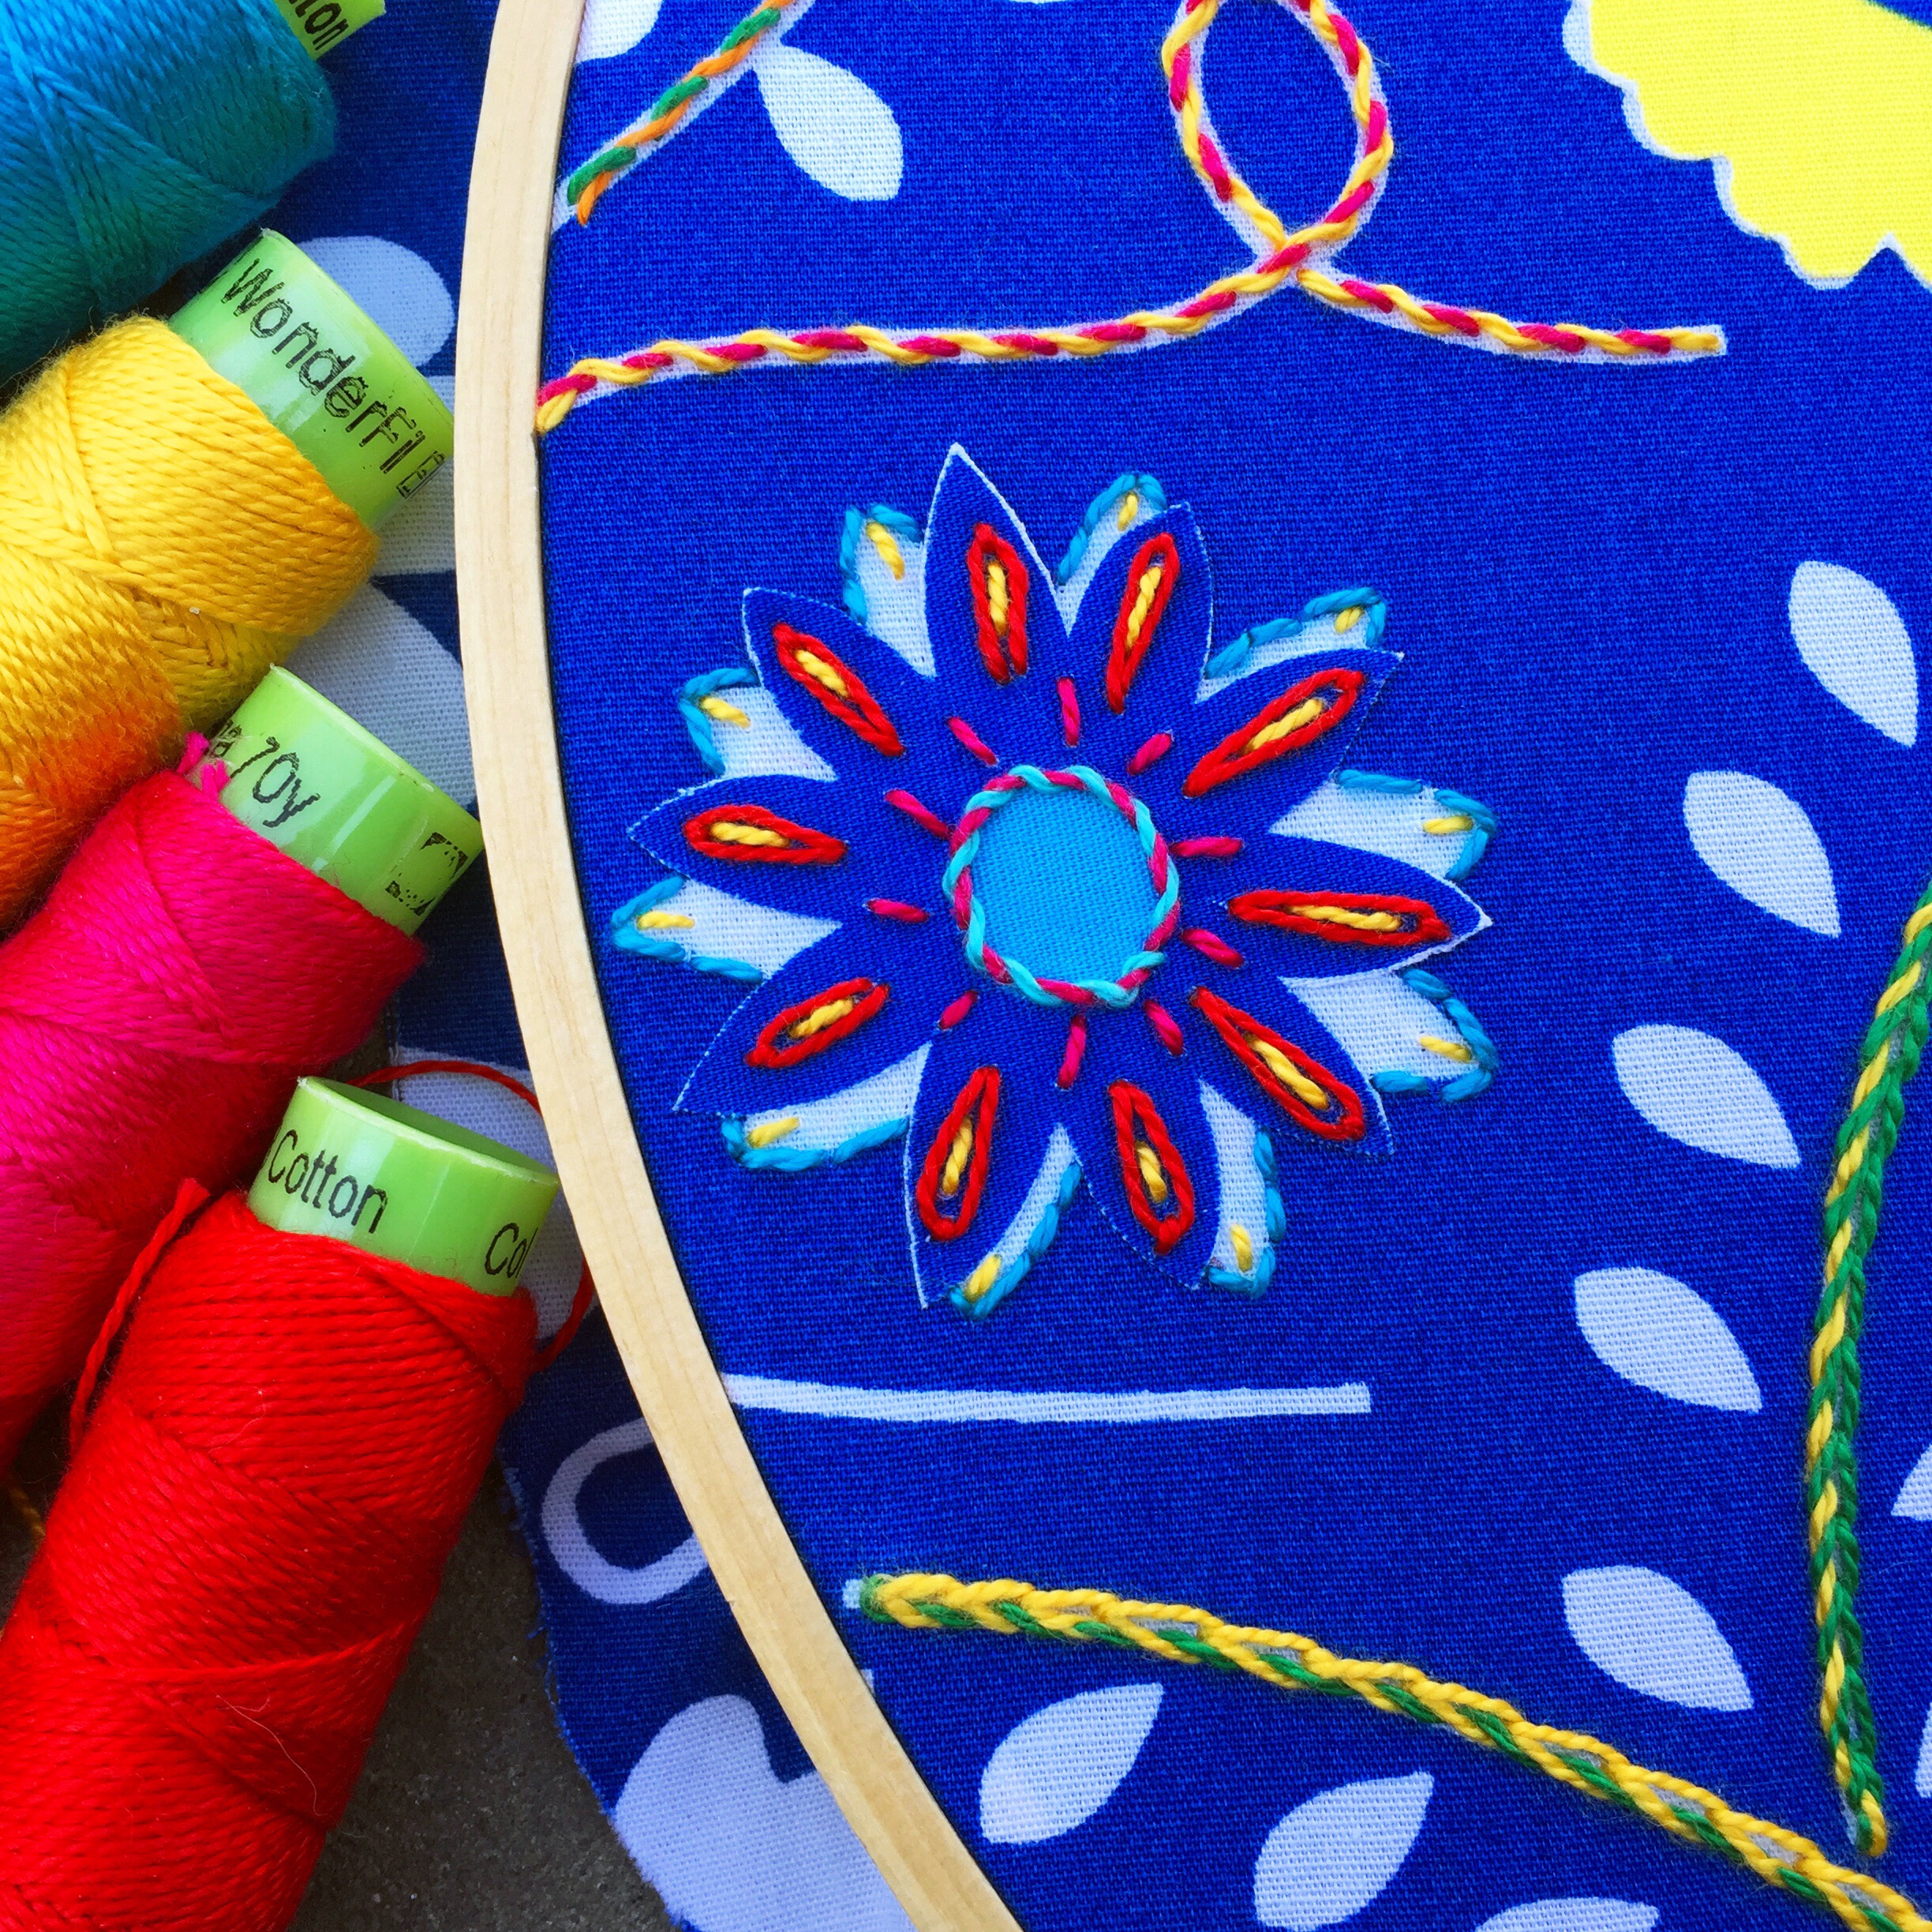
Once I had my copy of the pattern, I used the techniques outlined in my book, Boho Embroidery to transfer the pattern to a selection of my favorite Tula Pink fabrics.

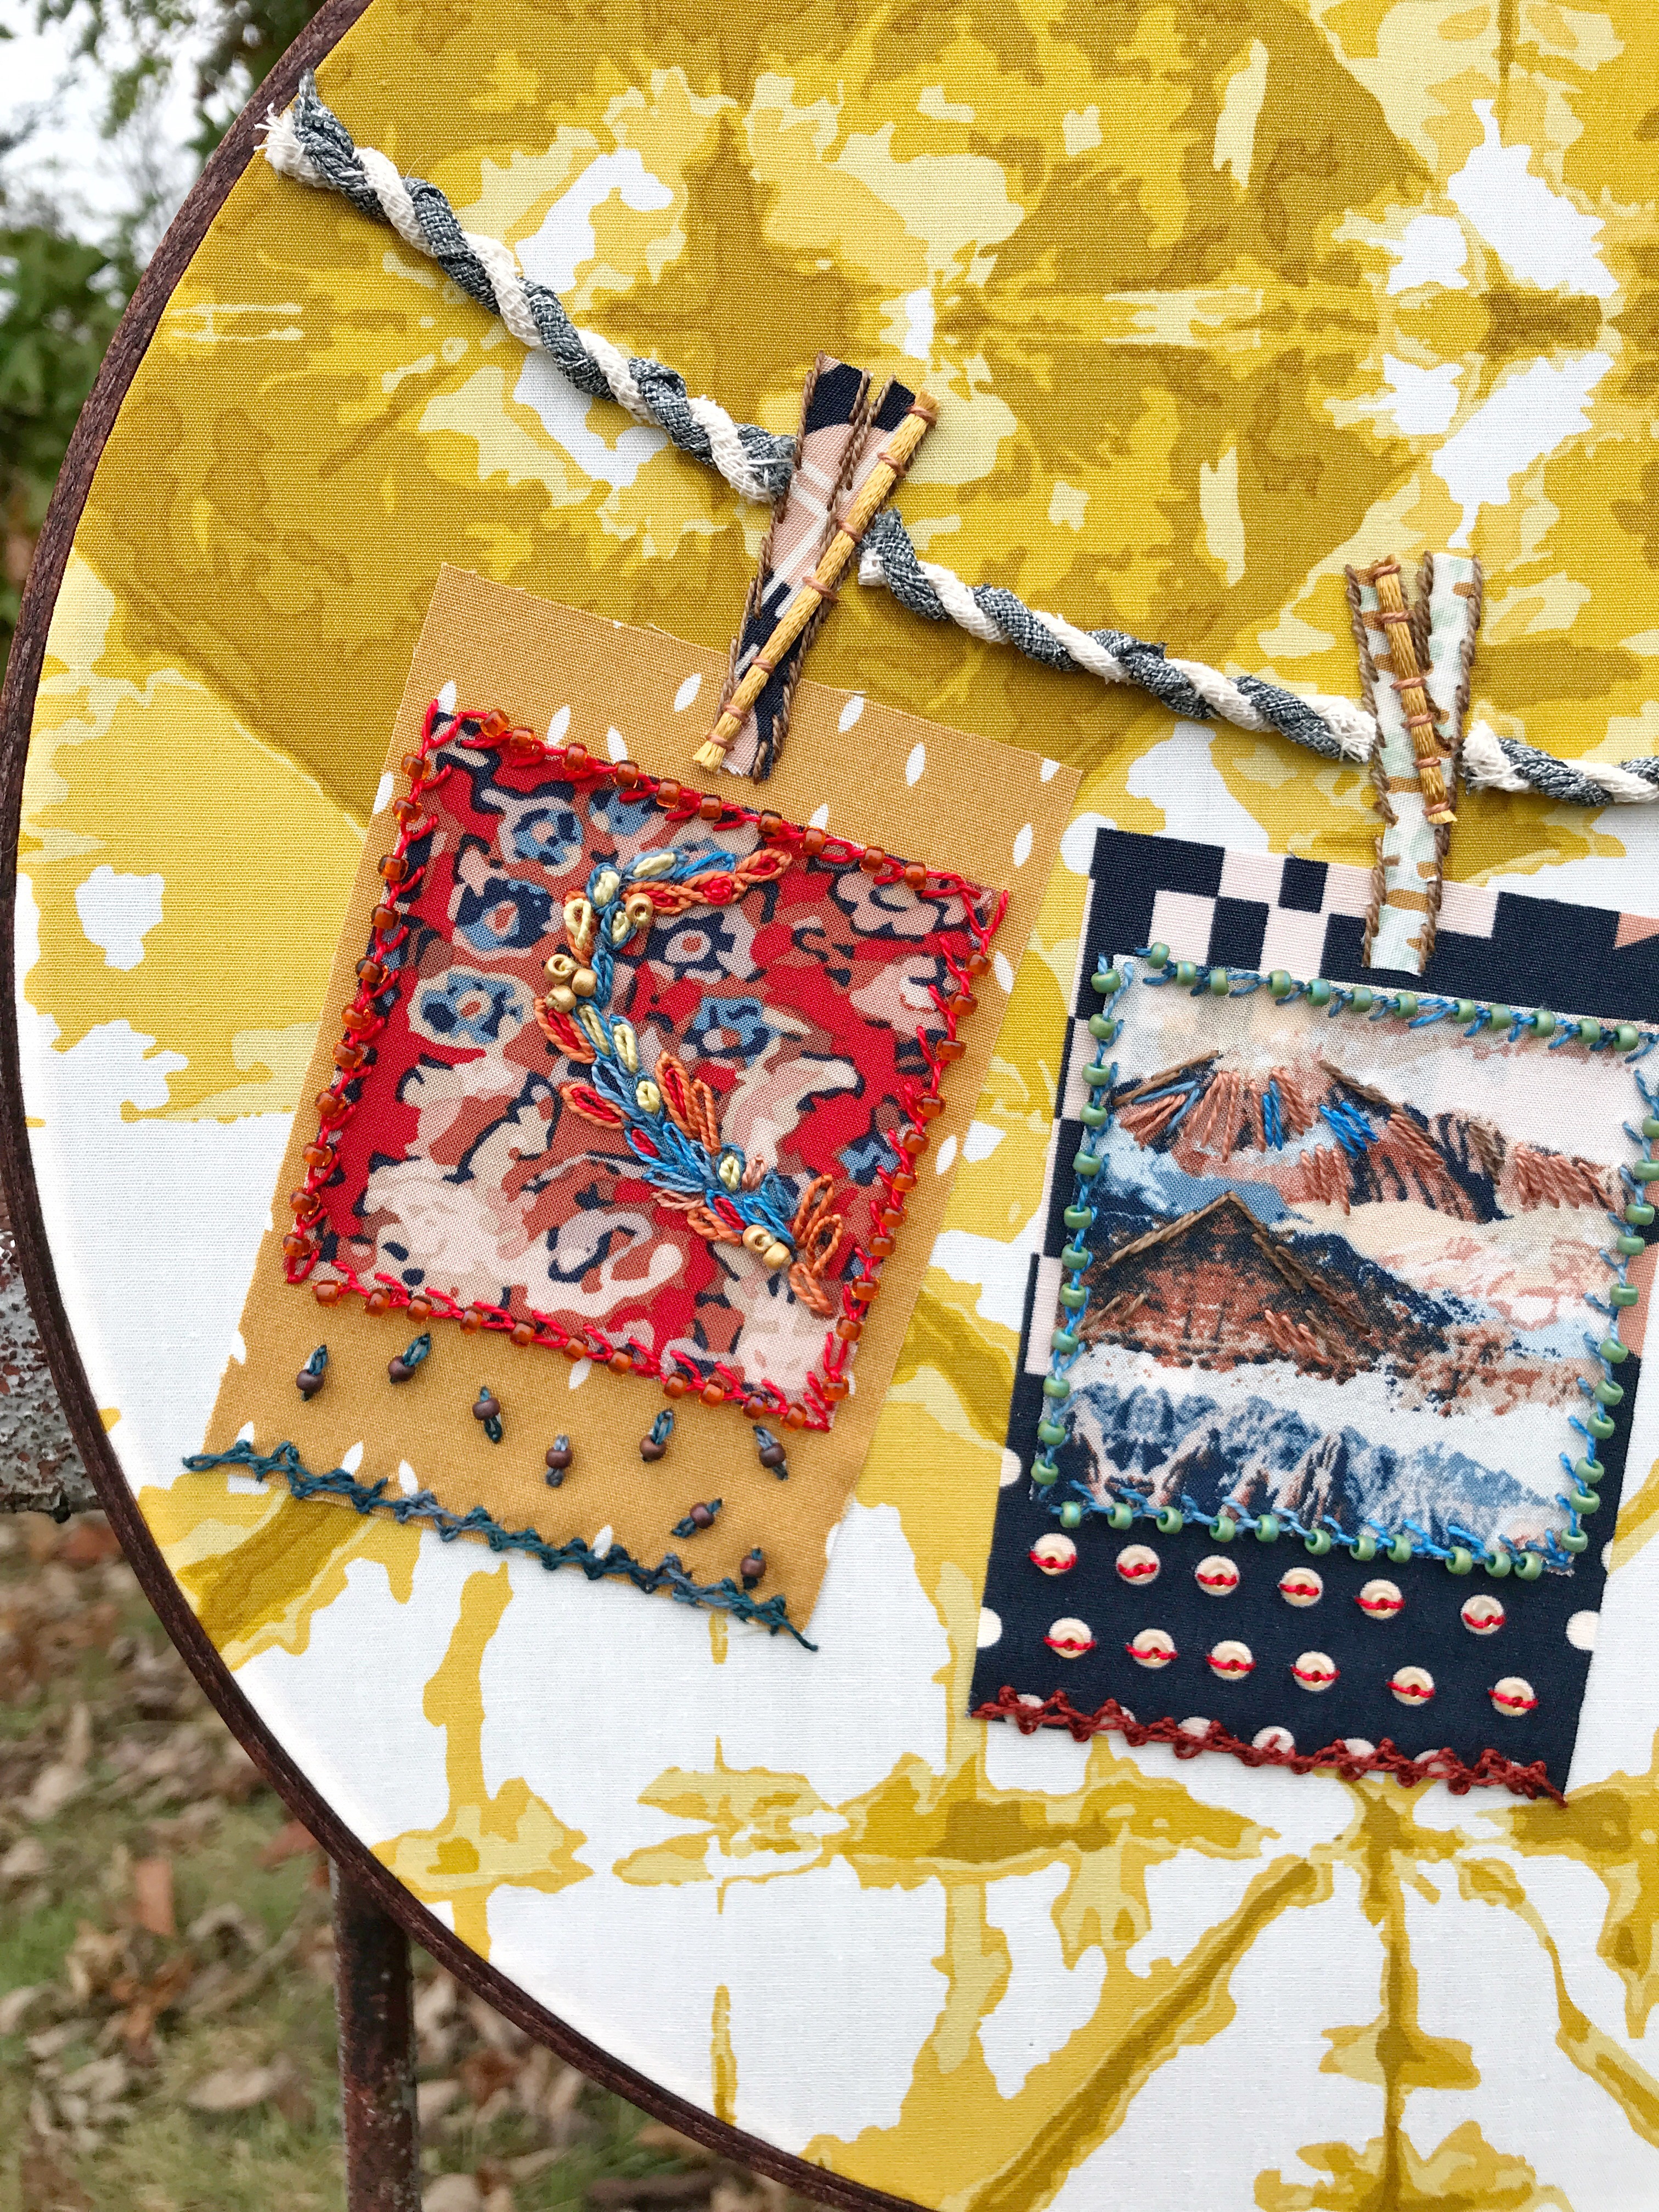
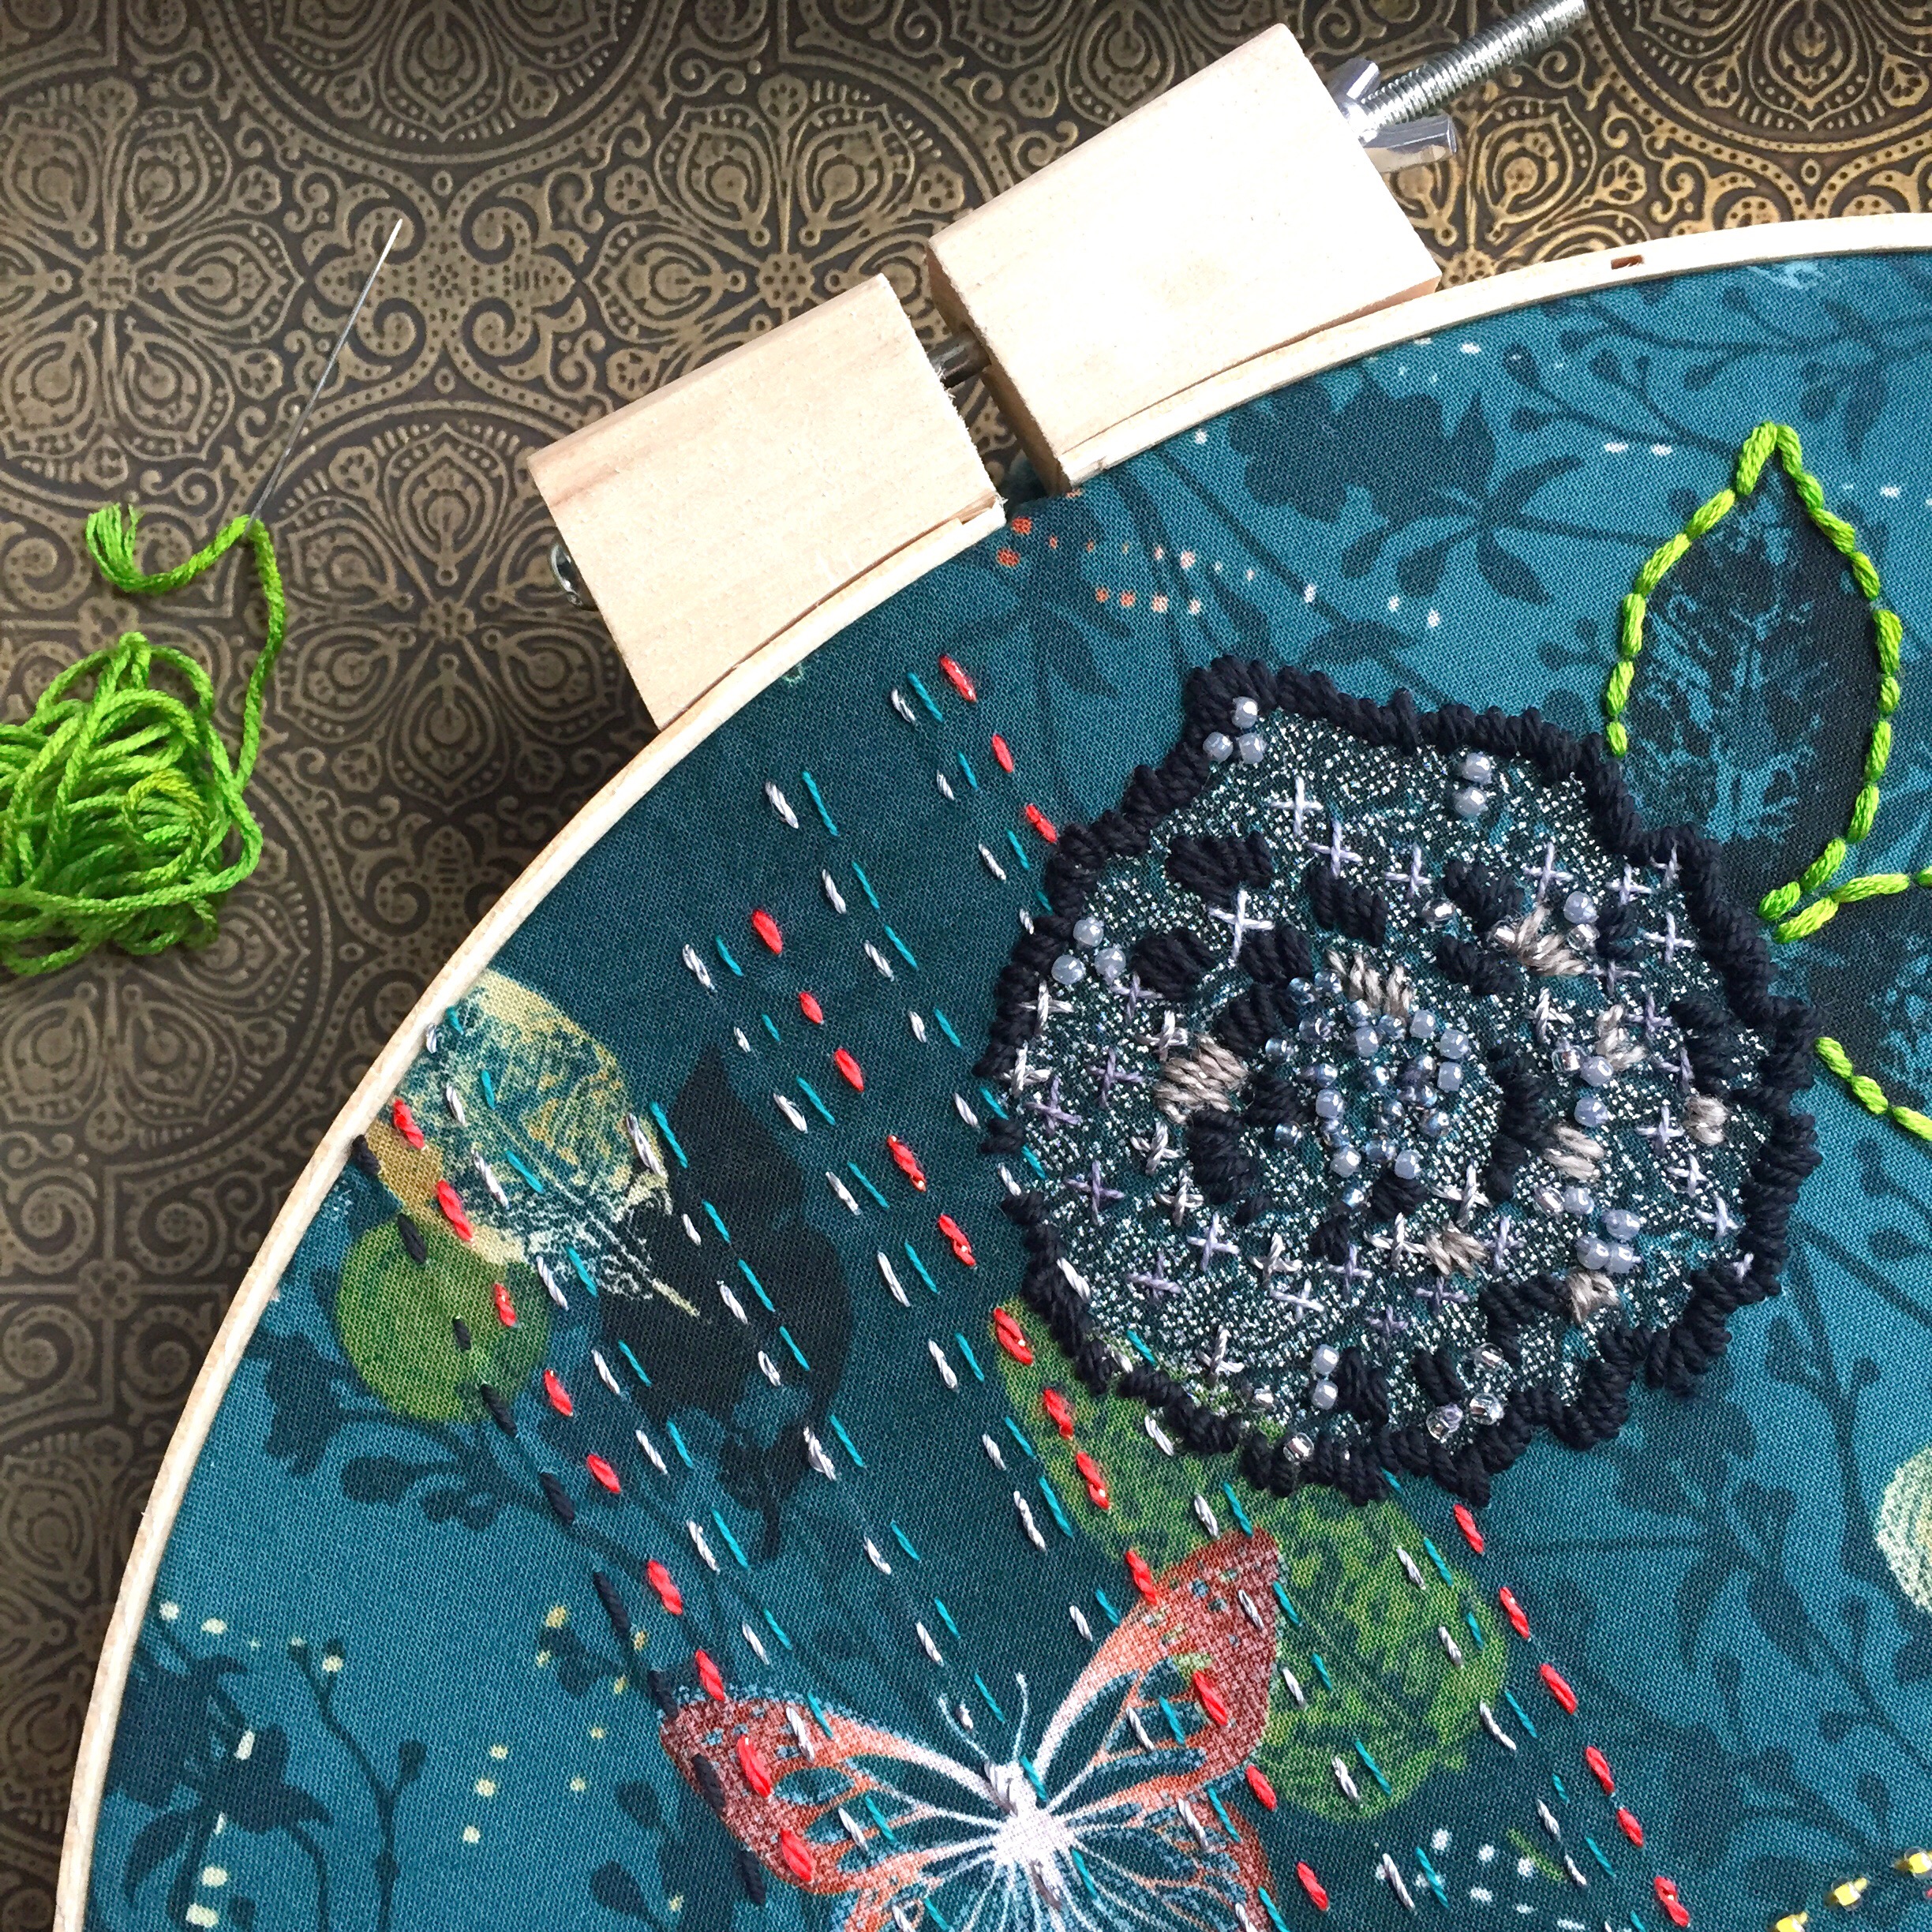
Here’s what I ended up with once I ironed all of the fabric pieces in place.

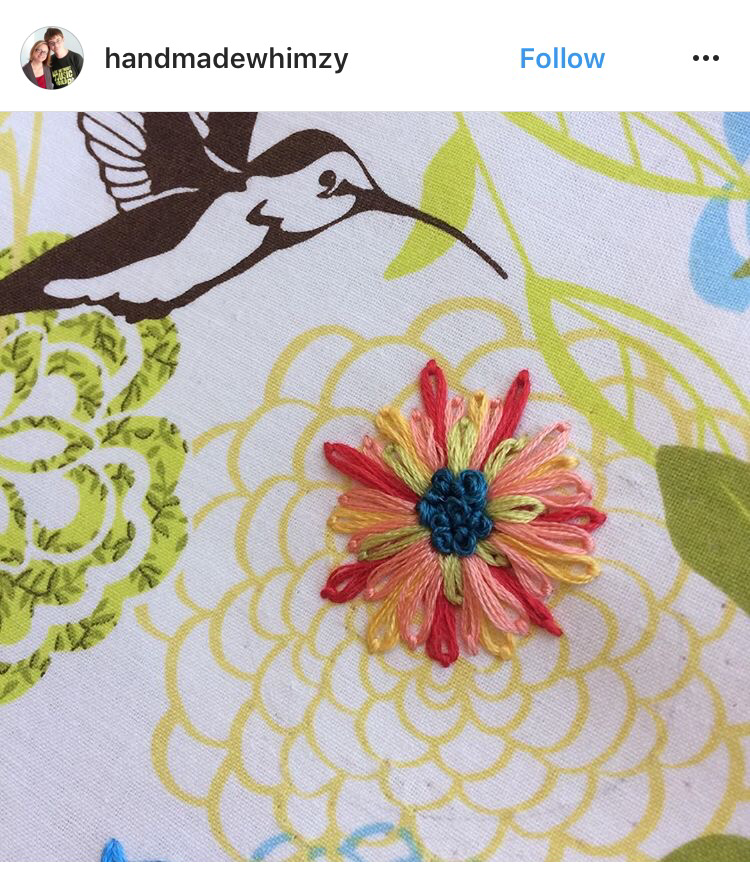
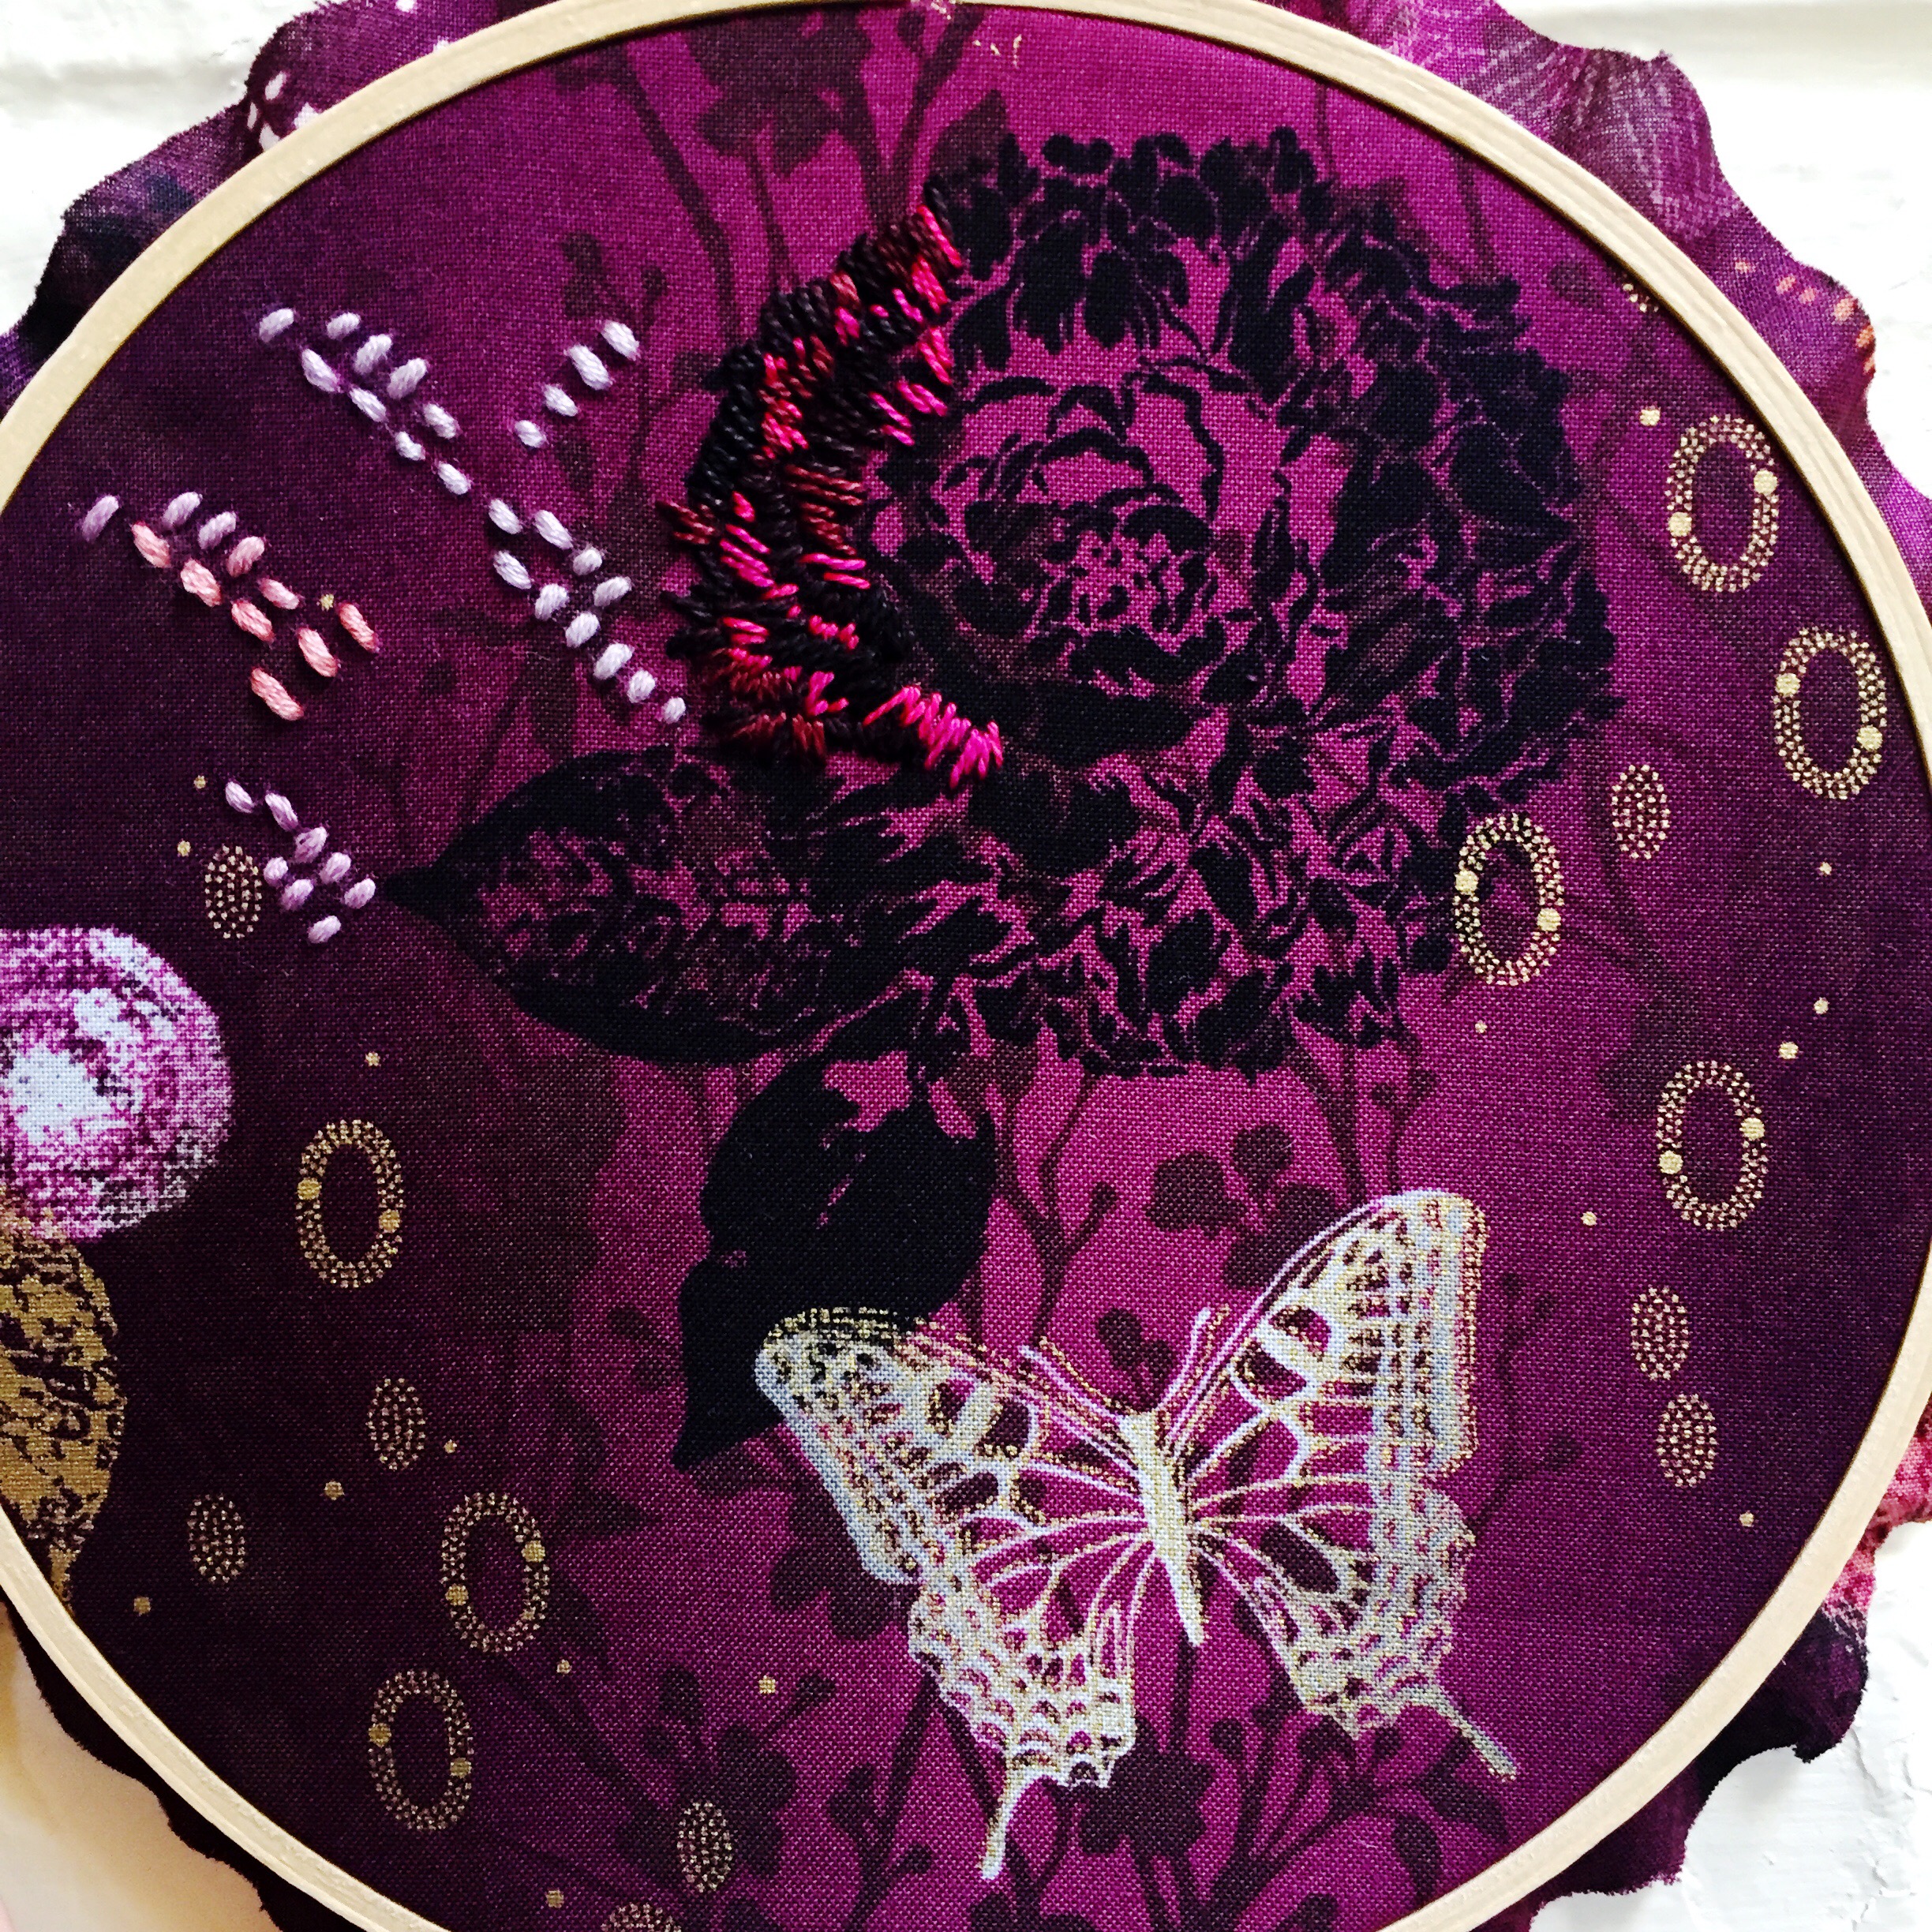
Using Madeline Tosh Unicorn Tails yarns and the Stem Stitch, I outlined all of the pieces. You can see what a difference it makes when each piece has been outlined:

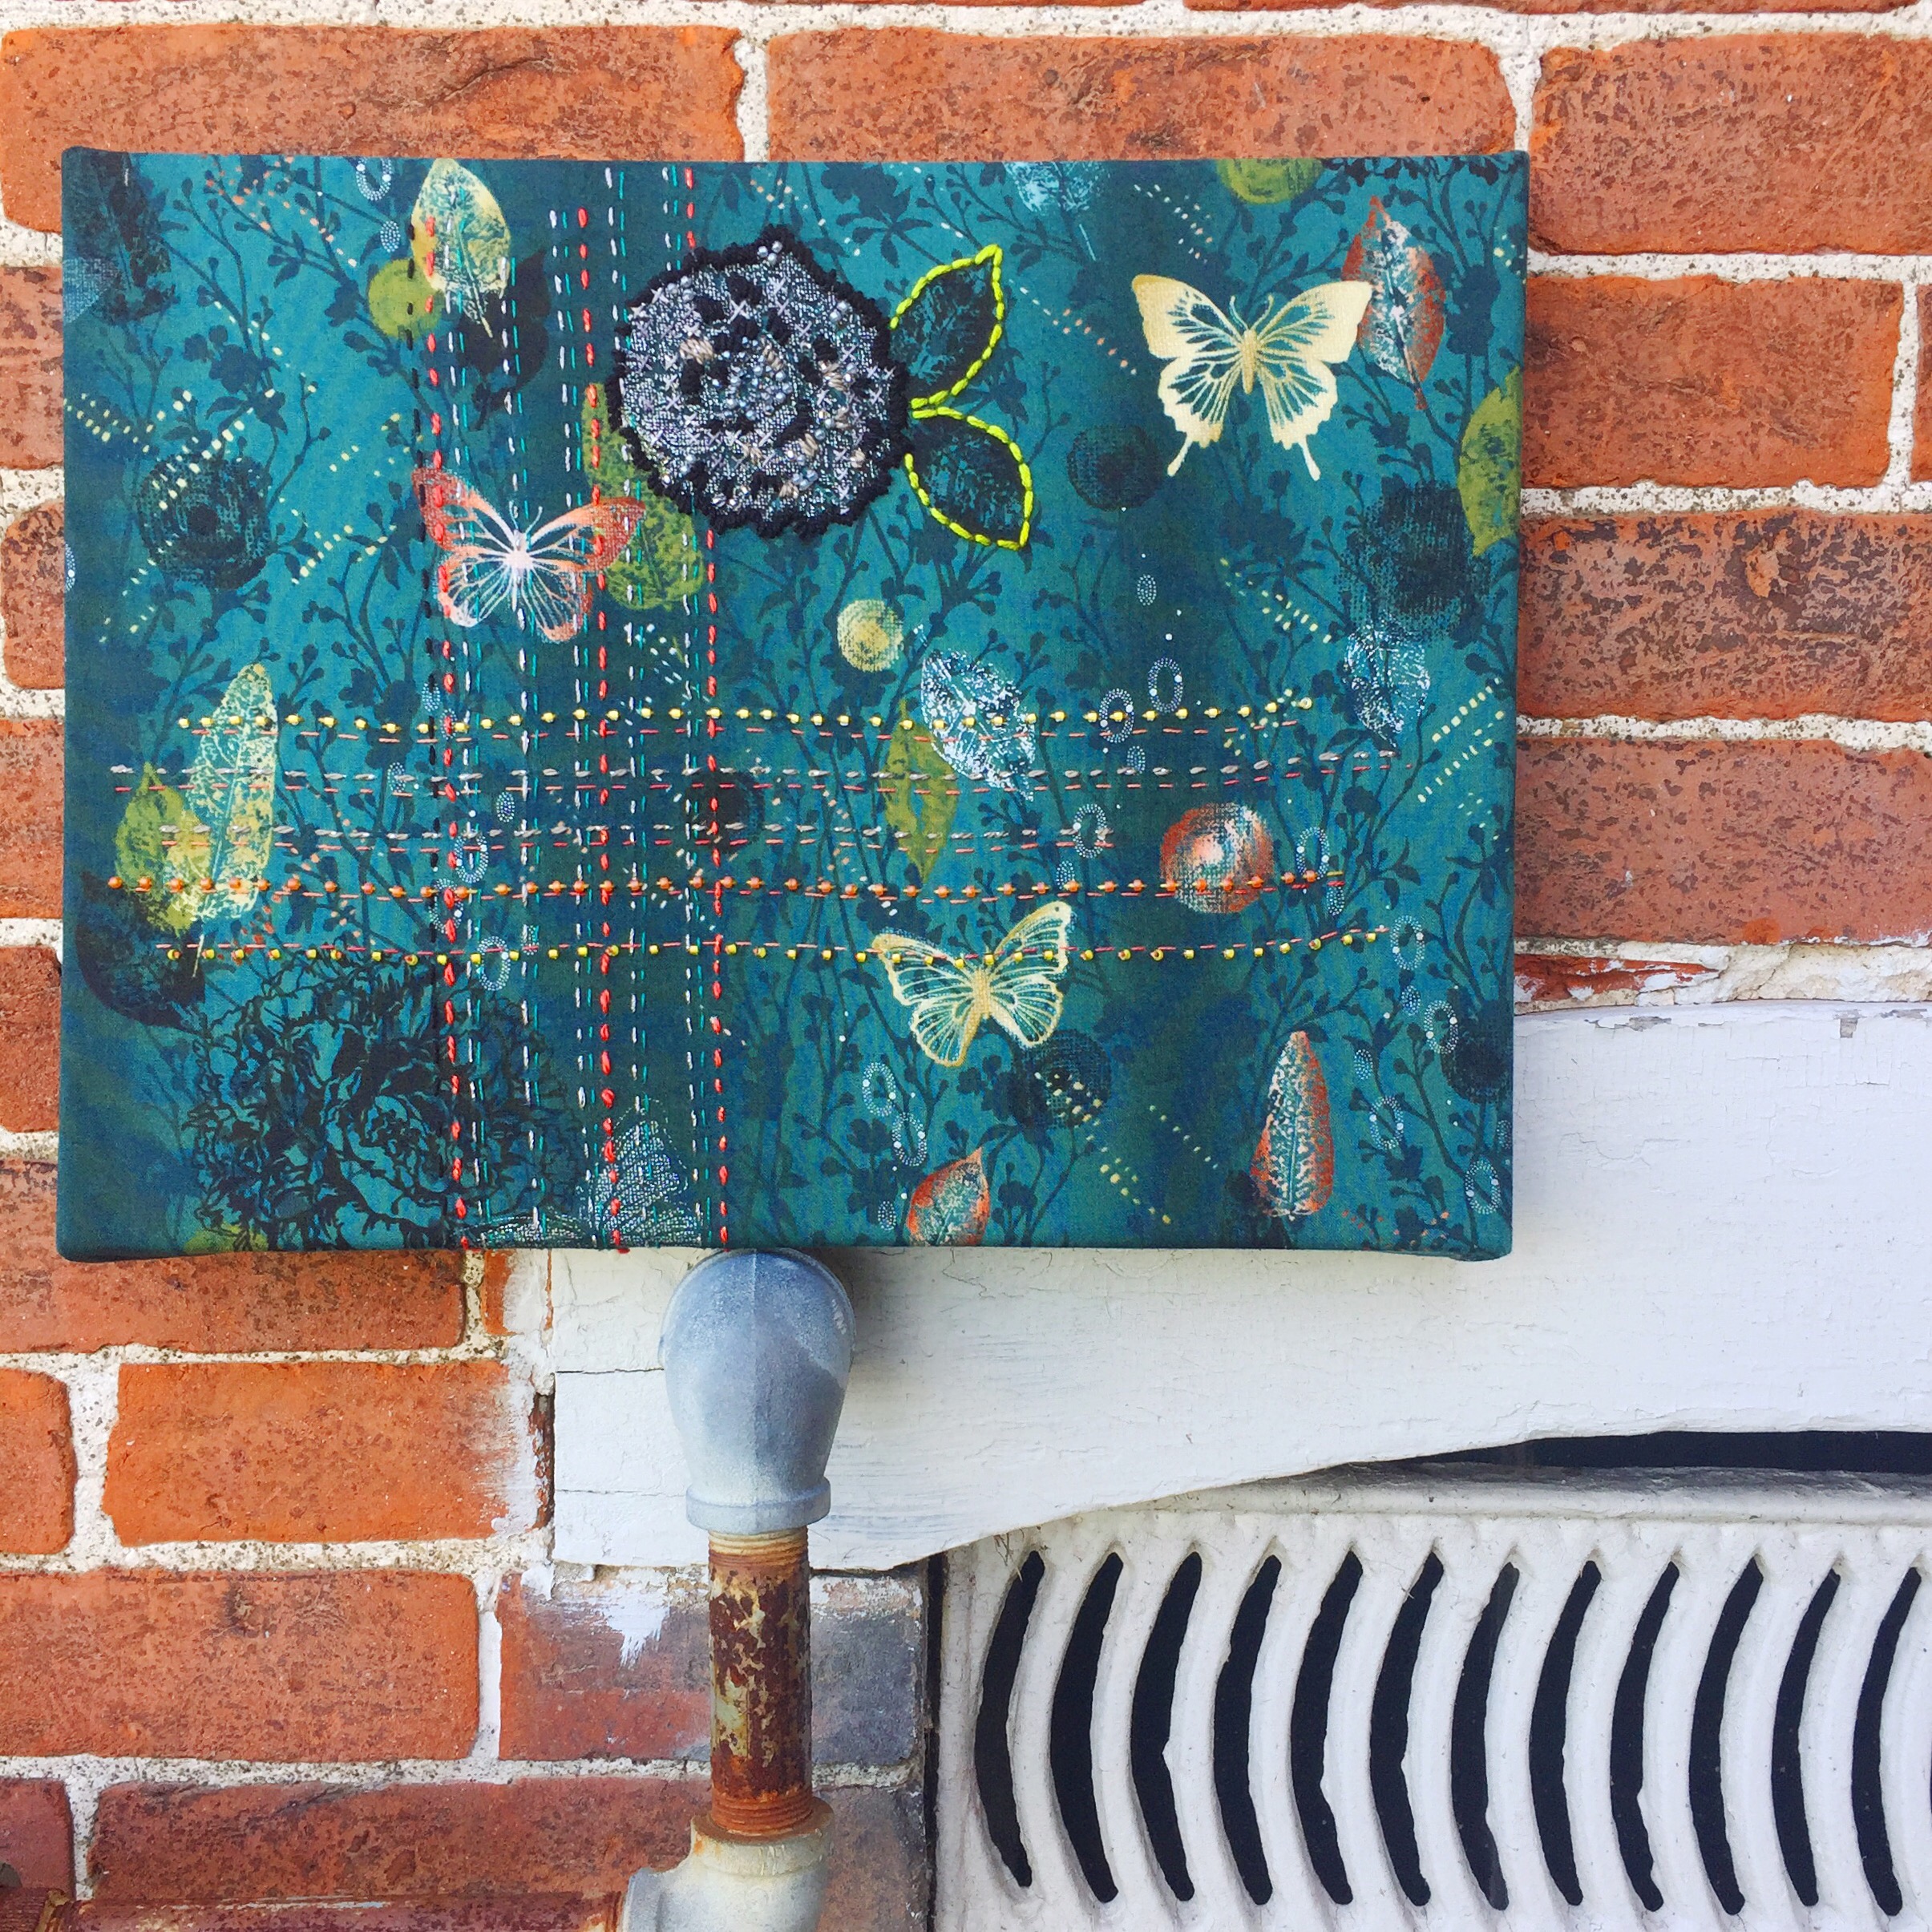
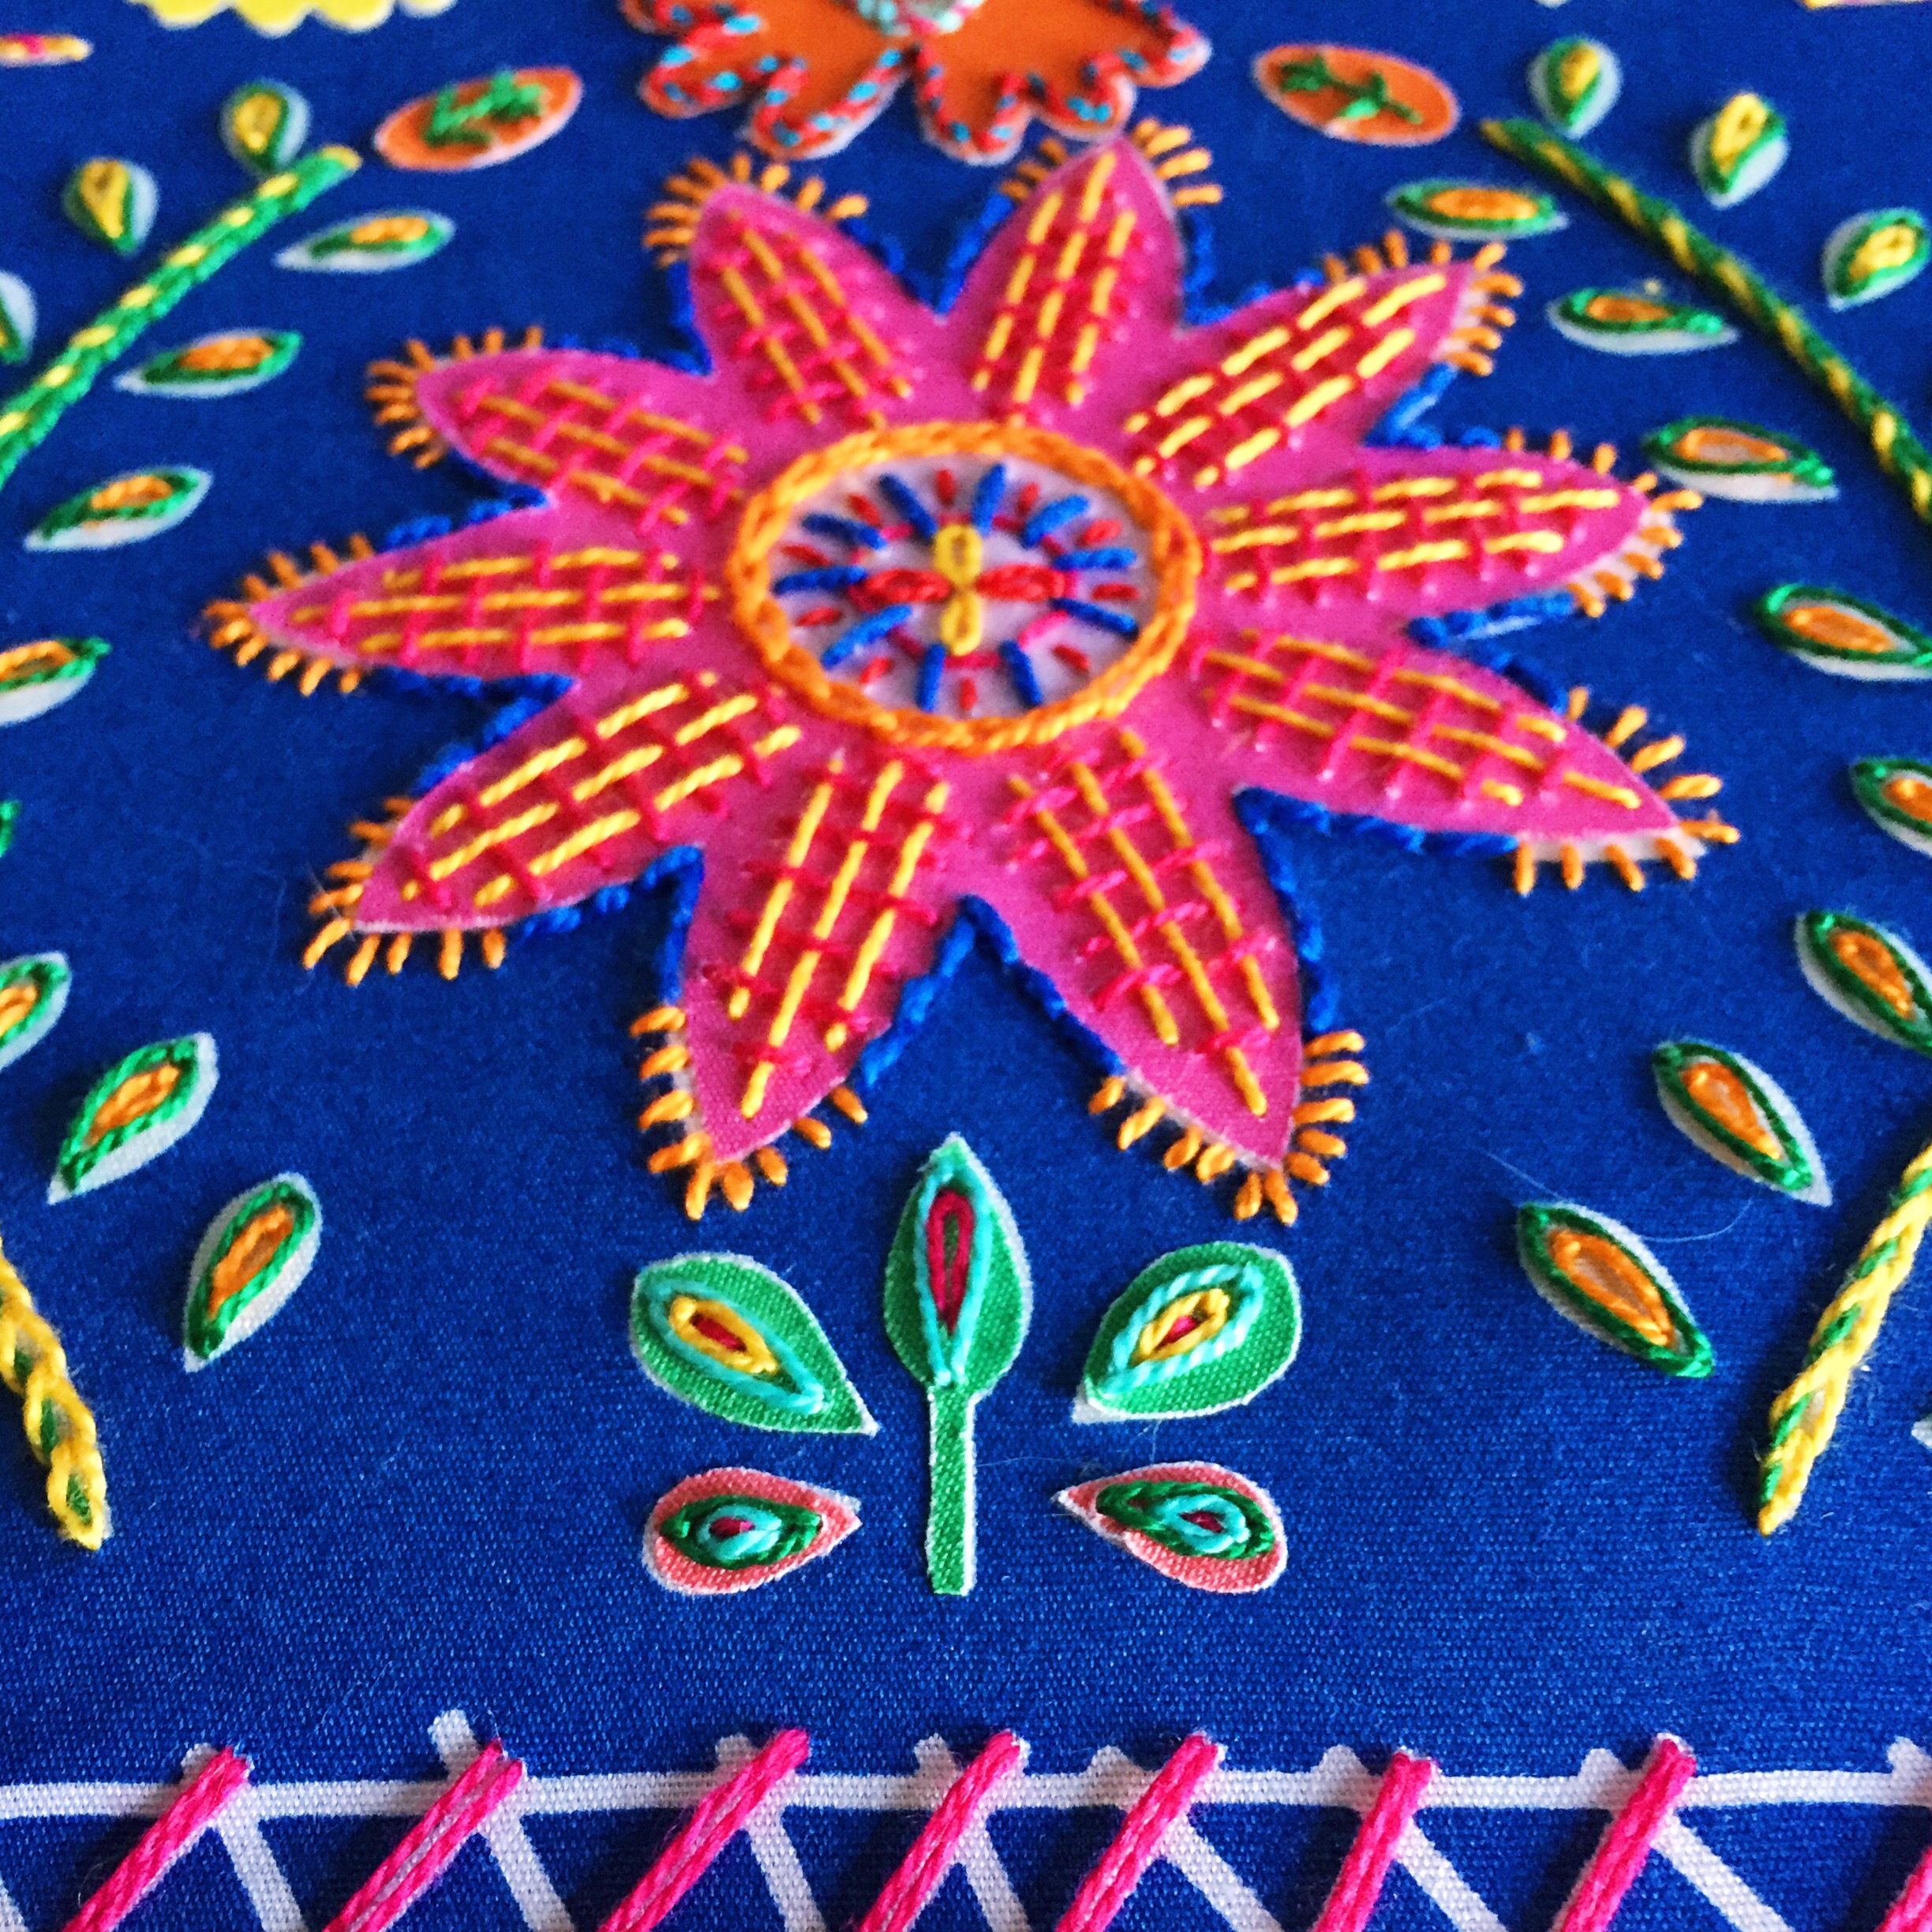
And then I just kept on embroidering! I added sequins and beads and finished it up just in the nick of time so that I could share it with all of you! Here’s how it looks all stitched up:

And how about some up close and personal detail shots, because it’s all about the details!

The sequins make these feel like Disco Bunnies, don’t they?!

And there you have it!

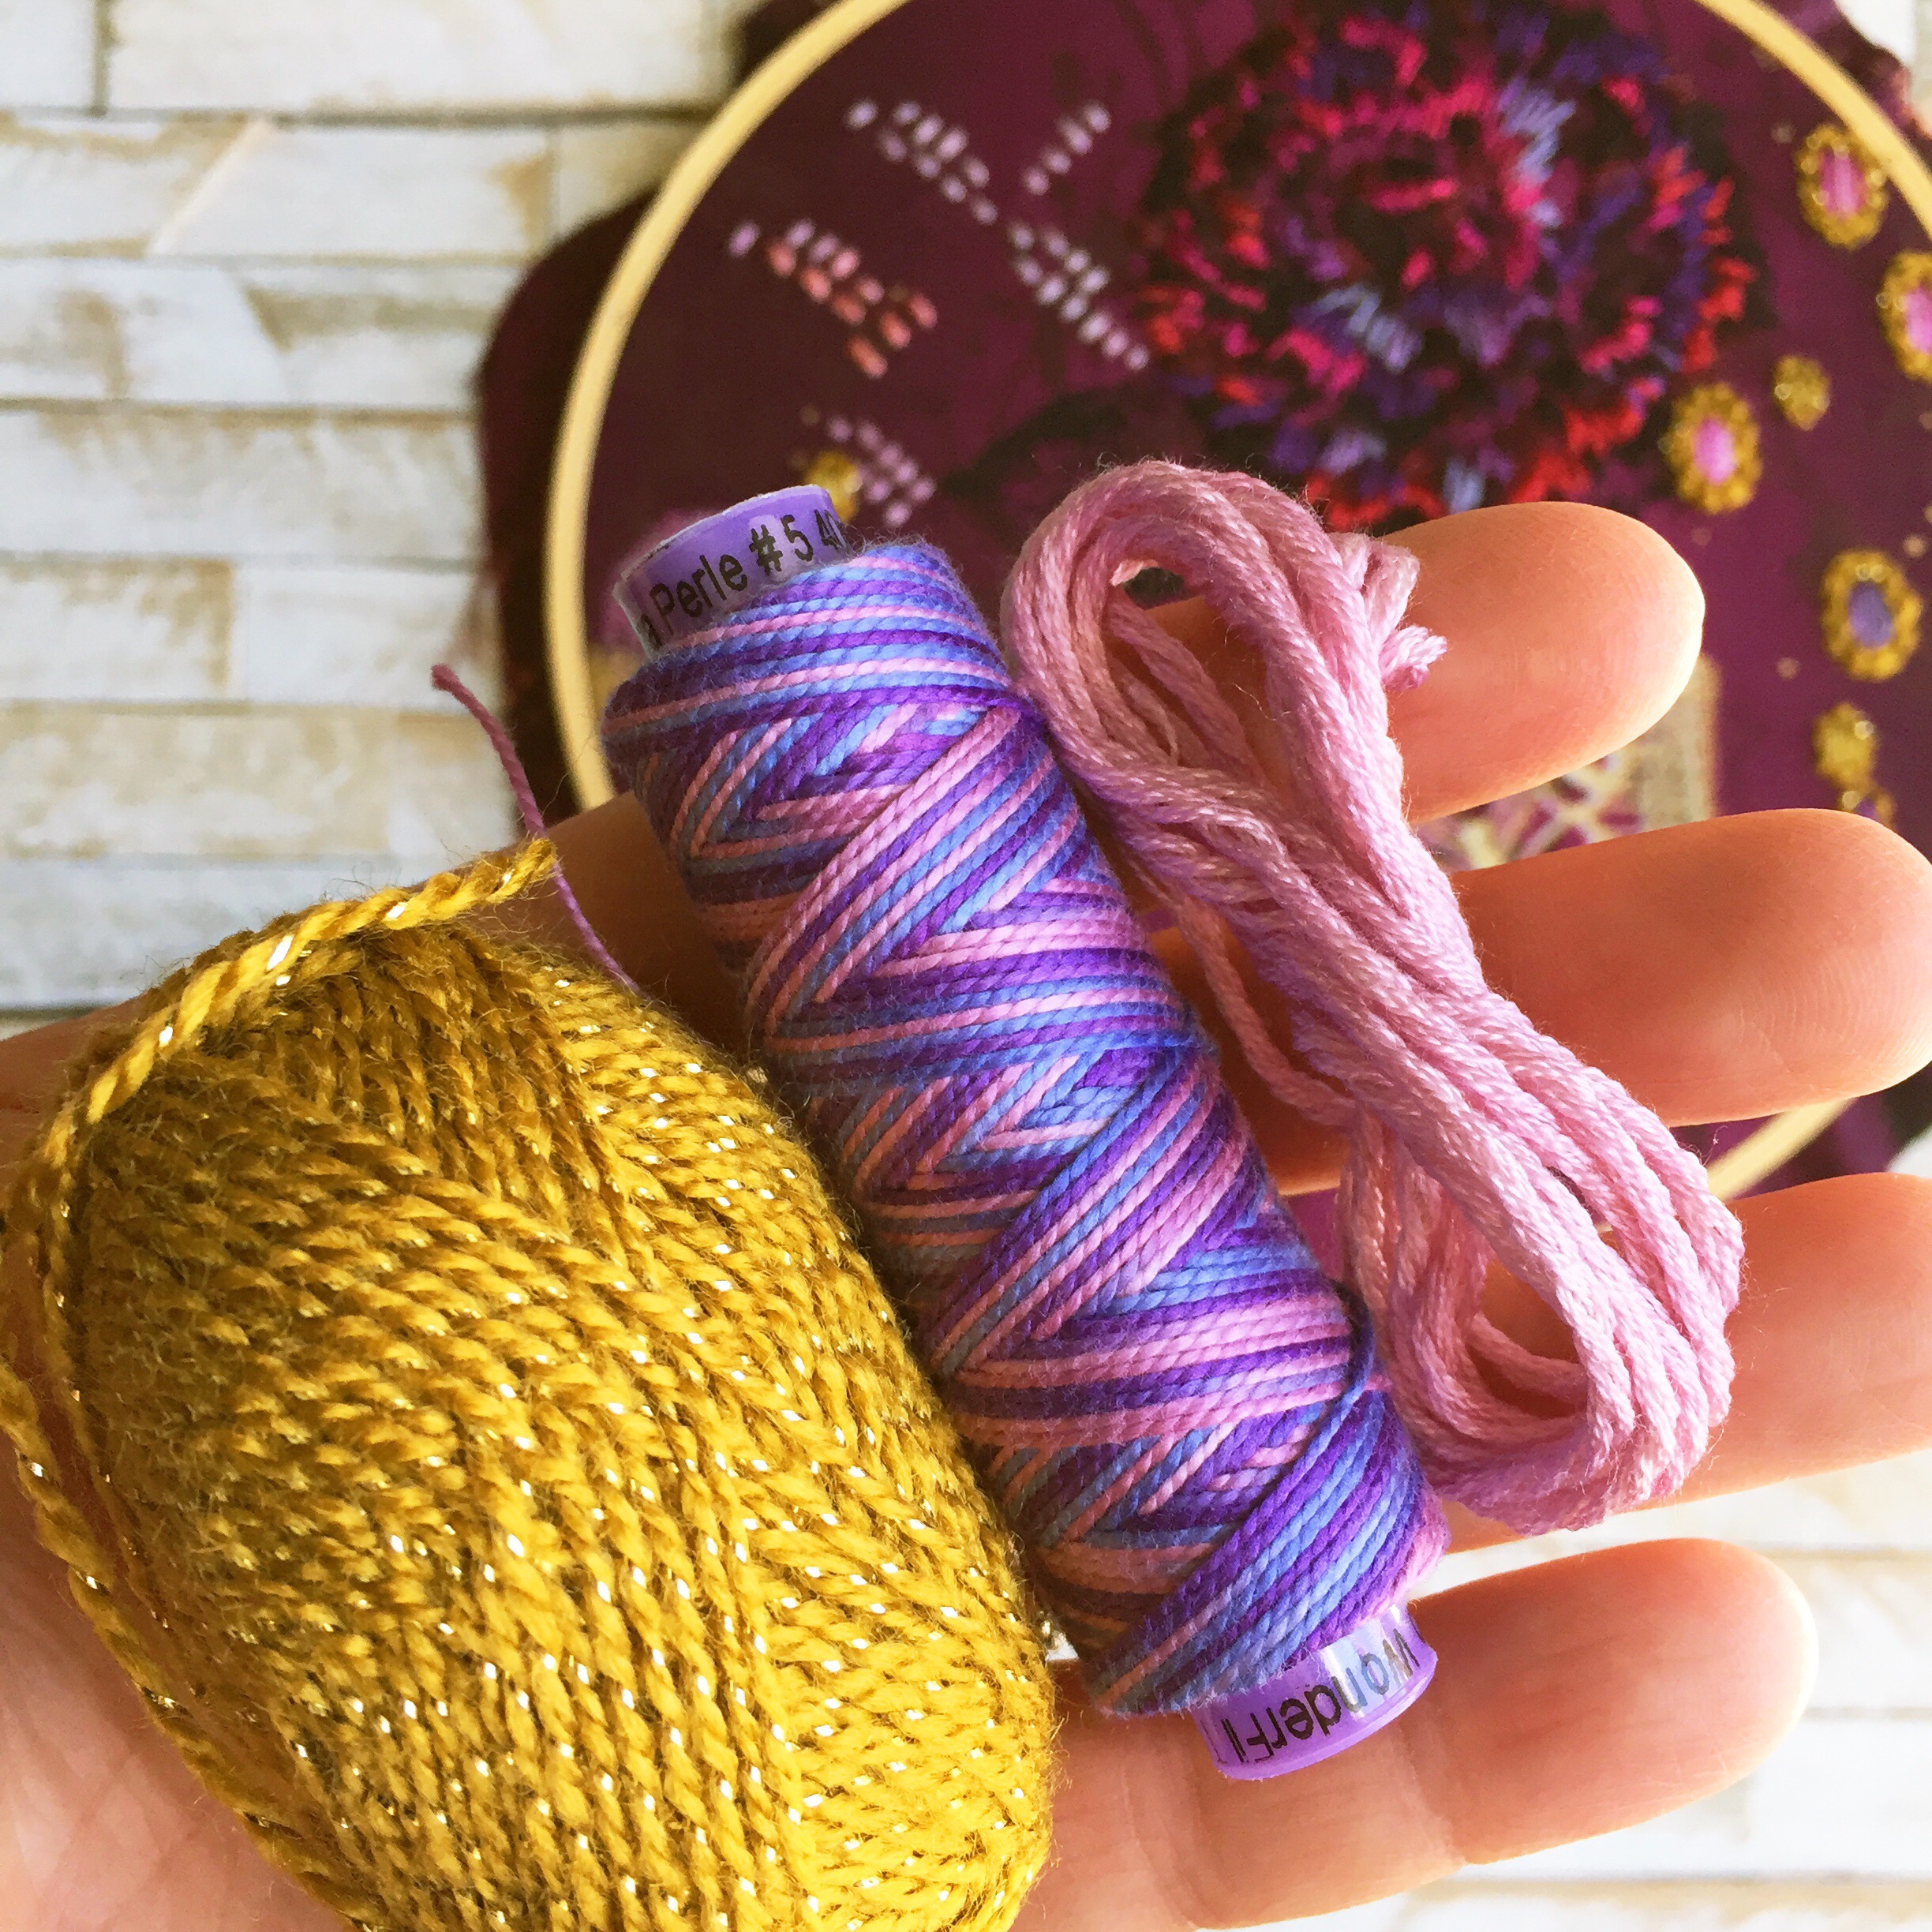
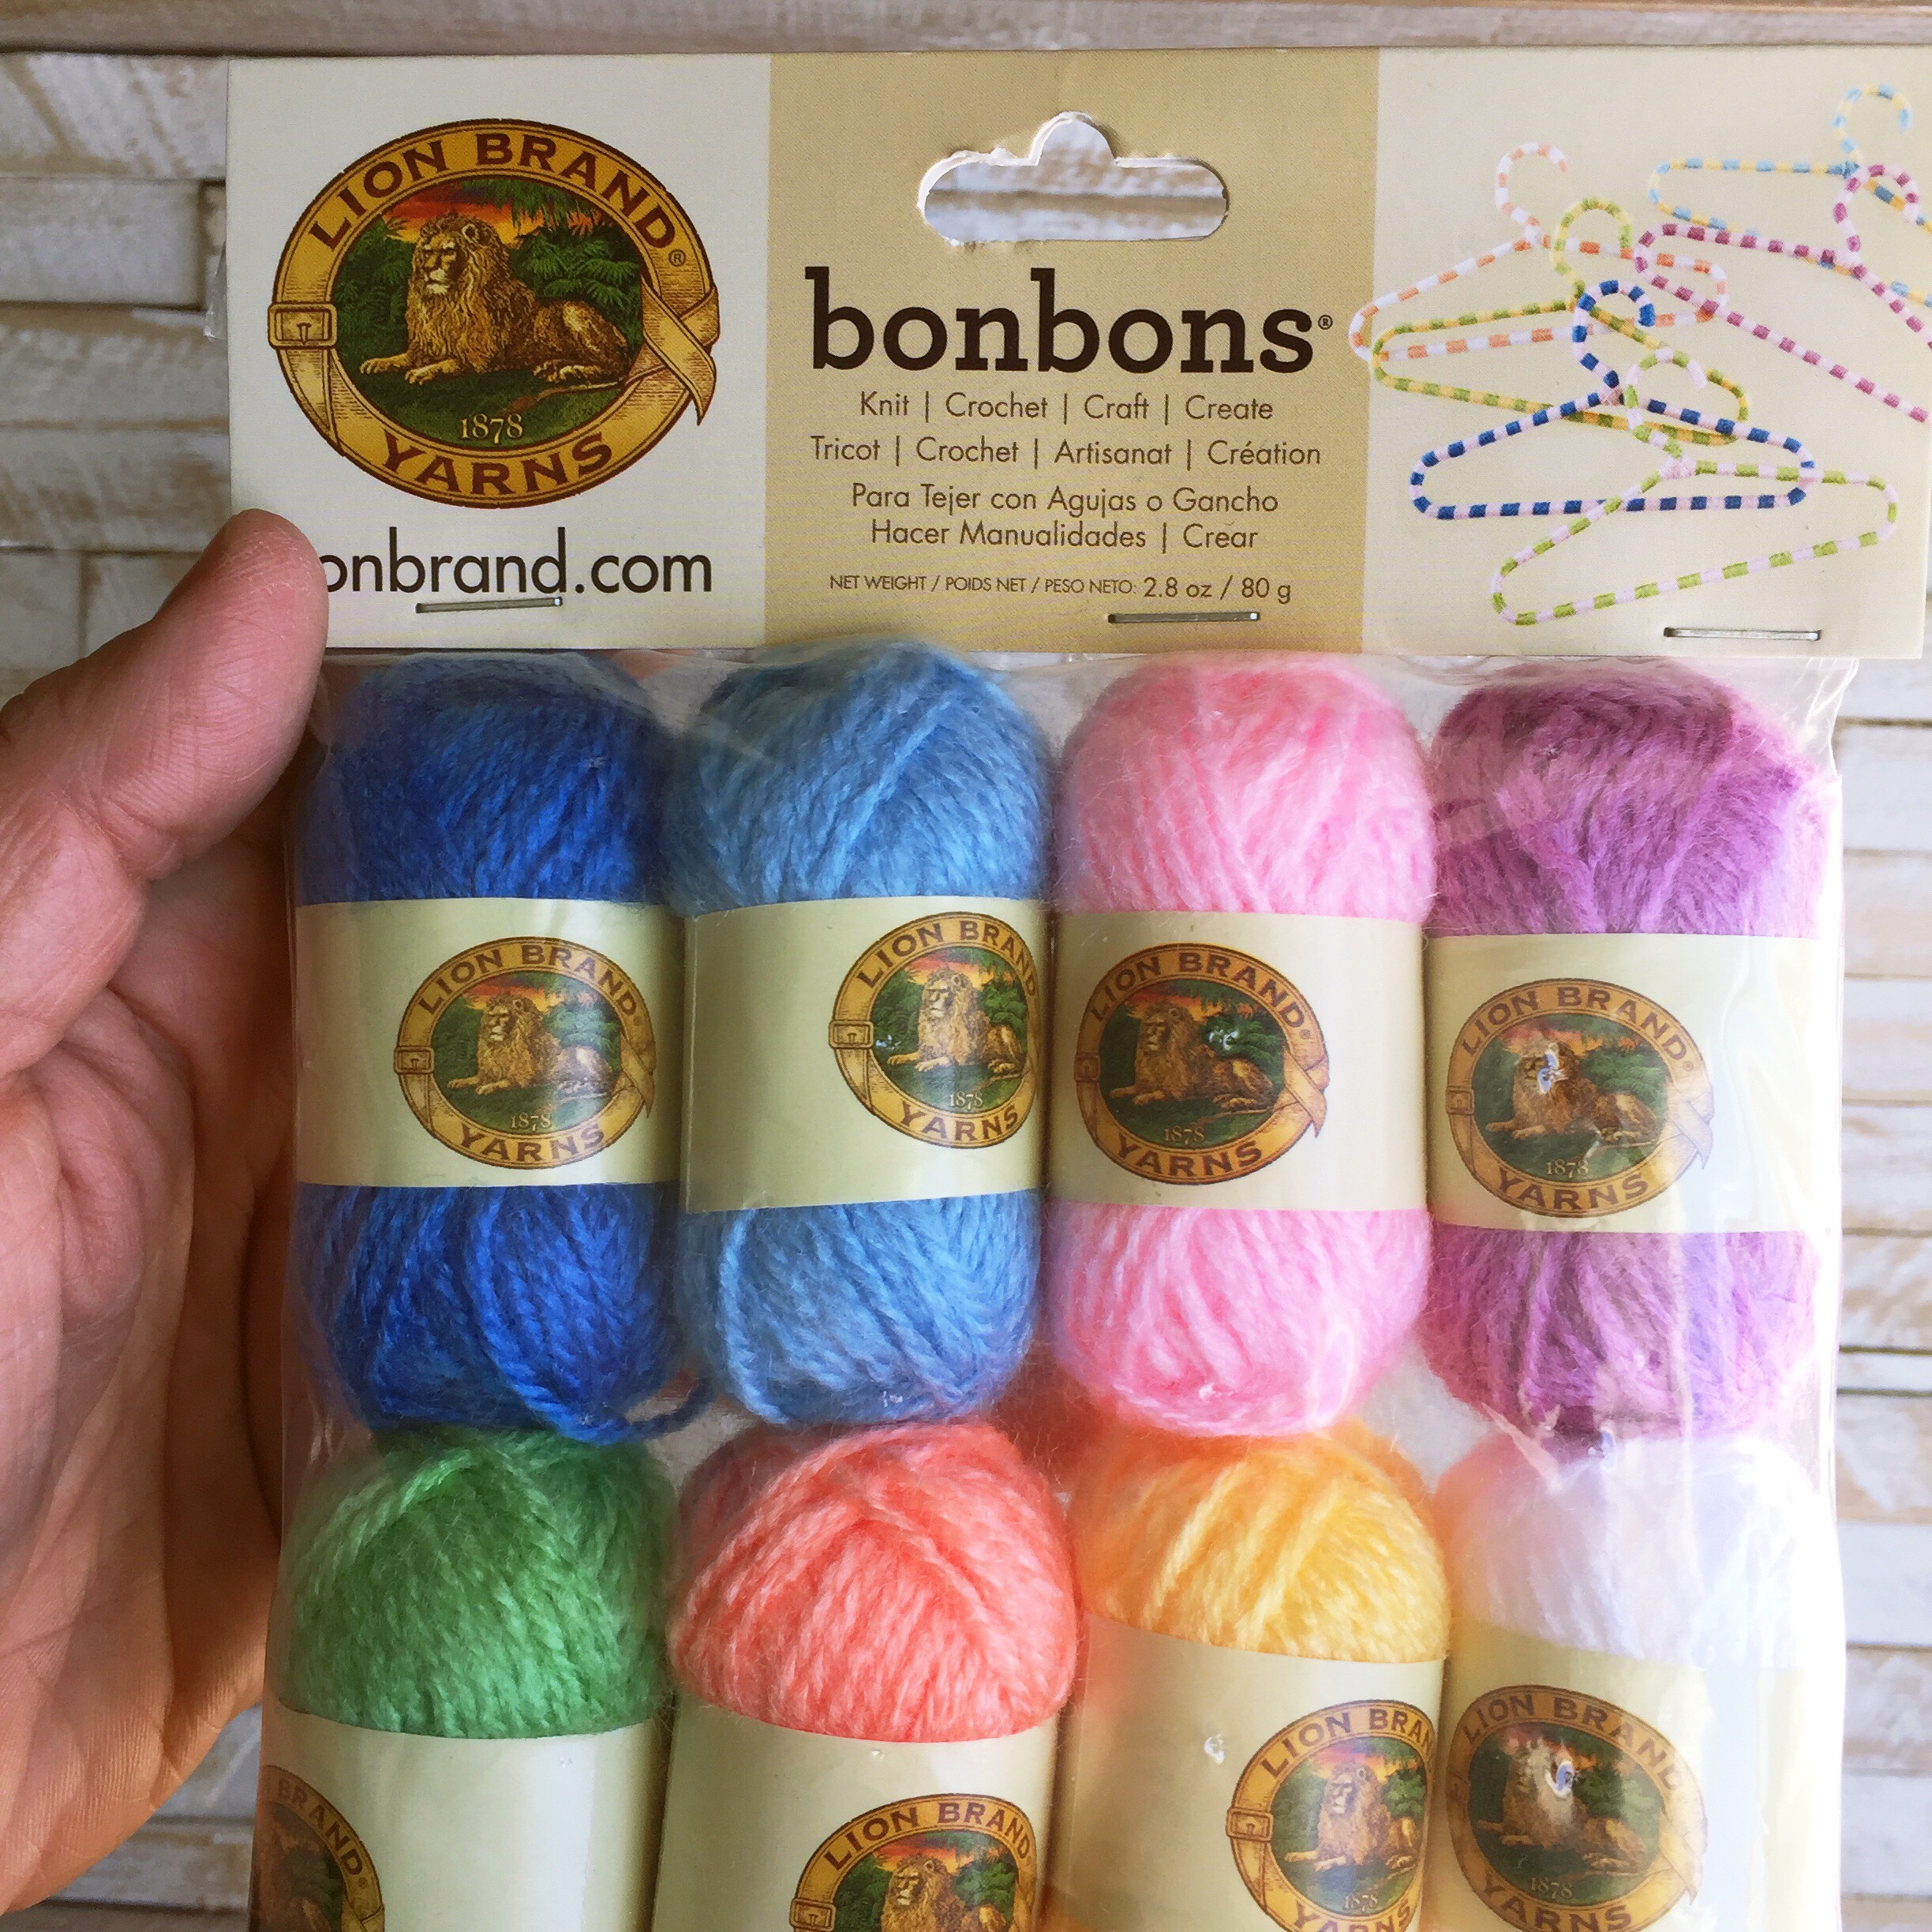
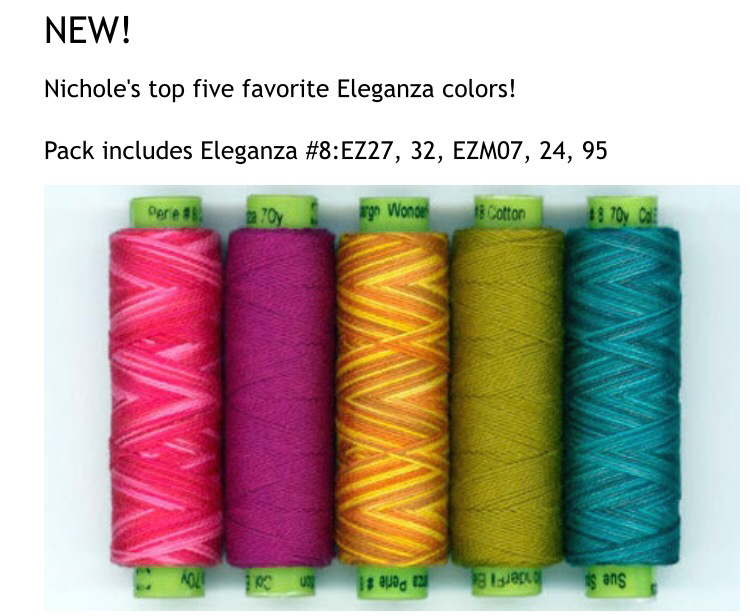
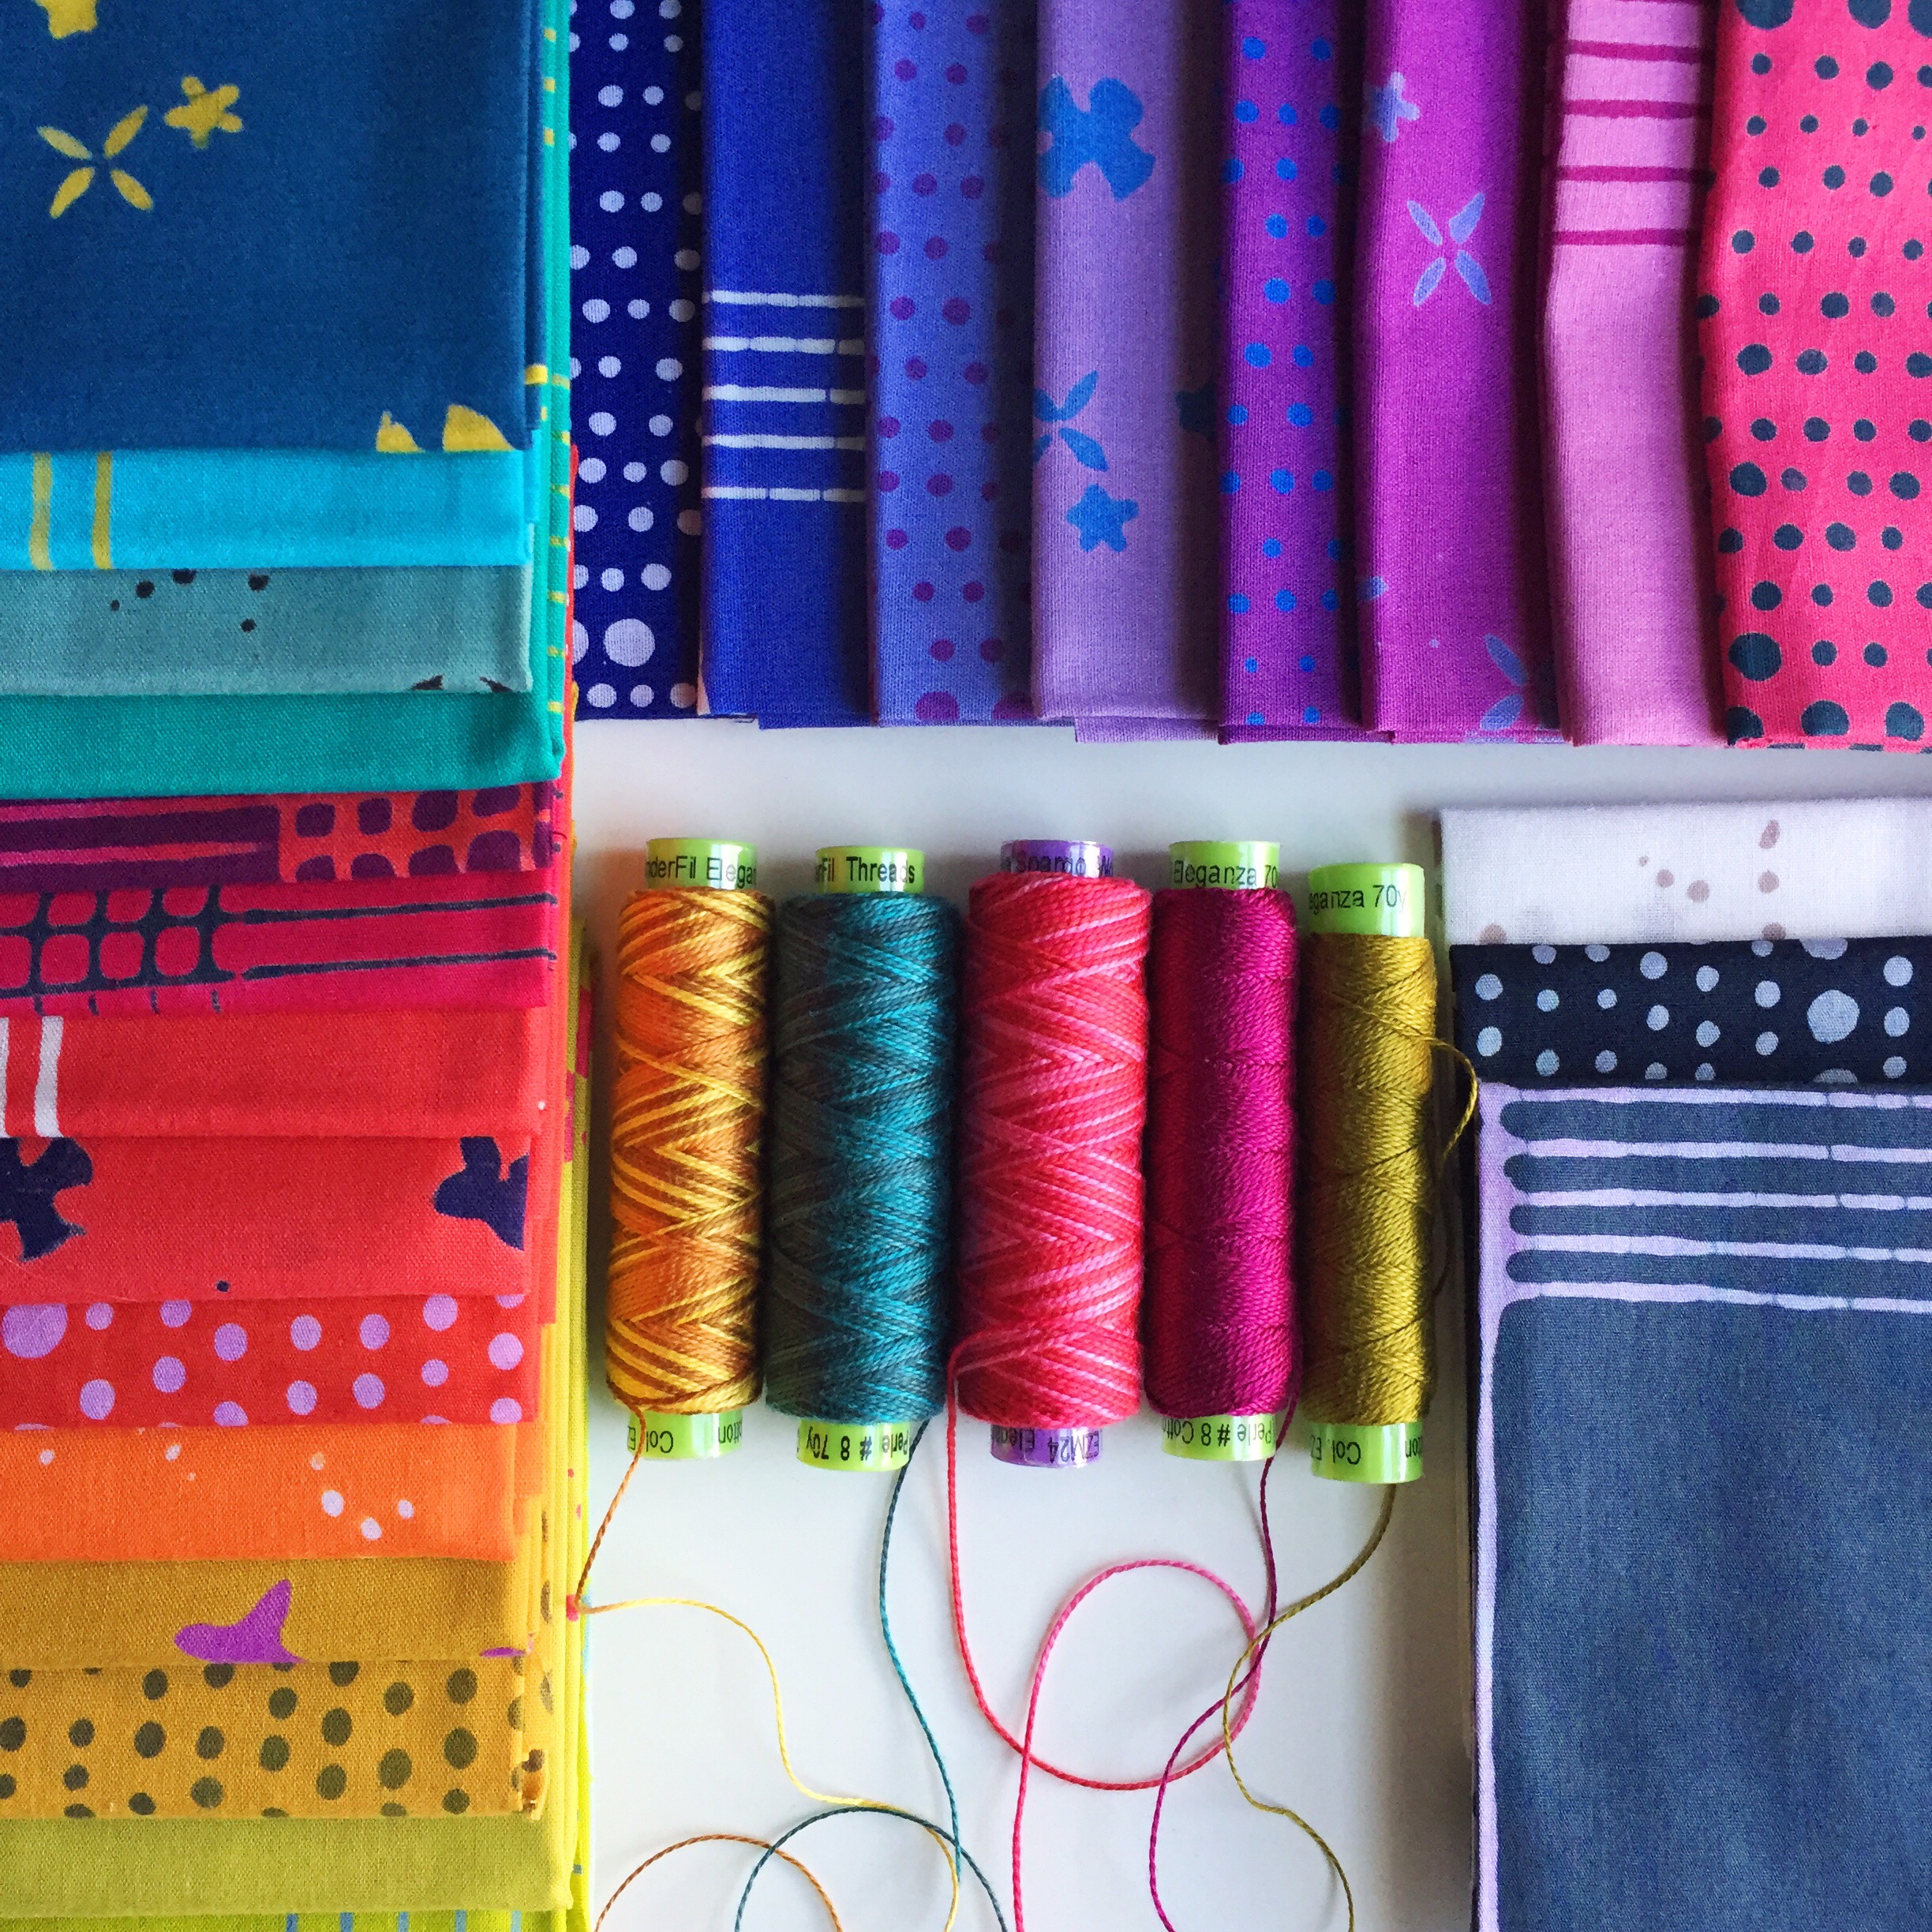
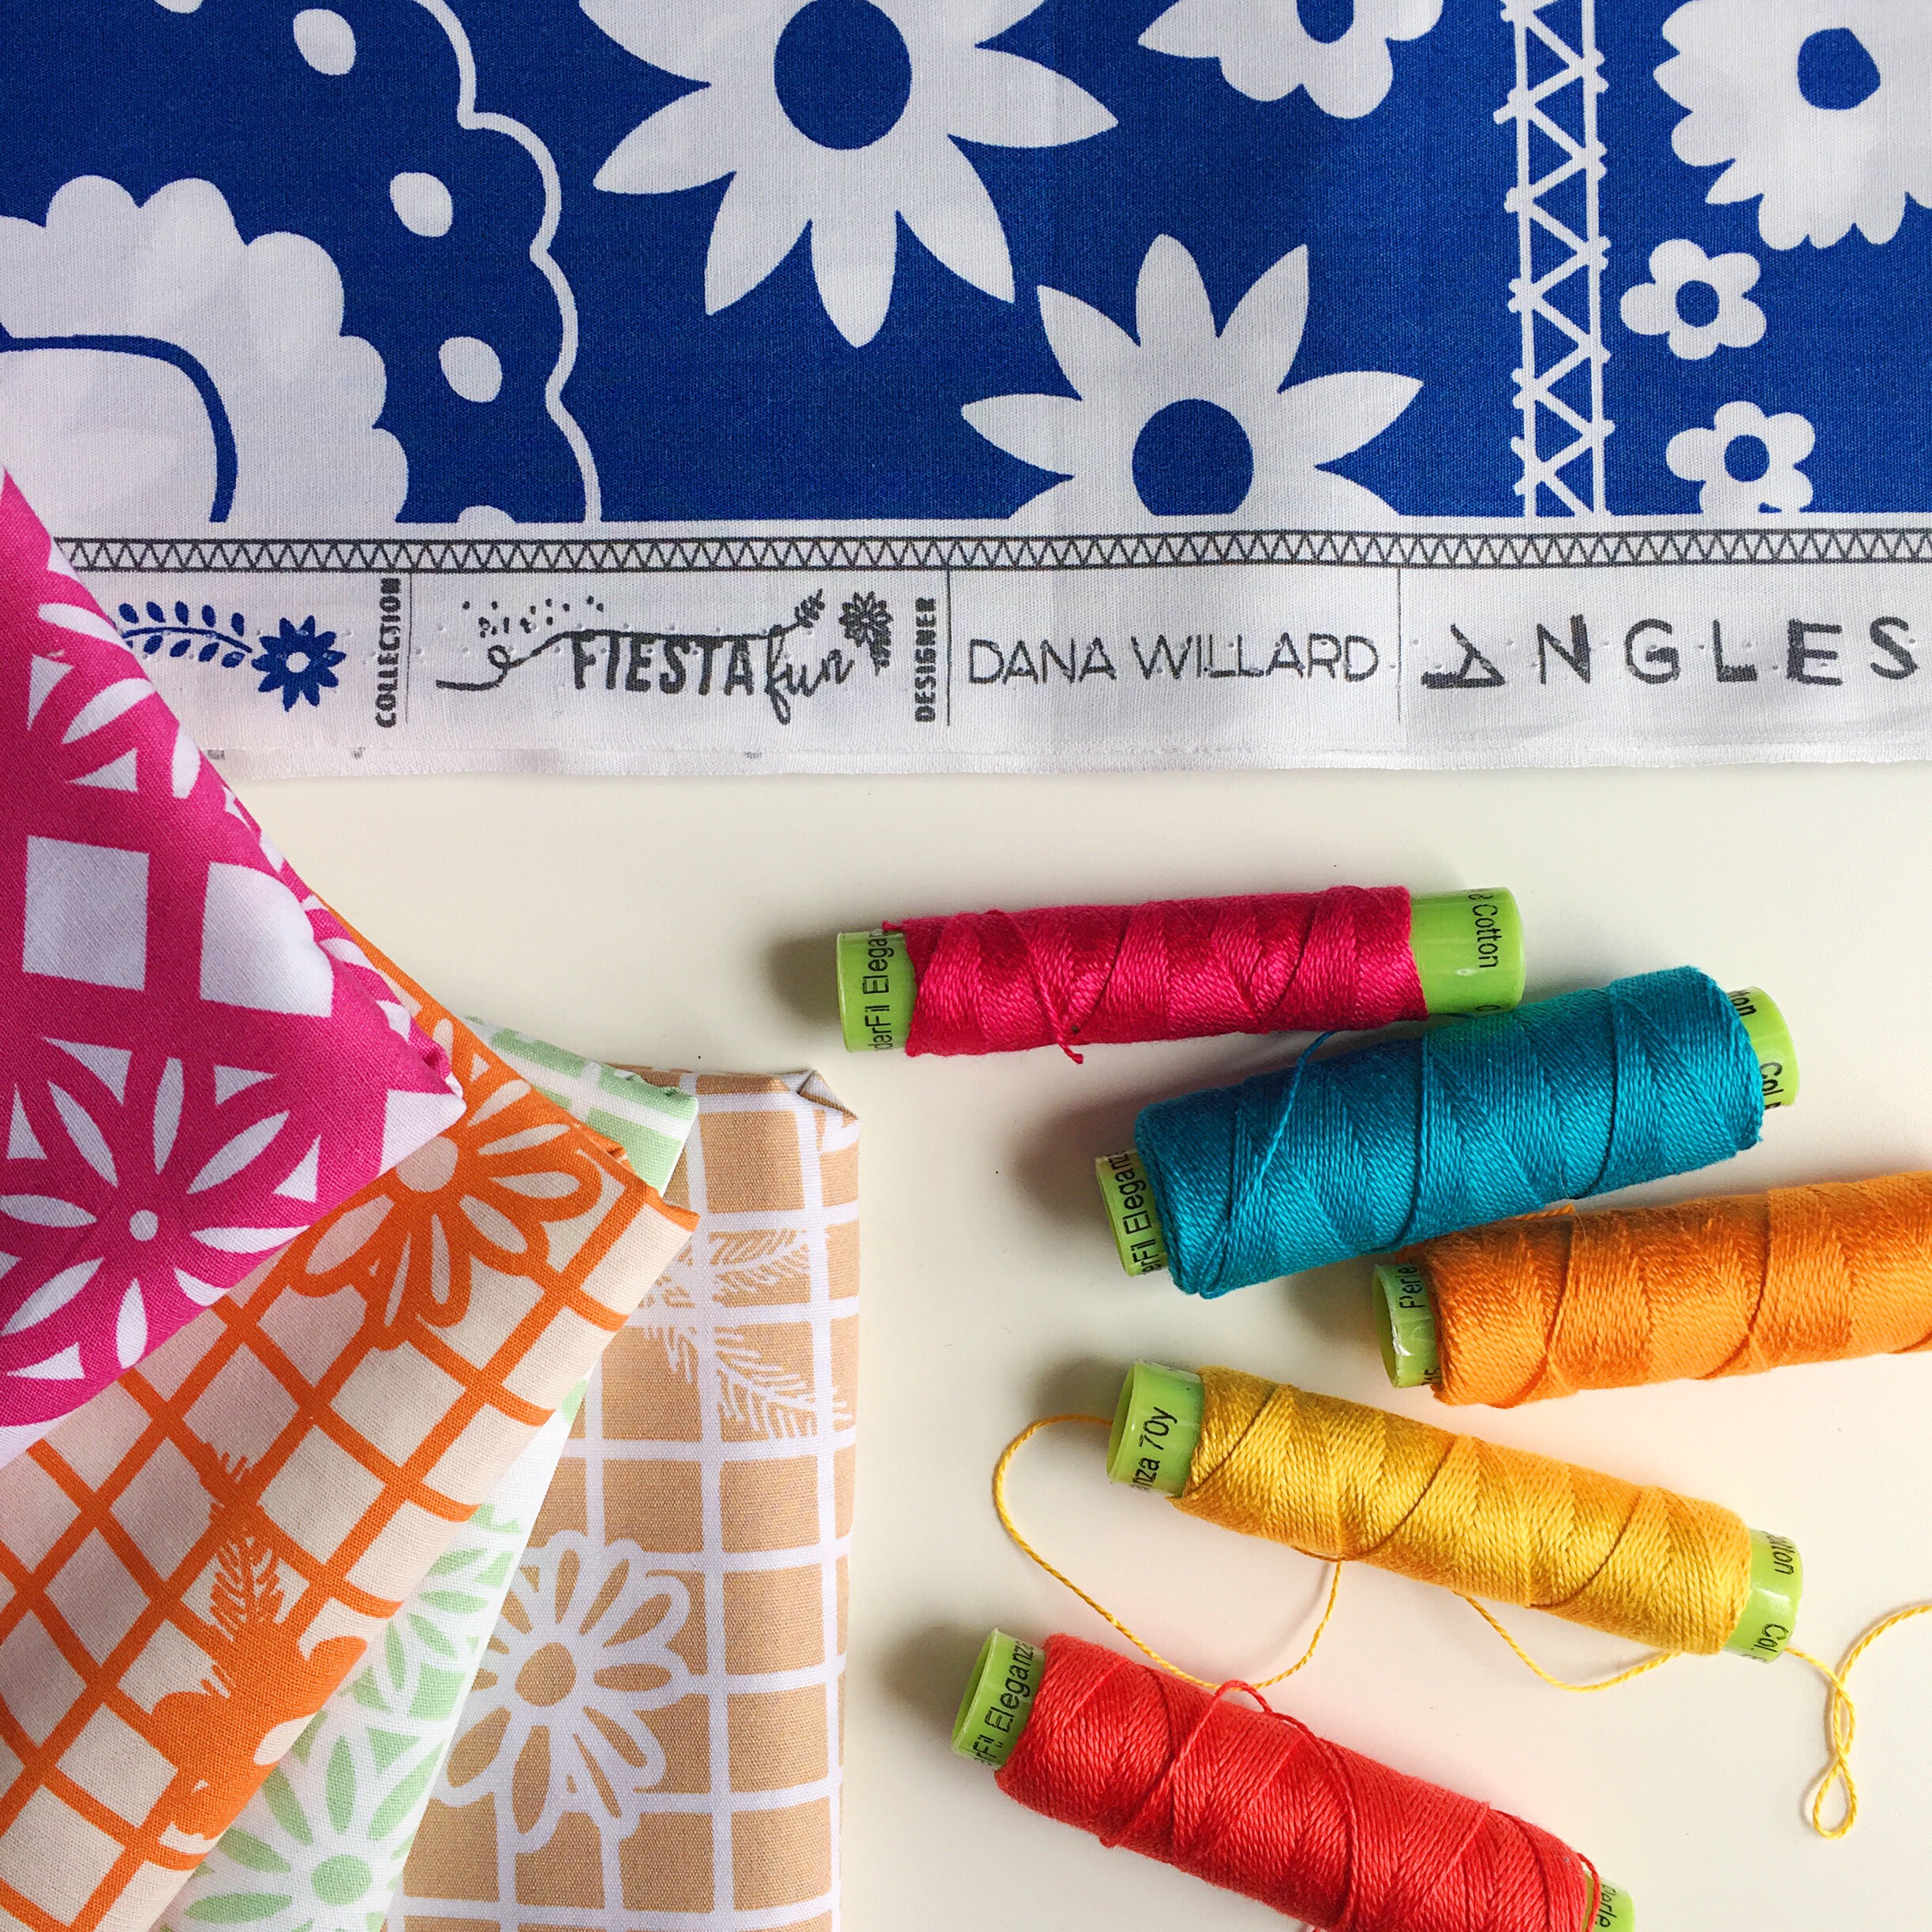
If you want to try your hand at an embroidery project like this, here are the specialty Threads and beads that I used:

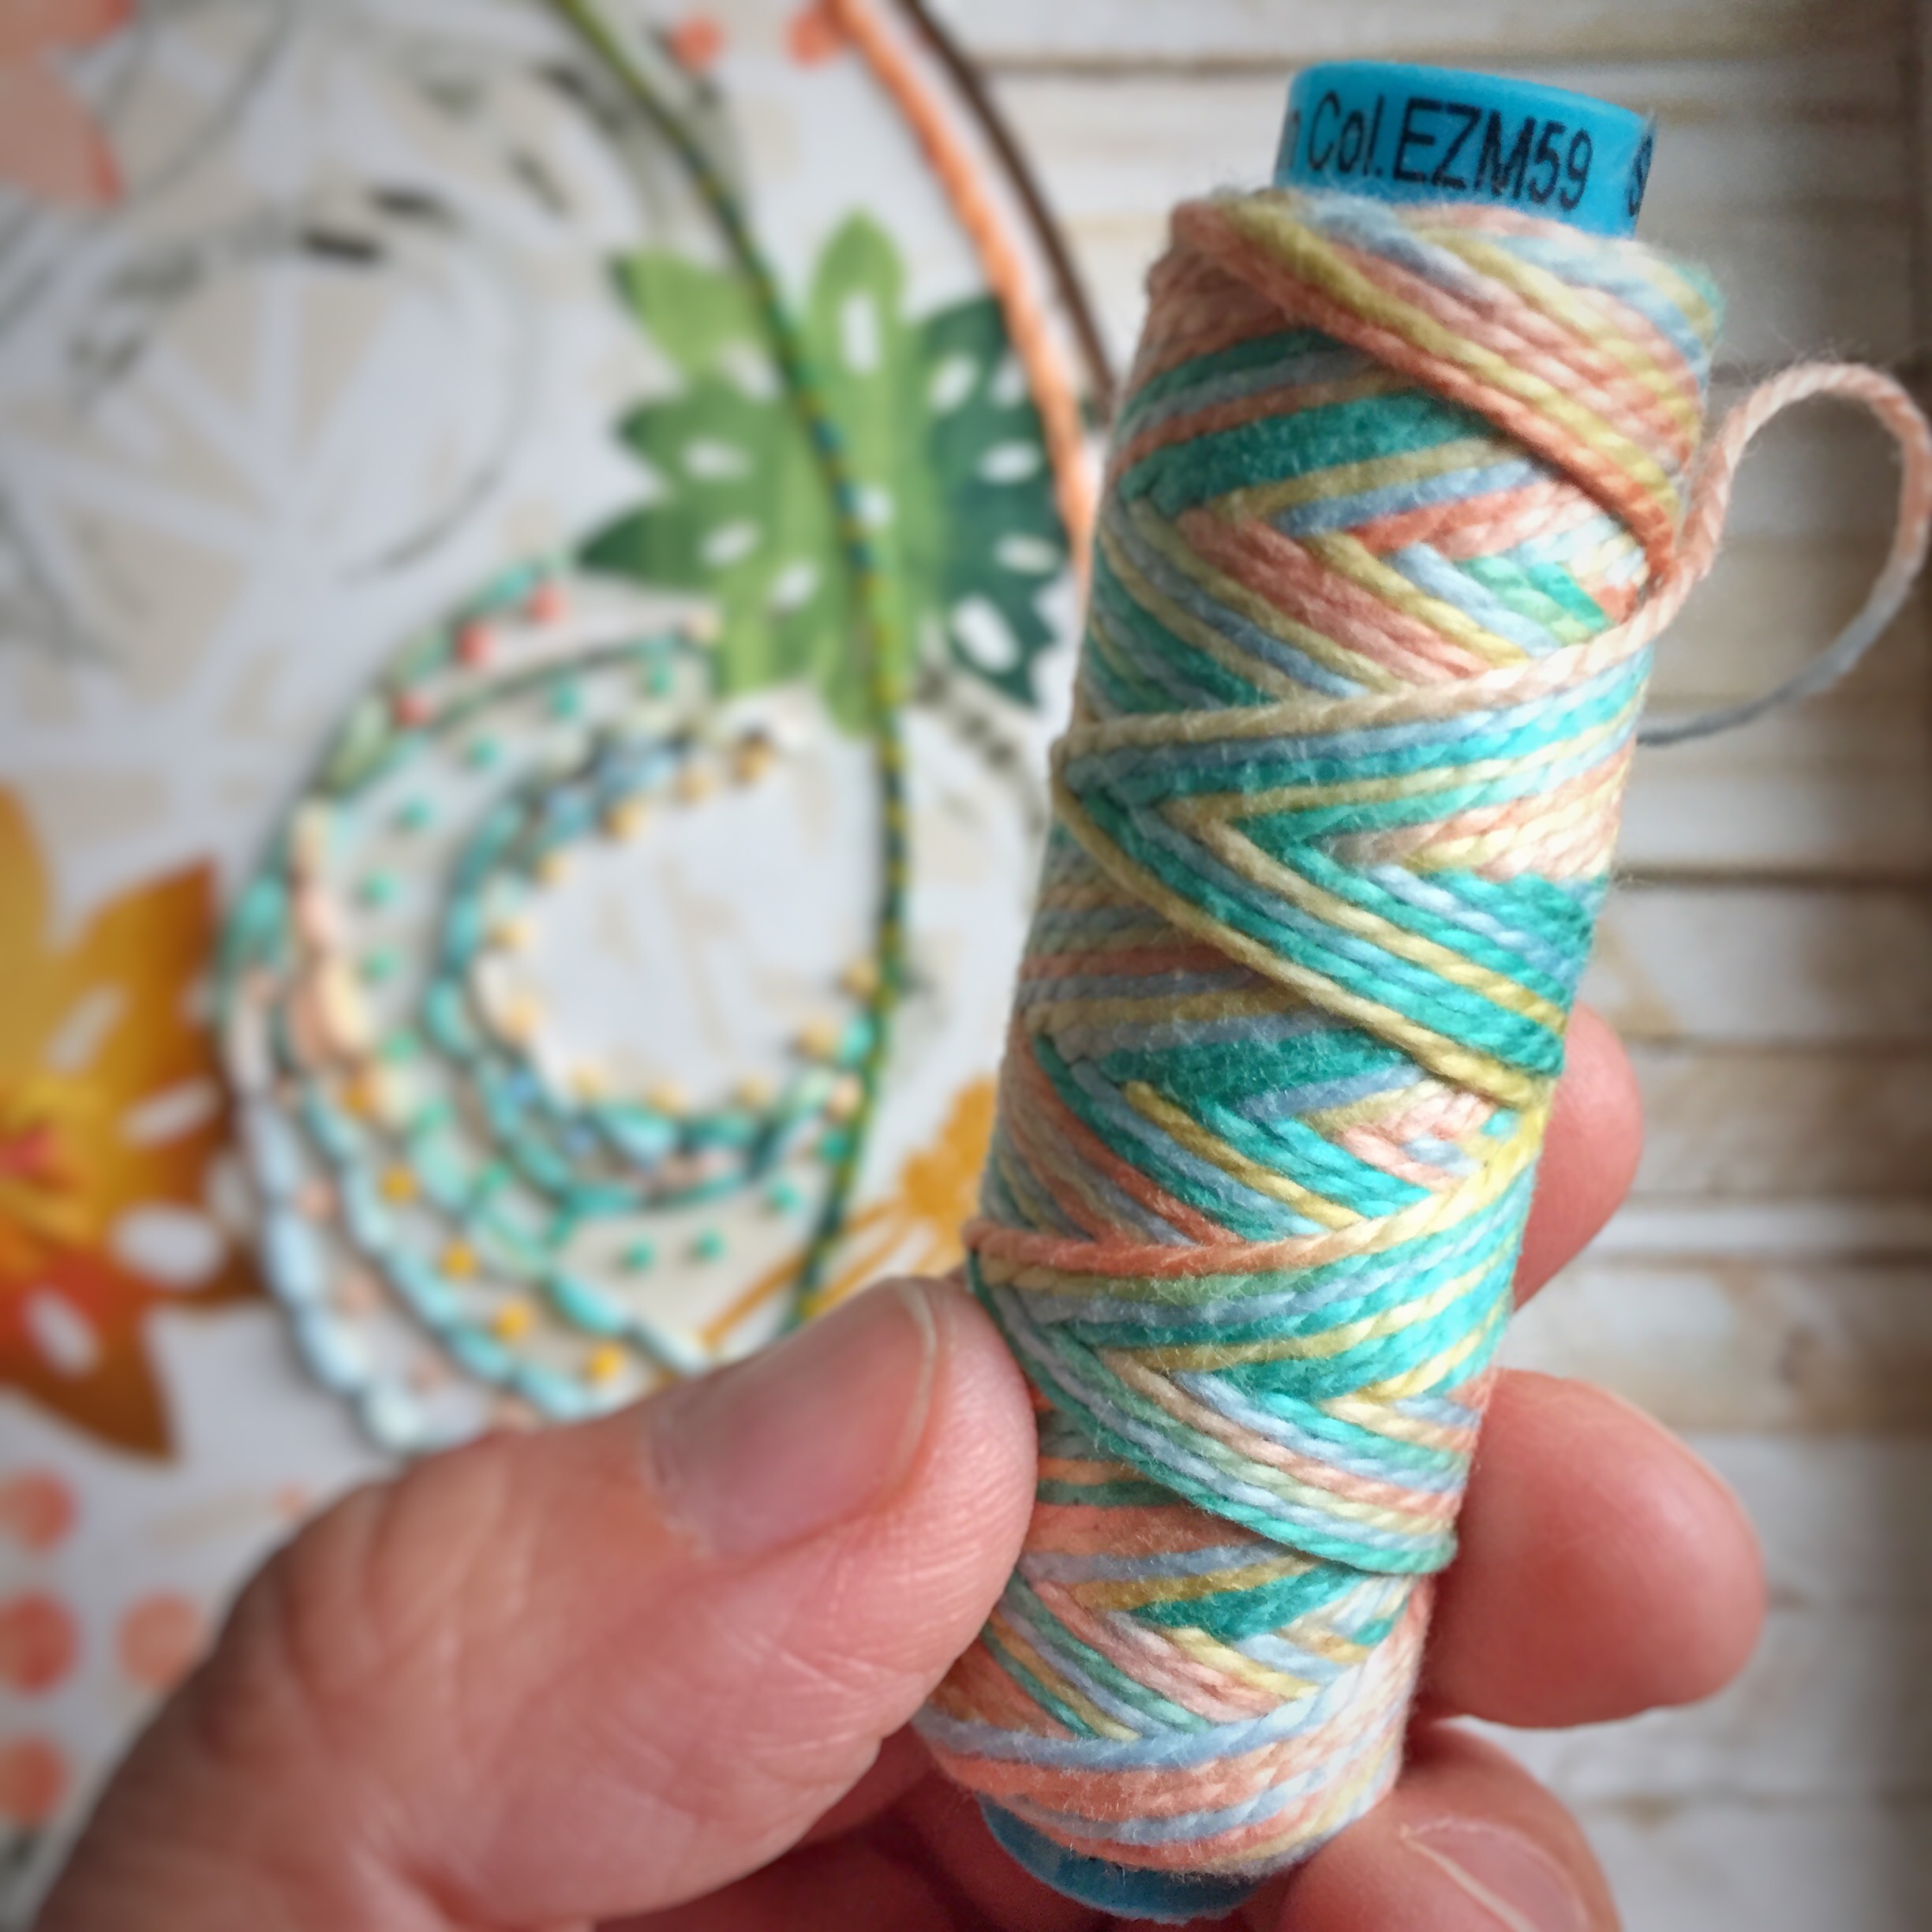
This yarn is really fun to embroider with….I mean, check out those colors! You can find these “Unicorn Tails” at Mad Tosh.

If you’ve been following along for awhile now, you already know how much I love the Eleganza Perle Cotton from Sue Spargo and Wonderfil Specialty Threads! I used the size #8 and in some cases doubled it up so that my stitches stood out next to the Unicorn Tails. I could have just used a size #5 or #3, which are both thicker, except I was gifted this box of threads and the colors matched perfectly!

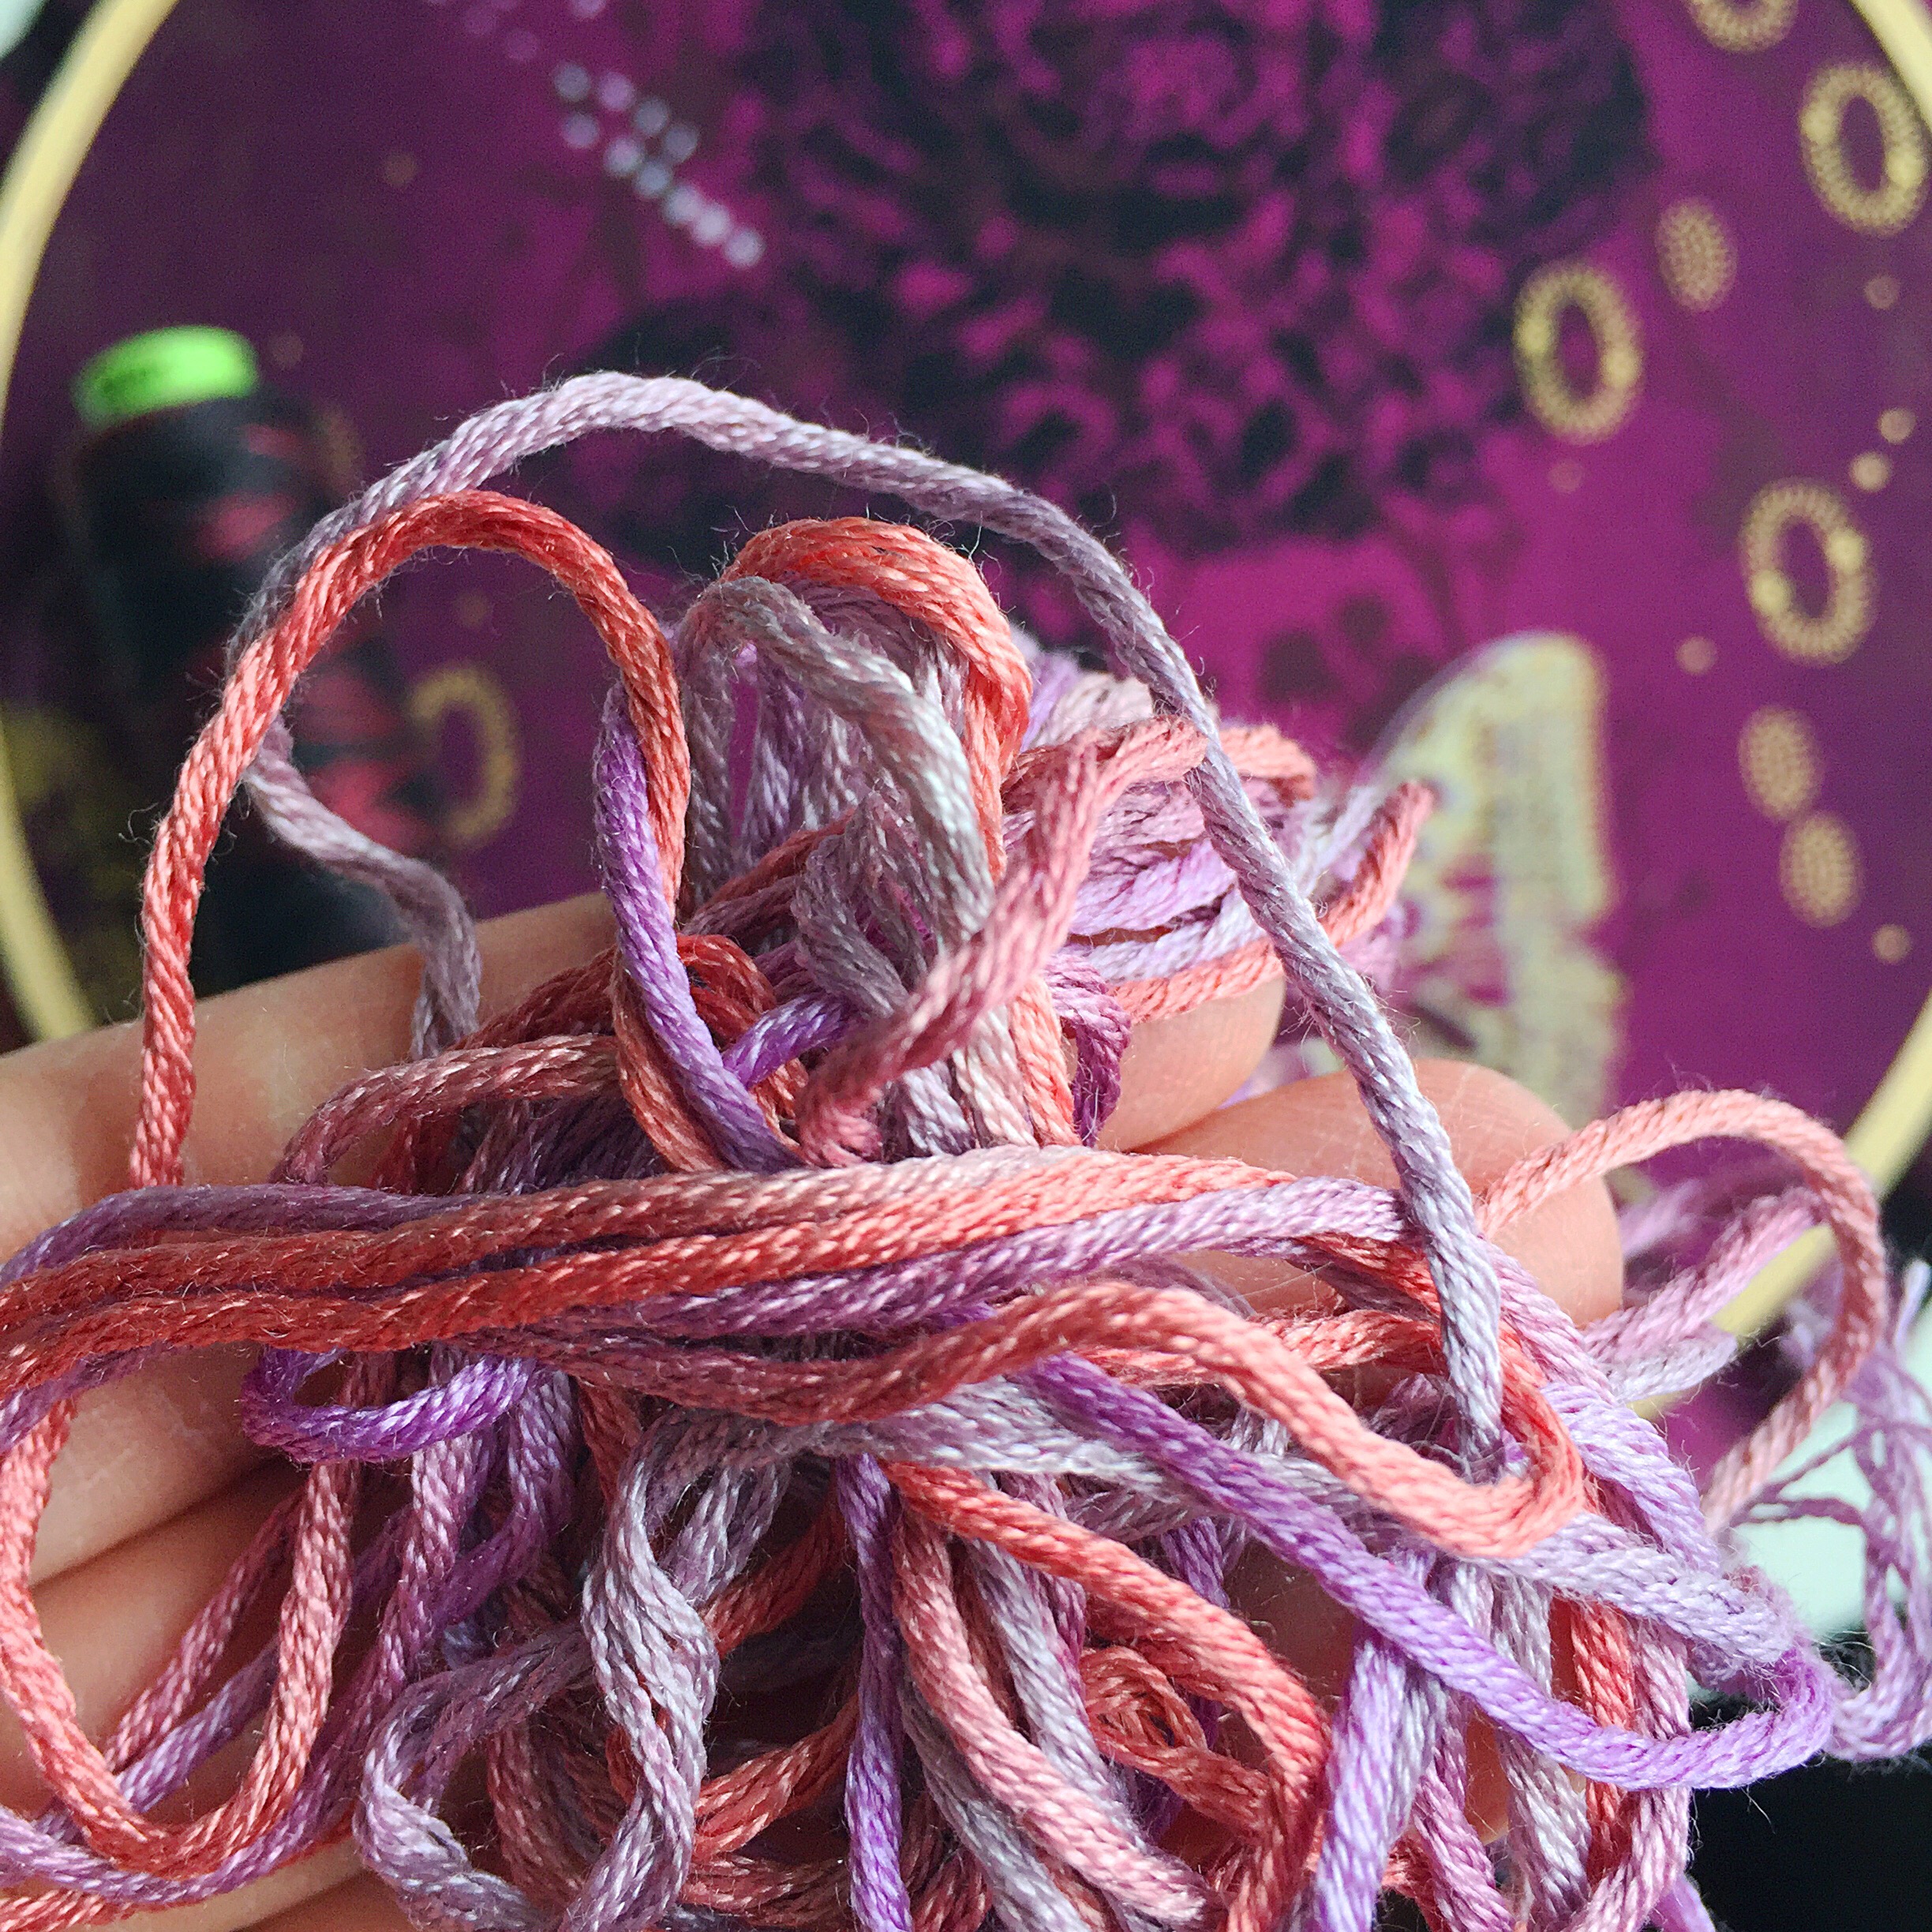
Another one of my favorite threads (especially to use when working with beads and sequins) is Sulky Petites. These threads are approximately the weight of 2-strands of a floss like DMC that gets separated, except you can use these right off the spool without separating strands.

And speaking of beads, my favorite seed bead source is Fusion Beads. (How about that neon pink?!) I used size 8 seed beads for this project.

And if all of this seems completely overwhelming and you just want to stitch a pattern, look how completely different this project can be if it is simply embroidered using the Tula Pink color guides and her pattern from the book!

photo courtesy of The Quilting Company and stitched by Elise Baek

Please be sure to check out all of the other amazing embroidery projects on this Book Showcase!

Here’s the full schedule:

Monday, November 27th — The Quilting Company

Tuesday, November 28th — Minki Kim, Minki’s Worktable

Wednesday, November 29th — Nichole Vogelsinger, Wildboho

Thursday, November 30th — Amanda Carestio, Sew Daily

Friday, December 1st — Nydia Kehnle, Nydia Kehnle Design

Monday, December 4th — Sharon Burgess, Lilabelle Lane Creations

Tuesday, December 5th — Cindy Guch, Raspberry Sunshine

Wednesday, December 6th — Sandi Sawa Hazlewood, Crafty Planner

Thursday, December 7th — Wynn Tann, zakkaArt

Friday, December 8th — Elise Baek, Elise & Emelie

Monday, December 11th — Ann Blalock, Coats & Clark Sewing Secrets

Tuesday, December 12th — Sara Lawson, Sew Sweetness  * Watch the Facebook Live video at 7pm CST

Wednesday, December 13th — Nancy Jewell, Free Spirit Fabrics

Thursday, December 14th —Annette Allison Millard, The Sewful Life

Friday, December 15th — Brenna Riley Gates, The Quilting Company

Cricut Maker

Recently, I discovered the brand new Maker machine from Cricut and I can’t wait to tell you how easy it was to make this hoop with the machine!

If i’m being completely transparent, i’d have to say that I never even looked at Cricut machines for my own use, because my focus is on fabric crafting rather than paper crafting and I thought Cricut machines were just for paper. Well, not so with the Maker machine…yes it can cut paper but also fabric, vinyl and even thin wood!

I was sold!

So, I received and unboxed my machine, set it up and then sat down to learn how to use Cricut’s Design Space app for the iPad (which can also be used on your computer and that’s actually where I set up my first project).

Since this was going to be my very first project ever, I wanted to keep it simple in case I really messed it up!!

I chose images from the design library: a pair of scissors and a swirly ribbon. This video shows a snippet of what the cutting process looks like:

I have the fabric backed with Heat ‘n Bond and that is being held in place on the pink Cricut adhesive fabric mat.

Once the cuts were made, I had three separate pieces that I then assembled onto my background fabric.

And then my favorite part, of course, the embroidery!

The fabrics that I used are from Alison Glass.

The threads that I used are Eleganza from Sue Spargo. This is the size 8 thread, but I doubled it up for stitching this piece.

And finally, I am asked all the time about the beads that I use…these are size 8 Japanese seed beads from Fusion Beads.

I stitched it up and have the perfect hoop for my stitching studio space! (say that three times fast!)

I’m thrilled with how simple it was to use the Maker machine and how quickly I was able to put together all of the pieces for this project. I’m thinking that for my next project, I might use my own design for a hoop. So, stay tuned, i’ll be sure to share it with you here!

And in the meantime, you can check out how others have been using their machines on Cricut’s Instagram page!


The Maker machine and supplies have been provided to me by Cricut. The opinions, photos and videos above have been provided by me. 

AGF Rayon Blog Tour


Welcome to week 2 of the Art Gallery Fabrics Rayon Blog Tour! Check out the hashtag #agfrayonbloghop for the beautiful projects made from these soft and buttery rayons!

Buttery?! Can that really describe a fabric?! It can! In fact, its the only way I can describe how absolutely soft and smooth these rayons are! If I were a maker of clothing instead of embroiderer of fabric, these would absolutely be a staple of my fabric stash!

Being thinner than a quilting cotton, which is what I’m used to using for embroidery, I wasn’t sure what I was in for when I began this project.

Note: It’s a really good idea when you’re not sure how your fabric will react to adhesives and the high heat of an iron, to test a swatch and make sure your fabric is not at risk of being ruined. 


I’m excited to share what I made with my April Rhodes rayons, not having worked with rayons much before this. I loved the challenge of straying from the comfortable world of quilting cottons and venturing into the sleek world of rayons! And, you didn’t expect me to whip up a skirt or dress, right?! Okay, good, because I didn’t!

Fabric designs from April Rhodes make me feel like a world traveler. To me, they embody the spirit and colors and visuals of exploration and adventure. I wanted to capture that sense of adventure in my project, the Polaroid Photo hoop.


Combining the rayons with quilting weight cotton worked really, really well. If anything, stitching though layers of fabric (when one of those layers is a rayon!), went better than I had planned. Working delicate stitches on several layers of cotton can be tedious at times, but the thinner weight of the rayon worked great with the stitches and beads and sequins that I layered onto the fabric.

Here’s a closeup of each Polaroid picture:

I love how photos, and especially Polaroid photos, capture a moment in time. These “photos” of fabric have a vintage vibe that captures the essence of exploration.

Working with the patterns of the fabric, I embellished with like colors in my favorite Eleganza Threads and with one of the brand new seed bead palettes from Fusion Beads. I love using seed beads and jumped at the chance to try out a hand selected palette of bead colors! This one is Autumn Colors and went perfectly with my fabrics.

*Note: these are size 8 seed beads. If you are new to using beads in your embroidery, I would suggest starting with a size 8 or the slightly larger size 6 seed beads.

I hope you enjoyed my stop on the rayon blog tour! Be sure to check out the links below to see the beautiful variety of projects created with Art Gallery Fabrics Rayon!

MONDAY, OCTOBER 9 – CRISTY @LOVEYOUSEW_ | Blog here

TUESDAY, OCTOBER 10– NICOLE @MODERNHANDCRAFT | Blog here

WEDNESDAY, OCTOBER 11 – SARAH @SARIDITTY | Blog here

THURSDAY, OCTOBER 12 – JESY @NEEDLE_INK_AND_THREAD | Blog here

FRIDAY, OCTOBER 13 – DANYELLA @MADESEWMODERN | Guest Blog here

MONDAY, OCTOBER 16 – NICHOLE @WILDBOHO | Blog here

TUESDAY, OCTOBER 17 – CYNTHIA @CNYTZ51 | Guest blog here

WEDNESDAY, OCTOBER 18 – VICKI @ORCHIDOWLQUILTS | Blog here

THURSDAY, OCTOBER 19 – AMANDA @PINKMANDARIN.HANDMADE | Guest Blog here

FRIDAY, OCTOBER 20 – JENN @JENNROSSOTTI | Blog here

Thread Round-Up

As someone who works with lots of threads and always on the lookout for new colors and textures to try, it is one of my favorite questions when I am asked: “what threads do you recommend?”

So here’s a quick thread round-up for you if you are thinking of starting an embroidery project and want to try something new!


Hands down, my favorite everyday embroidery thread is Eleganza Perle Cotton. A collaboration with Wonderfil Specialty Thread, these colors from Sue Spargo are rich and saturated and match any project I am working on.

In the picture below, you will notice that size 5 is slightly thicker than size 8. With Perle Cotton, you do not need to separate threads, like you might typically do with regular floss. This is meant to be used directly off the spool, which might partially be why I like it so much!

You also get a lot of thread for your money with these spools! The size 5 comes in 40 yard spools and the size 8 comes in 70 yard spools.

This Dala Perle Cotton also comes from Sue Spargo, only this one is hand-dyed in small batches by her daughter, Kelly. The colors in these variegated threads are also incredible!

If you are used to using thinner threads but want to add a bit more texture to your work, I suggest giving this particular brand a try. It is easy to work with, does not need to be separated and also adds lovely visibility to your stitches. And notice the twist in the threads? That adds to the texture of your work and gives it a bit of shine. If you are going to be spending lots of time adding your embroidery to a project, you definitely want those stitches to stand out, right?!

Have you ever worked with wool yarn or thread in your embroidery? If you haven’t, these are my two favorite brands of wool yarn to use in my hand stitched projects.

On the left is Koigu Needlepoint Yarn which I picked up on a recent trip to Purl Soho in NYC. It comes in 11 yard hanks and is the weight of a fingering yarn. It does not need to be separated like regular embroidery floss. I have found that even though it looks thicker, it threads through Milliner’s Needles easily and I haven’t had any problems using it in my embroidery.

The Ellana wool thread on the spool is from Sue Spargo. Compared to the spools of Eleganza Perle cotton, this thread is thinner and wispier. I like to use it double stranded, but if you are looking to add delicate texture, then you can certainly use it as a single strand. This also comes 70 yards to a spool and the color selection cannot be beat! I could seriously find a use for every single color in this collection!!!

My favorite threads for adding beads to my work are these Sulky Petites and Sulky Blendables. When compared to a DMC type floss, these are the weight of 2-strands of floss. Each spool is 50 yards. I like using these to add beads because the colors are subtle enough to blend with my work and I rarely have problems with the thread tangling. This is a nice, lightweight addition to my embroidery toolbox!

Boho Stitch Along. Week no. 23

Welcome back for Week no. 23! If you are just beginning a piece for the #BohoSAL, check out my previous posts here. And if you are new to embroidery and want to learn the basics, check out my embroidery book, Boho Embroidery for everything you need to get started!


I picked up my Urban Artifacts hoop again this week after not stitching it for awhile. It’s like coming back to a comfortable old friend! I haven’t shown a full view of this hoop since I started stitching it back in January, so here is where I am so far:
I worked a little bit of couching this week and added some beads to coordinate with the variegated thread that I used.

This thread is beautiful. It is called “Fly a Kite” and is a mix of buttercup, spearmint, ice and bluejay blue colors and is from a Limited Edition color pack (which, P.S. it looks like is still available!) from Sue Spargo. I typically do not use much size 3, the largest perle cotton size, but I don’t know….i’m really liking the thickness of this size to stitch with.


As far as other stitchy happenings this week, if you checked out my Instagram stories, you’ll remember I was stitching up a Liberty pincushion from a kit that I bought from Nicole at Modern Handcraft. Have you seen her Hexie pincushions yet?! If not, check them out! I love, love everything that she makes!

I bought this kit ages ago and am so proud of myself for finally finishing this thing! And, bonus, it is just adorable in my workspace!


And lastly, I was really excited to attend Book Expo America, the largest book fair in North America, this week. I was there for a Boho Embroidery book signing. It was great to meet so many librarians who will be using my embroidery book as part of their summer program series and giveaways at their libraries.

My color/texture loving self could not get enough of this display! Made from recycled paper, each round of paper was hand lettered and illustrated by both artists and visitors to the booth. It was truly stunning and this picture only captures a small section of the display!

Between fan-girling at Book Expo (I saw Mo Willems from a distance!) and my book signing, I had a small window of time to run over to Purl Soho and geek out over the displays of Liberty fabrics and wall of yarns.

And spotted some wool Ellana in action too!

What a whirlwind day in the city!

Hope your week went well and don’t forget to check out the beautiful hoops being stitched up in the #Bohosal pool!


Boho Stitch Along. Week no. 22

Welcome back for Week no. 22! If you are just beginning a piece for the #BohoSAL, check out my previous posts here. And if you are new to embroidery and want to learn the basics, check out my embroidery book, Boho Embroidery for everything you need to get started!


I am just loving this Outback Wife fabric SO MUCH. The fabric has so much texture pre-stitching and is slightly heavier than a quilting cotton, so it can withstand the weight of the beads and threads that I am adding! Here it is, in my garden….doesn’t it look like it belongs with the peachy-orange irises?!


And speaking of Outback Wife fabric, did you see the two limited edition color ways that were released at Quilt Market? I will be stalking my favorite fabric shops for yardage to be available because I think I need more!!!

Here is a picture of the limited edition colors from Ella Blue Fabrics:


We have so beautiful floral inspired hoops that are in the #BohoSAL feed and I thought I would share some of my favorites this week!

This is a lovely piece by @locowispsnwips and you can check out her feed for lots of detail shots!!

@beckymac1 has perfectly matched her Eleganza to this gorgeous floral and I can’t wait to see more pictures of this hoop as she makes progress!

 I just love hummingbirds and so when I saw this hoop from @handmadewhimzy, I knew I had to feature it! And I love how she is changing the flower with her embroidery!

Such perfect little stitches from @quilterathart and lots of other beautiful embroidery on her feed!


And that’s a wrap! Have a fabulous week and happy stitching!

Boho Stitch Along. Week no. 15

Welcome back for Week no. 15! If you are just beginning a piece for the #BohoSAL, check out my previous posts here. And if you are new to embroidery and want to learn the basics, check out my embroidery book, Boho Embroidery for everything you need to get started!


You may have noticed that I tend to jump around a lot with my #Bohosal piece!! It’s really just to keep you on your toes and not at all because I have too many ideas to contain to just one piece!!!
This week I started and finished a project. When I have lots of deadlines and projects going, I find it works best to introduce yet another project, just to really make my week tricky!

I like to move around the art on my walls fairly regularly, which means that I sometimes end up with pieces that just don’t work anymore. I had a canvas picture of a bike and I just couldn’t make it fit anymore. So I decided to pull a piece of fabric that I really liked and embroider that and then staple it over the canvas picture. This is one of my favorite ways to change up art!

I chose a print from the Shiny Objects collection by Flaurie and Finch. I’ve worked with their fabrics a lot in the past and love the details that are included in each of the fabrics. This collection has metallic bits sprinkled throughout, which is so much fun!

I began with a running stitch in several varieties of thread: Eleganza Perle cotton, Silk Thread and even some yarn. Next up I added beads to the running stitch. I finished up with satin stitching around the flower and a neon leaf or two to really make the flower pop off of the fabric.

I’m thrilled with how it turned out!

Next week i’ll share some of my favorite #BohoSAL posts from our ever-growing pool! How exciting to look through all of the pictures and see so many hoops in progress!

Have a great week and Happy Stitching!

-nichole


Boho Stitch Along. Week no. 12

Welcome back for Week no. 12! If you are just beginning a piece for the #BohoSAL, check out my previous posts here. And if you are new to embroidery and want to learn the basics, check out my embroidery book, Boho Embroidery for everything you need to get started!


I’m continuing along with my Flaurie and Finch “Shiny Objects” hoop this week for the Boho Stitch Along and first of all, I promised the thread sources that I used in this hoop! From left to right they are:

Lion Brand bonbons, Sue Spargo Eleganza Perle Cotton and Silk n’ Colors from The Thread Gatherer.

I love the variety of textures that these threads lend to this project!

These are the Lion Brand Yarn bonbons which I found at Joann but Amazon also has them in all of the colors. I’ve found that the colors in store vary and they can be tricky to find (usually hanging somewhere in the yarn department but sometimes closer to embroidery supplies).

I originally picked them up because they are cute and tiny (and yes, I fall for stuff like that all the time!) but I wasn’t sure how they would work with embroidery. It turns out they work awesome! I use a Milliner’s Needle and easily embroider with this thicker-than-floss-thinner-than-yarn bonbon!

This week I also picked up, but didn’t test out yet, this Dritz Non-Stick Pressing Sheet. I have found that when I am working with Batik fabric, my usual Heat n Bond method does not always work great…sometimes leaving behind the texture of the Heat n Bond on the fabric itself. Hopefully this extra layer will help with that problem. I’ll let you know when I actually try it out!

And lastly, we had quite the snow/sleet storm this week and, eager for winter to be gone already, it made me pull out this neon Cotton + Steel hoop that I had prepped awhile back and stitch it up!

I echoed the shapes from the background fabric (a Cotton + Steel print from Alexia Abegg) and layered several other fabrics from the same line before embroidering in my most neon colors! A painted neon hoop completed it and it’s finally available in my shop!

Have a great week stitching!

-nichole

Boho Stitch Along. Week no. 11

Welcome back for Week no. 11! If you are just beginning a piece for the #BohoSAL, check out my previous posts here. And if you are new to embroidery and want to learn the basics, check out my embroidery book, Boho Embroidery for everything you need to get started!


I think by now you know that I love to switch between projects a lot! I have several #BohoSAL hoops going and I work on them depending on what mood i’m in and what other projects I have going for the week!!

This week, I started on a piece of fabric from Flaurie & Finch. I met the ladies of Flaurie and Finch at Quilt Market in October and, besides being super nice, they haven’t designed a fabric yet that I don’t love!

I also really wanted to try out this stunning Silk ‘n Colors thread from The Thread Gatherer. This is a 12-ply thread which means you can use anywhere from 1-12 strands of it in your project. I chose to use all 12 strands just to see how well I could stitch with it. Let me tell you, this thread is amazing. I had no trouble with tangles, the thread easily went through my fabric and the end result was a noticeable raised stitch.


This particular deep purple fabric is from Flaurie and Finch’s Shiny Objects collection and it is called “Menagerie.” I love a fabric that has a healthy dose of metallic shimmer! Butterflies are always a bonus!


So there’s my #BohoSAL for the week. Here’s what else i’ve been up to…


I was excited to be featured on Sue Spargo’s site last week…you can check out the feature here as well as check out the thread pack that I curated in my favorite colors! P.S. You can also find my book on her site now too!


If you’ve been wanting to try Eleganza thread but aren’t sure where to start, the colors that I picked for the Wildboho Eleganza thread pack are a great mix of saturated colors that I use for just about everything!


It goes especially well with the brand new upcoming Alison Glass line, Chroma Handcrafted. Seriously, these colors!!!


Speaking of colors, I’ve had the chance to work with another gorgeous fabric line from Dana Willard (on instagram at @made_everyday) for Angles which is a new-ish division of Art Gallery Fabrics. Dana’s fabrics are just beautiful and colorful and everything you want as a base for embroidery! (P.S. you Boho Stitch Along-ers…any of these fabrics would be really fun if you are looking for a new #BohoSAL piece!)

Her line is called Fiesta Fun and you’ve seen peeks of the hoop I’ve been creating this past week on Instagram.

First off, check out some of these colorful prints! (These are just a few of the prints from this line. For more fabrics and some gorgeous inspiration, check out Dana’s page describing this new line here.)


These bright colors are just what I wanted to be stitching as winter winds down!


For this hoop, I began with the blue and white fabric and then added the first bit of color from flowers that I cut from the colorful version of the same fabric.

Now, I know some of you are all about fussy cutting and will see nothing wrong with what I’ve done here, but others will look at this cut fabric and see nothing but waste!!! It had to be done, though!!!

Once I cut out the flowers that I needed and attached them to the fabric, I could begin adding even more texture and color with my embroidery.

And here’s the finished hoop…I just love how this turned out!!!

I’ll leave you with all that color inspiration for today!

Have a great week of stitching!

-nichole