The New Cricut Machine Tool Organizer

I’m one of those people who has been handling this 3-month quarantine period with extreme organization! I have gone through every room, bookshelf, cabinet and drawer in my house. No spot has been overlooked. Everything has been rearranged and reorganized and it’s all feeling nice and tidy.

Despite my major studio overhaul/reorganization last summer, I knew that upcoming electrical work in my 100-year old house was going to require that I completely empty out that room once again. A daunting task and one that I have been slightly dreading for months.

As I slowly emptied the room, I continued to look at my storage solutions to see if they were working for me. And then I heard the news that Cricut was releasing a new tool organizer (shop for it here) which could hold the many blades that I use with my Maker. I jumped at the chance to try out the organizer and I have to say that it has solved one of my tiny space organizing woes!

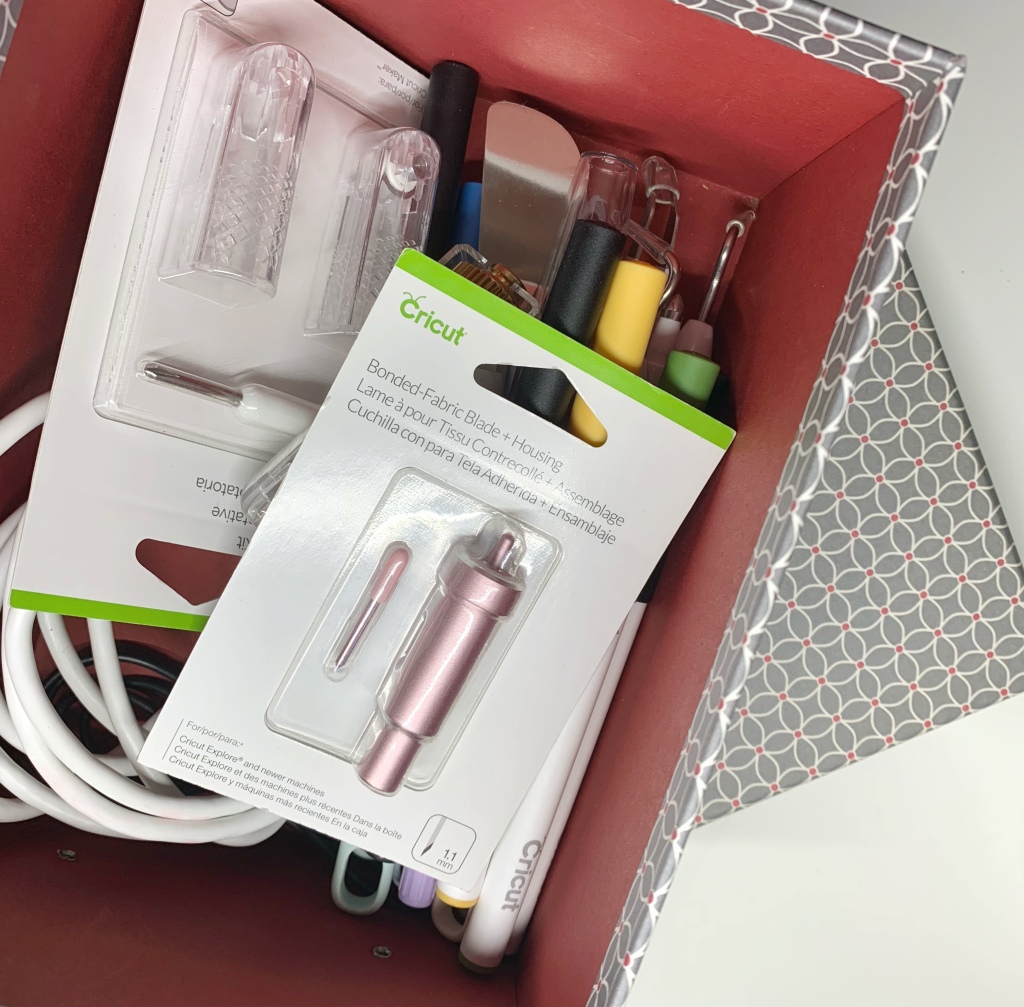
Here is an embarrassing look at how I’ve been storing all of my spare parts. Despite the adorableness of the box, it was not working great at storing all of the pens/blades/cords for my machine. (Hello rummaging around and finding a sharp blade!!)

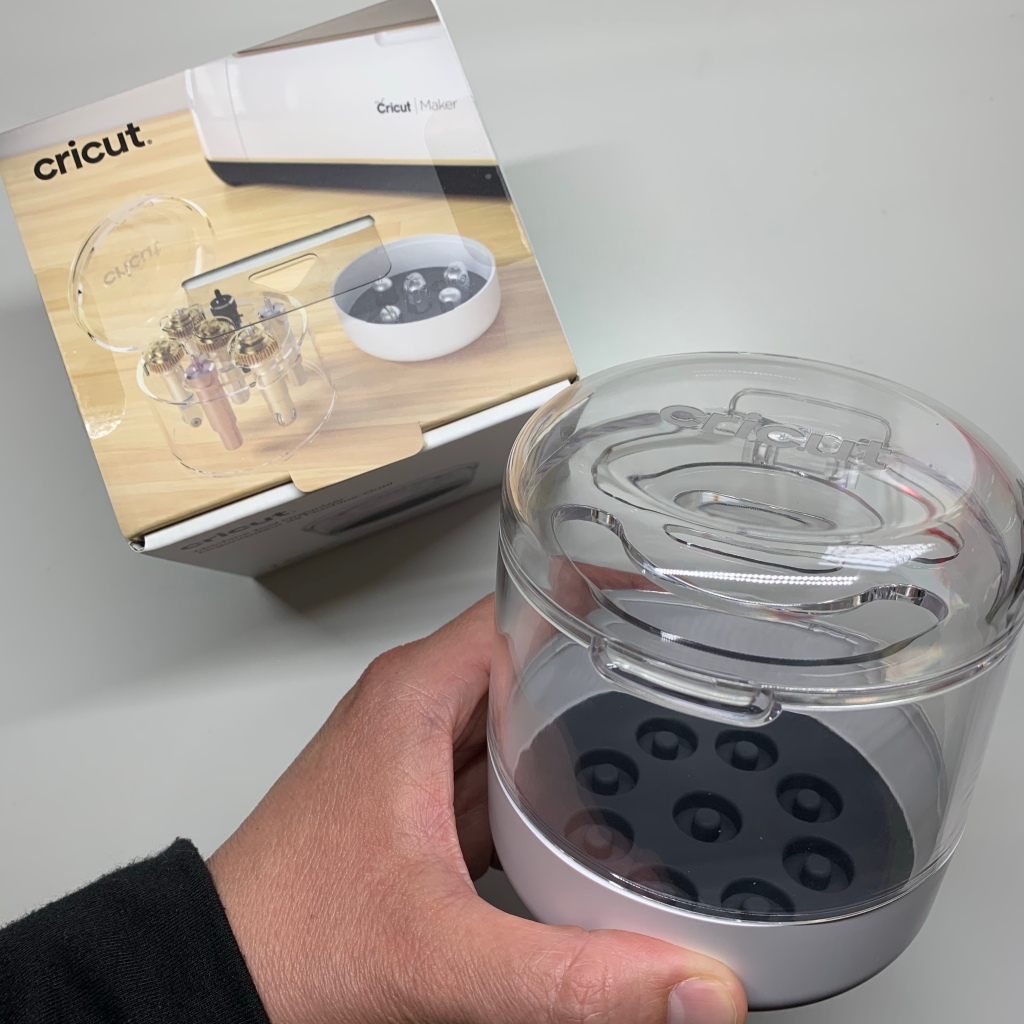
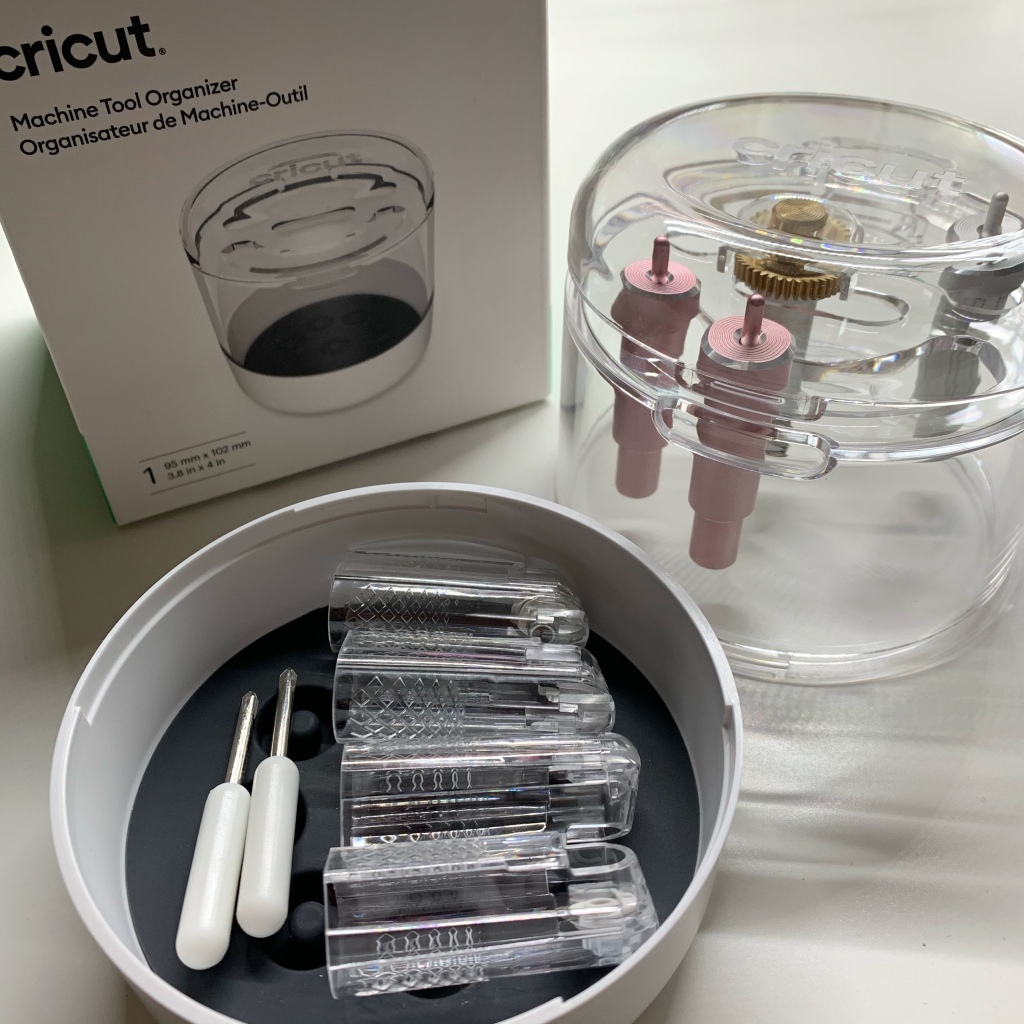
I was thrilled to open my package and learn that it could hold up to 10 blade housings. My current Maker usage limits the types of blades that I use to the Rotary blade and the Bonded Fabric blade. It also holds the QuickSwap blades (which I don’t use), but I’ll show you what I do with that space!

Here’s what’s included in the box:

And here’s how mine looks, all organized with the blades that I currently have:

Because I don’t use the QuickSwap blades (which the bottom part of the organizer has little spots to put them in), I just put my extra rotary blades in there and they stay nice and neat.

I love it because I can see what I have at a glance and it controls the chaos of my creative space!

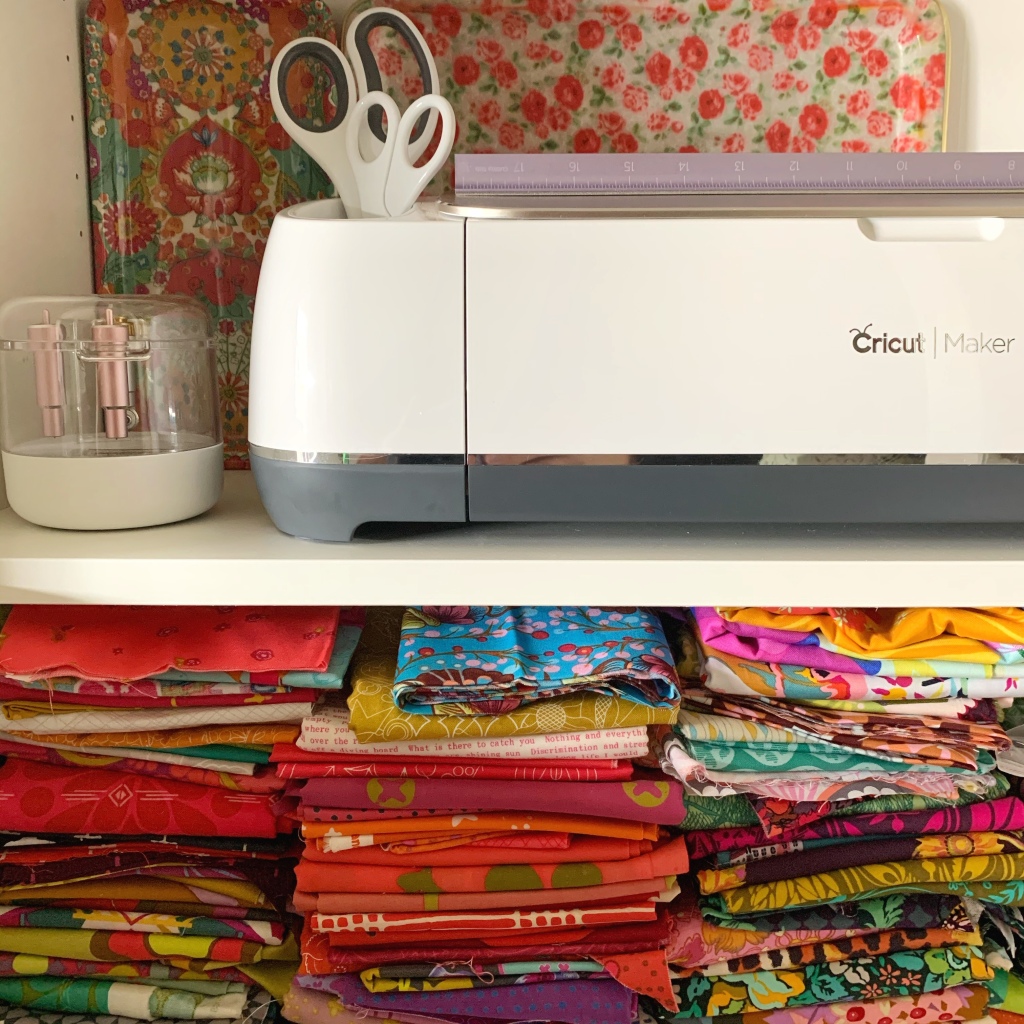
And here it is in my fancy Ikea bookshelf turned fabric and craft storage space!


Note: I have been provided products for review but I only share with you the products that I truly love and use! There may be affiliate links included in this post.

Cricut Maker + Teacher Appreciation Week

Believe it or not, I like to clear my to-do list (or at least put it aside for the day!) and sometimes work on projects that do not involve embroidery!

For Teacher Appreciation Week (May 6-10, 2019) this year, I decided to try my hand at a project that involves my Cricut Maker, several rolls of vinyl and every green Sharpie marker I could find!!

I’ve mentioned it here and here and now again in this post…that one of my very, very favorite things about the Cricut Maker is the ability to do whatever I want with fonts! I’ve embroidered fabric words that my Maker has cut, used it to print directly on fabric and this time, I’ve cut words out on vinyl.

Full disclosure before I even walk you through this project: if I could do it all again, I would absolutely be using the Cricut Transfer Paper to make the whole vinyl transfer process go more quickly. I had a stack of nine chalkboards all ready to be vinyl-ed up and it was a time consuming process that I’m pretty sure the transfer paper would have helped to speed up!

That being said, I absolutely love how these projects turned out! And I loved using my Maker with vinyl. This is an easy peasy project!

I picked up a stack of hanging chalkboards from Michaels:

This patterned vinyl might be my favorite ever!

Here are the Cricut materials I used for this project:

Natalie Malan, Orchard Vinyl

Premium Vinyl, True Brushed Sampler

Weeding Tool Set

18 x 24 Lilac Self-Healing Cutting Mat

TrueControl Kit

Cutting Ruler

Step One: Sun on Chalkboard

So I knew that I wanted to have a sun peeking out from the corner of the chalkboard. I began with a paper shape that I cut and placed in the corner.

When I was happy with the dimensions of the sun, I cut the pieces out of cardstock and then pulled out my new TrueControl knife. If you have only ever used X-Acto knives before (like me!), then you are in for a pleasant surprise.

The end of this knife is padded just enough to keep your fingers from hurting if you are making a lot of cuts. I must use tons of pressure when I am cutting with a knife like this and end up with sore fingers when I’m done cutting!

However, my fingers did not hurt when I had finished making lots of tiny little cuts! I easily cut out nine sun shapes and rays of light and then attached them to the chalkboard corners.

Aren’t they sunny and cheerful?!

Step Two: Vinyl Good Vibes Only

Since I use my Maker for font based projects about 99% of the time, I can give you a few tips I’ve picked up along the way.

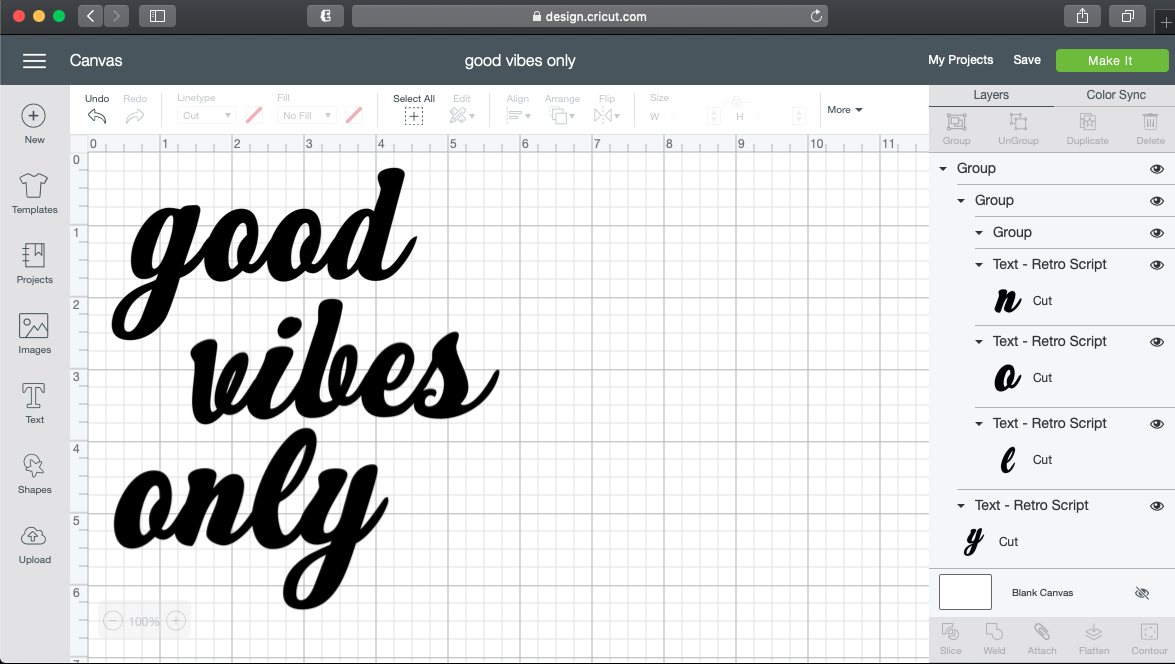
These letters do not come automatically connected. To connect them, you have to pick a font (in this case, it needed to be a script font) and type out your message. Next you have to separate all of the letters and then move them individually to connect them.

Play around with your fonts. Some connect and look better than others. You’ll notice that I used Retro Script as my font. It’s a nice chunky font that connects well and looks bold when cut out.

BEFORE CUTTING! You need to use the WELD button to connect the font and have it cut as one piece on the vinyl. If you just choose the Attach feature, you will see a little cut-out where you have attached each letter. Don’t make my mistakes!! Use WELD and your vinyl project will turn out much better (and with less headaches and wasted material!!)

Screen Shot 2019-04-25 at 9.19.41 AM

My Maker is set-up and loaded with the vinyl:

If you do a lot of vinyl based projects, I cannot recommend the weeding tool set enough. My very favorite piece is the weeding tool all the way to the left in the below picture.

My vinyl words and sun are all in place!

Step Three: Sharpie Leaf Vines

I had first wanted to paint each of the chalkboards. However, as I worked on this project, I thought that a leaf and vine detail would look fun running up the sides and across the bottom of the project. Each one would look different, too.

I needed to use three different types of Sharpie markers for this project. You can find them all here.

  • A Fine point sharpie for drawing and filling in the leaf shape. Keep in mind that there will be a small amount of bleeding from the marker onto the wood when you draw your shape. Keep going, though. Make all of your leaf shapes and fill them in.
  • Next step is outlining them with a metallic Sharpie. This will add definition around each leaf with the added bonus of covering up any leaves that bled onto the wood. The Metallic does not bleed.
  • Finally a white Fine Point Acrylic Sharpie. I added small dotted details onto the leaves. You’ll see that some I let fade into the leaf for dimension and some I repeatedly drew so that they stood out more against the leaf color.

Have fun mixing and matching your colors…I used several yellows to create a citron leaf color (one of my favorites!)

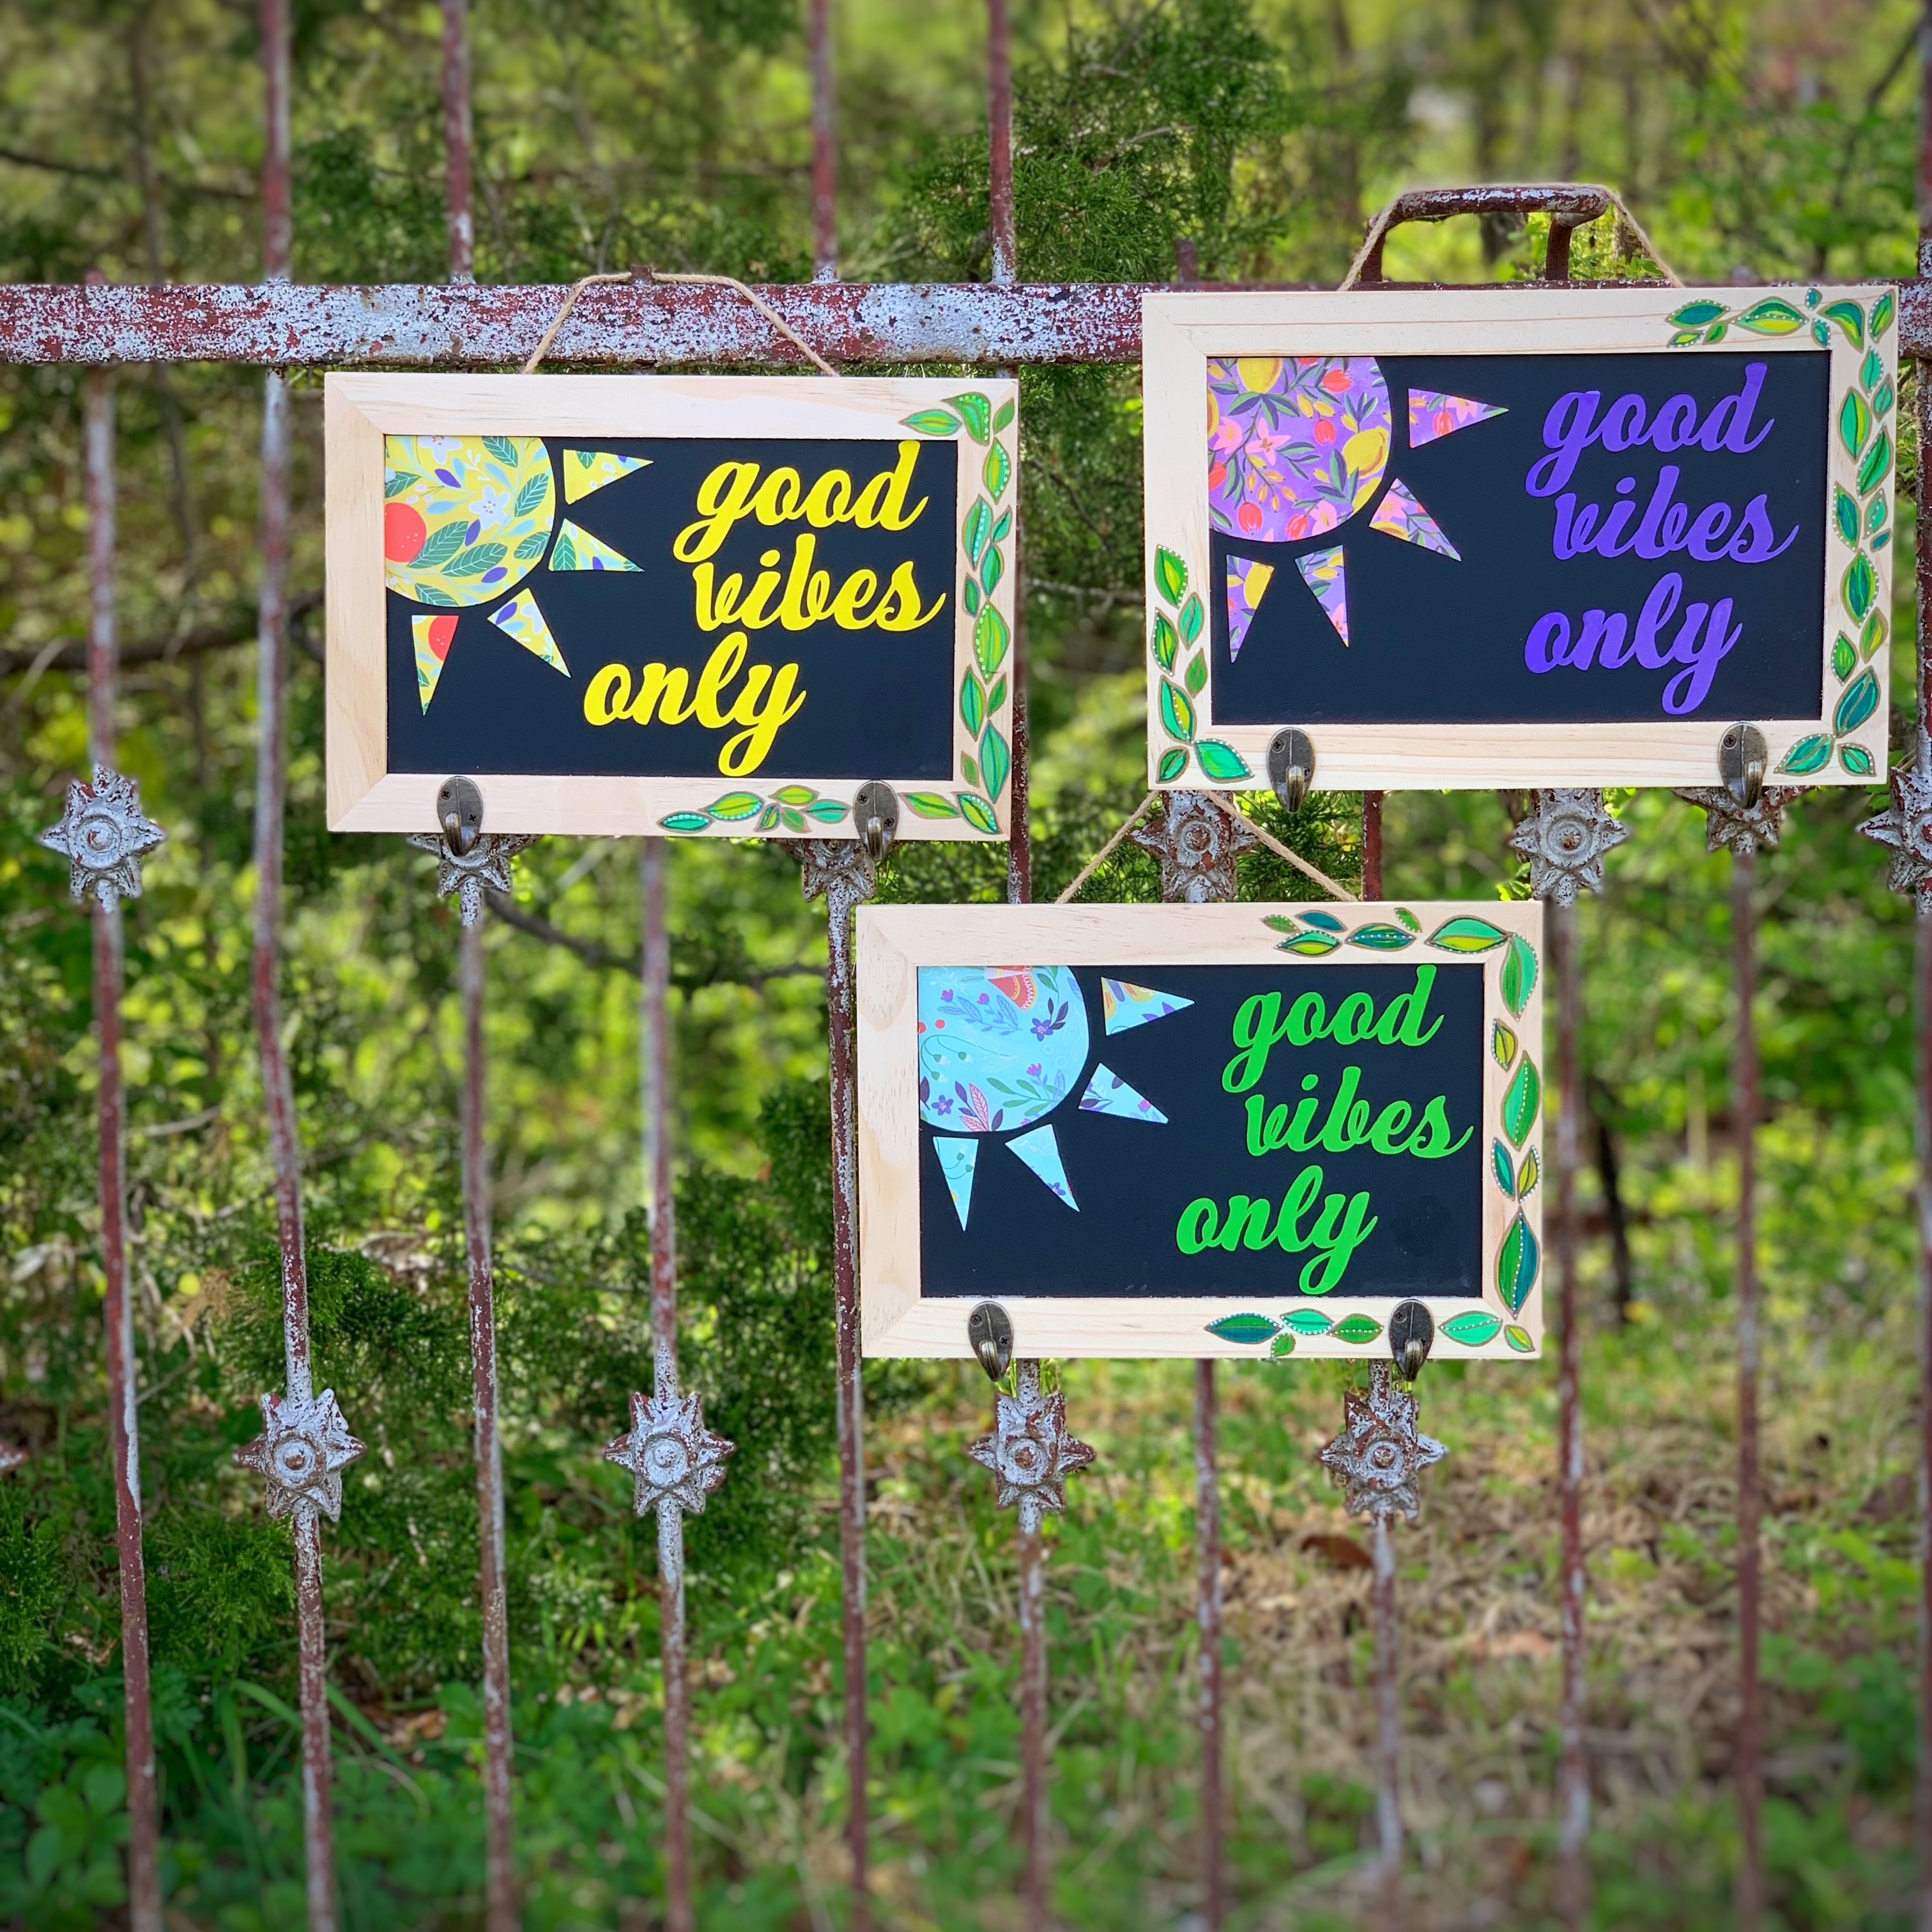
And there you have it: the finished chalkboard!

My final step before gifting these to our amazing teachers, will be to further personalize them by writing each of their names in the lower left corner with my white acrylic Sharpie.

I’m super happy with how these turned out and cannot wait for Teacher Appreciation Week to arrive!

Be sure to share any pictures with me if you take on a project like this for your teachers!


This post does contain affiliate links. It also contains lots of opinions, all of which are mine!

Cricut + Simplicity + wildboho

I wish I could tell you that I love sewing something from a pattern, but in the interest of full disclosure, I’m going to tell you that it is one of my least favorite things to do!

What I do like to do, is stray outside of the lines and not have to worry about staying within the confines of a pattern!

So….when I was given the opportunity to work with one of Simplicity’s new patterns for the Cricut Maker, I hesitated and had to work myself up to giving this a try. I already knew that the machine would do much of the work…cutting the pieces, etc, but I wasn’t sure I was up for the challenge of following a pattern!

Because I have a soft spot for flowers, this Flower and Arrangement pattern caught my eye and I thought it might make a unique embellishment for a piece of hoop art. So, with reluctance (!),  I accepted the challenge.

Screen Shot 2018-05-23 at 11.36.27 AM

I’m going to walk you through this pattern, step by step, and I’ll give you a little hint about the process…it wasn’t as scary as I thought it was going to be!

Alright, let’s start this pattern!

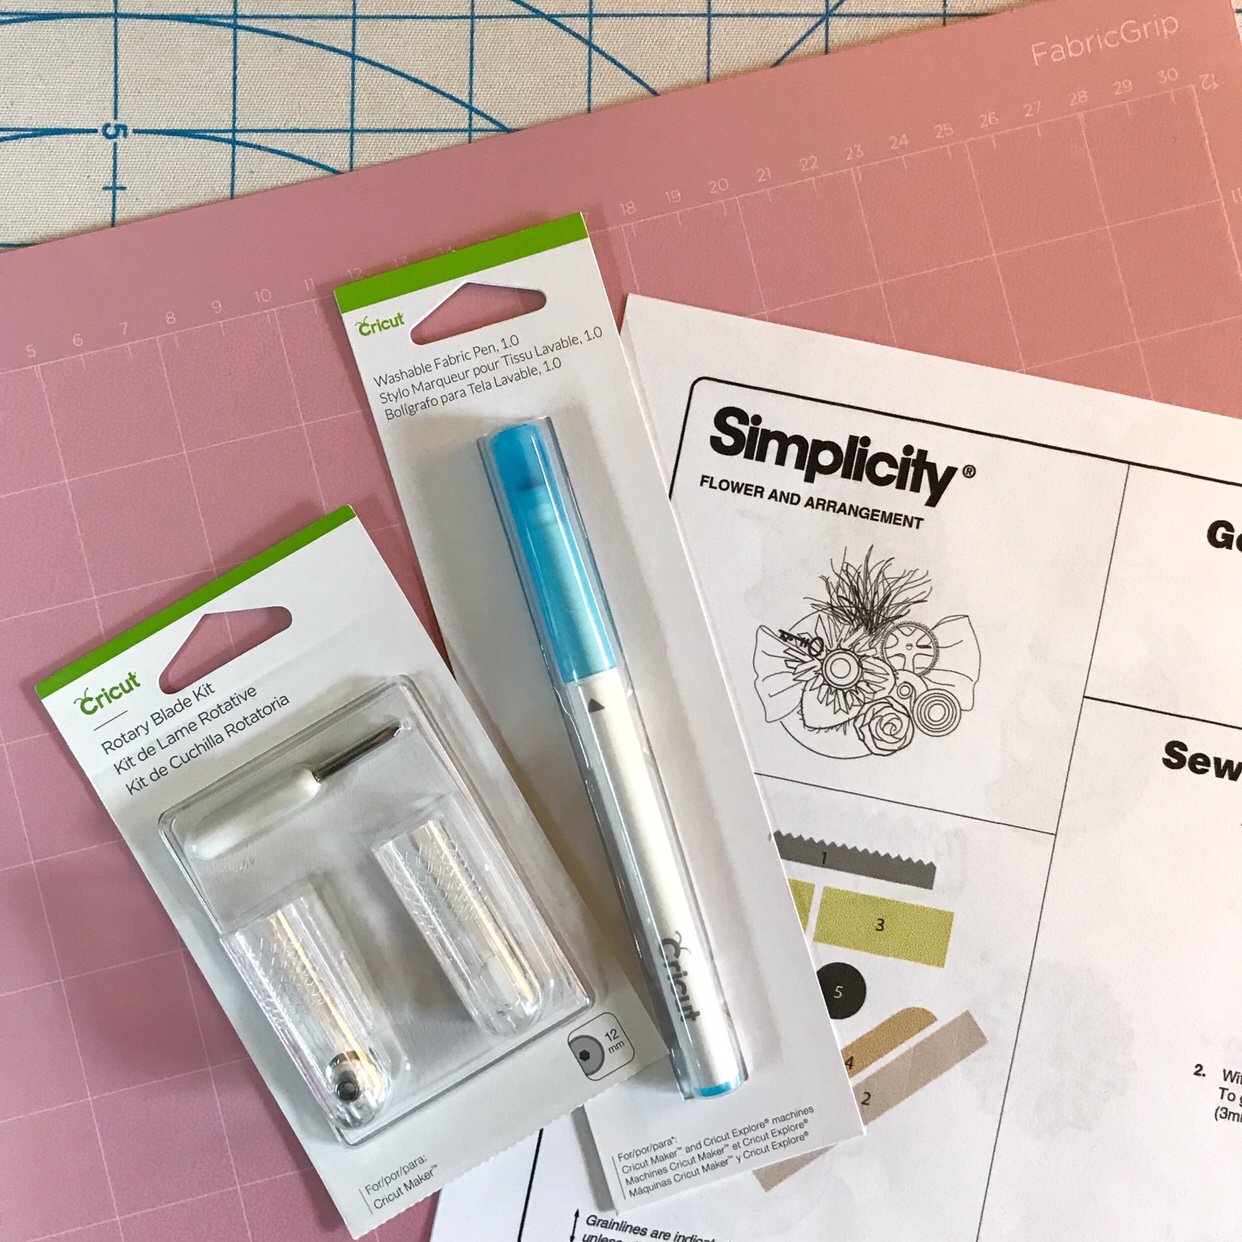
Step One: gather your Cricut materials and the Simplicity PDF pattern.
img_7863

You will need the fabric mat, the rotary blade for cutting fabric and the washable fabric pen for marking the pattern pieces.

Step Two: gather your fabrics.

The pattern shows you the pieces that make up the flower. You can base your color choices off of that like I did my second time through.

I’ll be honest and tell you that I forgot to print the pattern directions first and so I just randomly picked colors from my pile of fabrics when it told me to insert a new mat!

It all turned out very pretty in the end but I would not recommend that you use my method!!

So, you’ve read through the pattern (well done, you!) and you’ve chosen your fabrics. It’s time to move on to Step Three: Let the machine do the work for you!

The screen shot shows you what you will see in Design Space. From this point on, you will just be putting the correct fabrics on the mats and the machine will do everything else!

Screen Shot 2018-05-23 at 11.36.57 AM

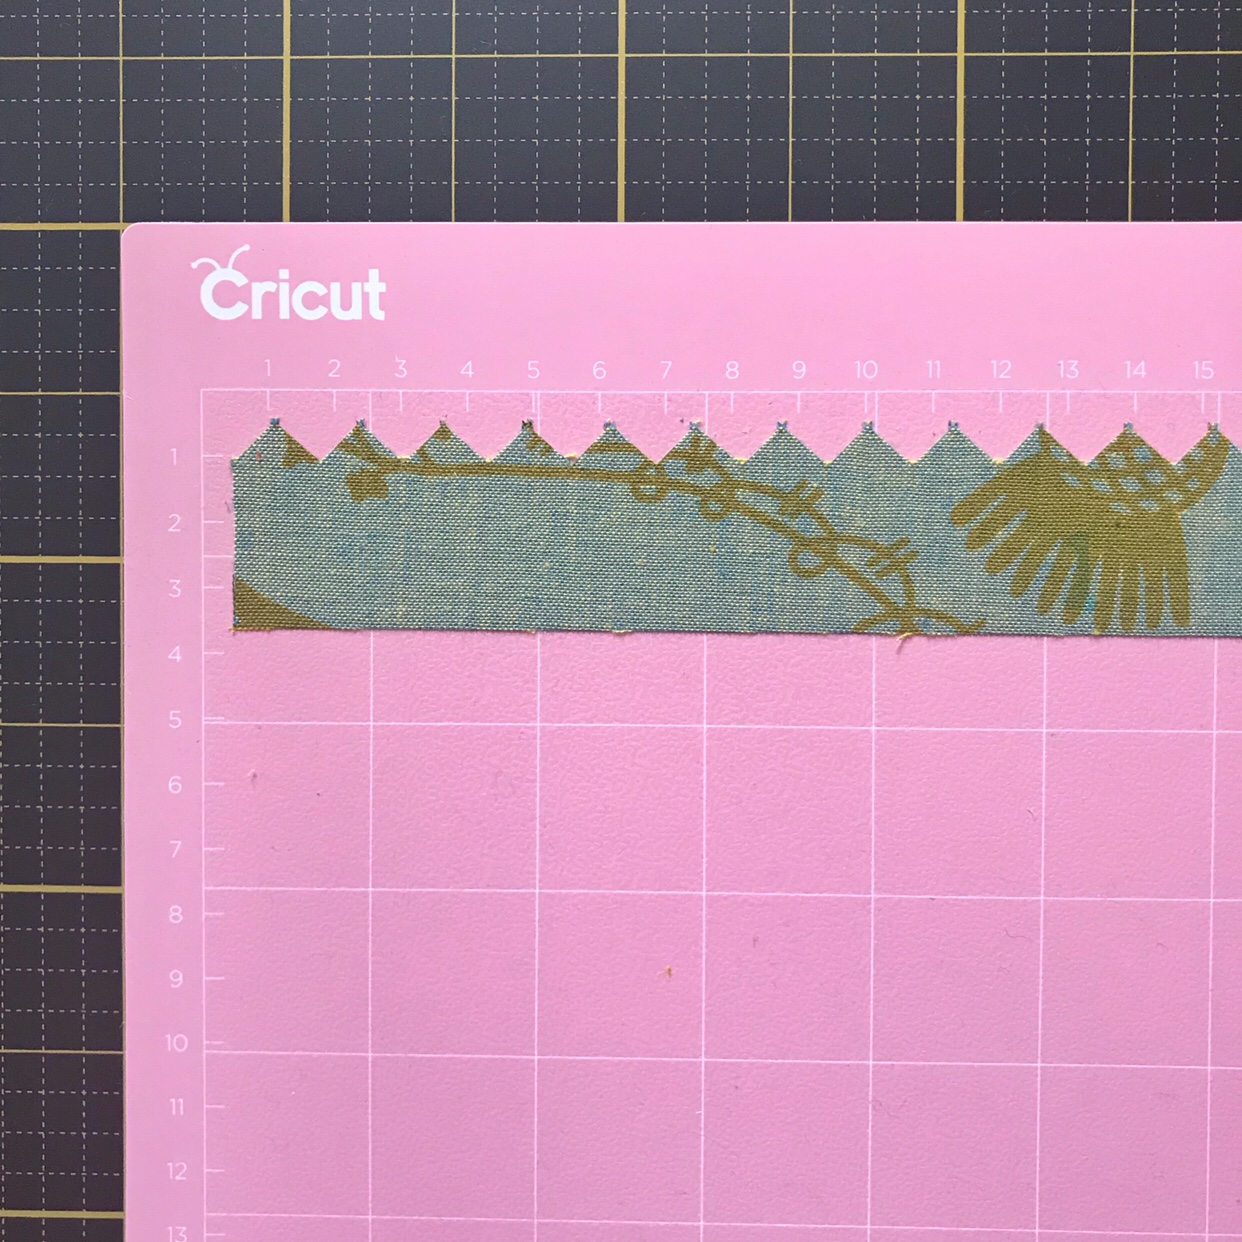
The rotary blade and washable pen are in position and my fabric is ready to be cut!

Check this out: do you see all of those perfect little points that have been cut out? Yup, the machine did that, not me!
Step Four: continue letting the machine do the work! How easy is that?!

You will soon end up with a tidy little pile of cut pieces, just like what you see below!

One suggestion after working through this pattern a few times: when you get to the two round circle pieces, choose a heavier fabric. My first choice was a thinner batik piece of fabric. My second choice was a heavier piece of textured cotton fabric. Finally on my third time cutting the pieces for the pattern, I decided to use a scrap of  wool felt and that was definitely the best choice. The other fabric pieces worked fine, but because this is the piece that you are hand sewing everything on to, you want something fairly sturdy.

I should also warn you that Step Five involves me breaking from the pattern in one other way: I did not use my sewing machine! Nope, not once.

If you follow along with my stitching adventures, you’ll already know that I prefer hand stitching to machine sewing. I wanted to try this entire pattern without the machine, just so that I could tell you that it was possible! And it is!

Your pieces have all been cut and you are ready to turn them into flowers!

This was the only step that slightly confused me and so I wanted to show several pictures to help you out.

You will fold the sides of your rectangular piece in towards the center.

Next you will fold that piece in half.

Grab a needle and some thread (I prefer the Sulky 12wt petites for this step) and stitch a running stitch along the bottom.

Tie a knot and then pull your thread right so that the fabric gathers up nice and makes a little ruffle.

The blue marks and the pattern will show you where each piece is to be stitched on to the circle.

Continue with each piece of fabric, following the directions as to where to attach it to the disc.

Because I (unfortunately) only have two hands, I couldn’t take pictures of how I actually wrapped the rose. That step is mostly self-explanatory and if I was able to figure it out, then you will just fine!

Soon you will have a complete flower!

So, what to do with your flower at this point?

Well, you can leave it completely as is and be done! Stitch a pin back or hair clip onto it and wear it as an accessory!

Or, and you should also know that this is always my go-to option, you can put it in a hoop!

Here is my simple version of the flower and arrangement attached to a fabric that has been stretched in a hoop.

Simple and pretty!
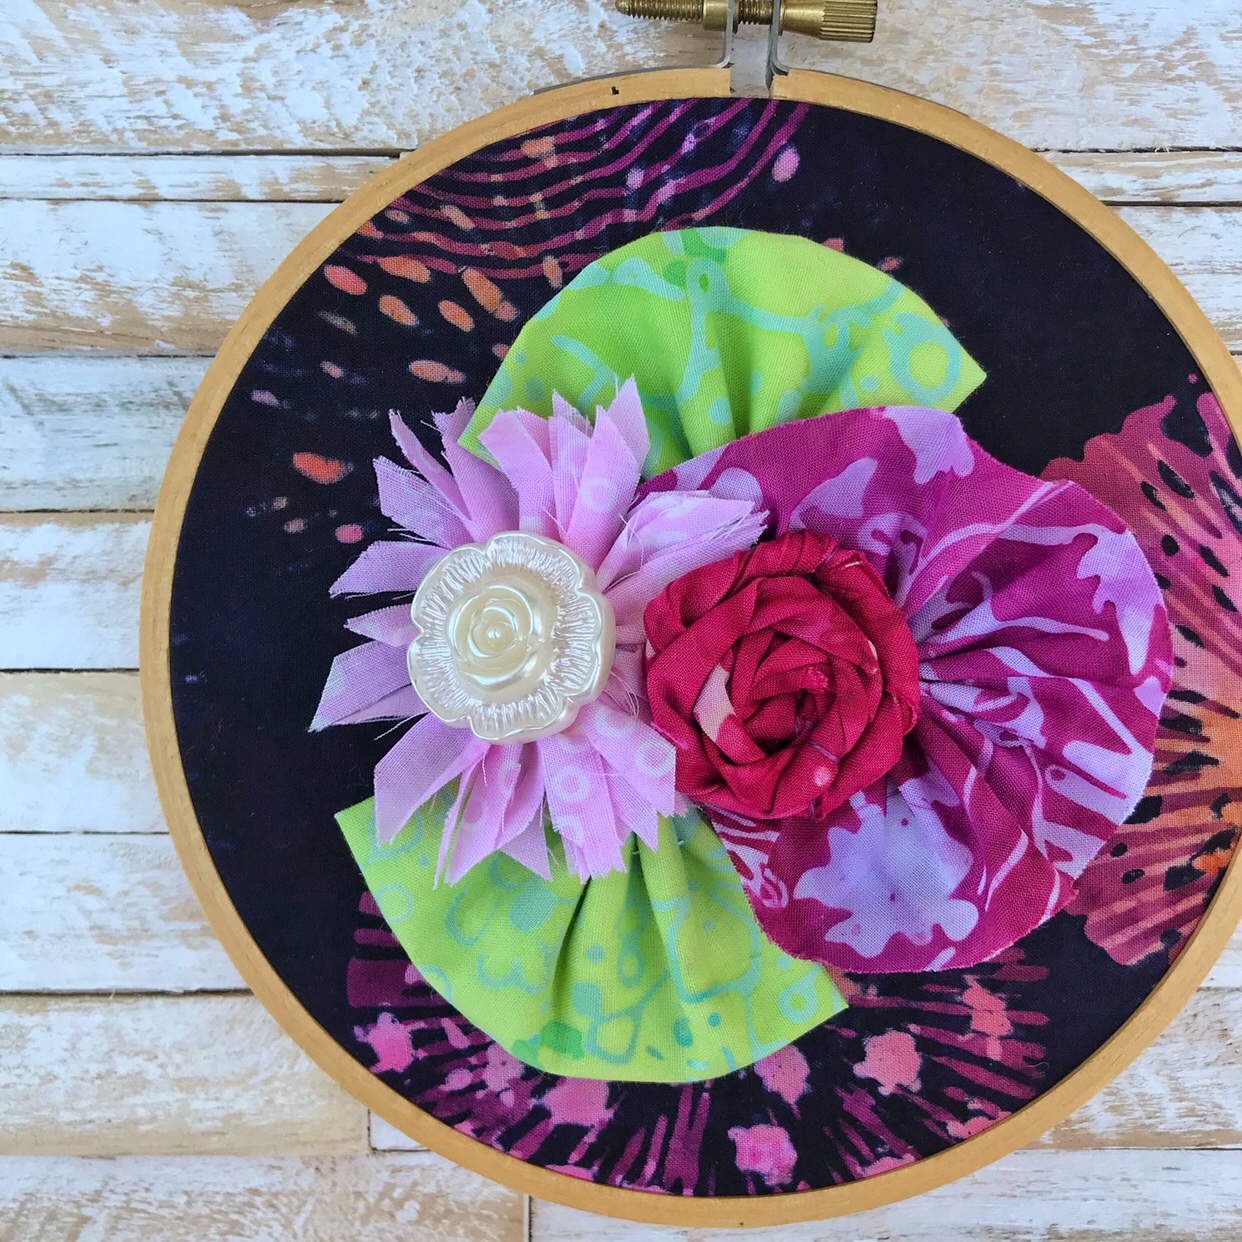
But, why stop there? You could take it one step further and add other embellishments, like the pattern suggests.

Here is my gussied up version! I added wispy bits of lace, gears and buttons.

And because I love to show you options, (and can’t resist Boho-ing up a project!) here is what you can create if you cut a few extra pieces and arrange them to your liking!
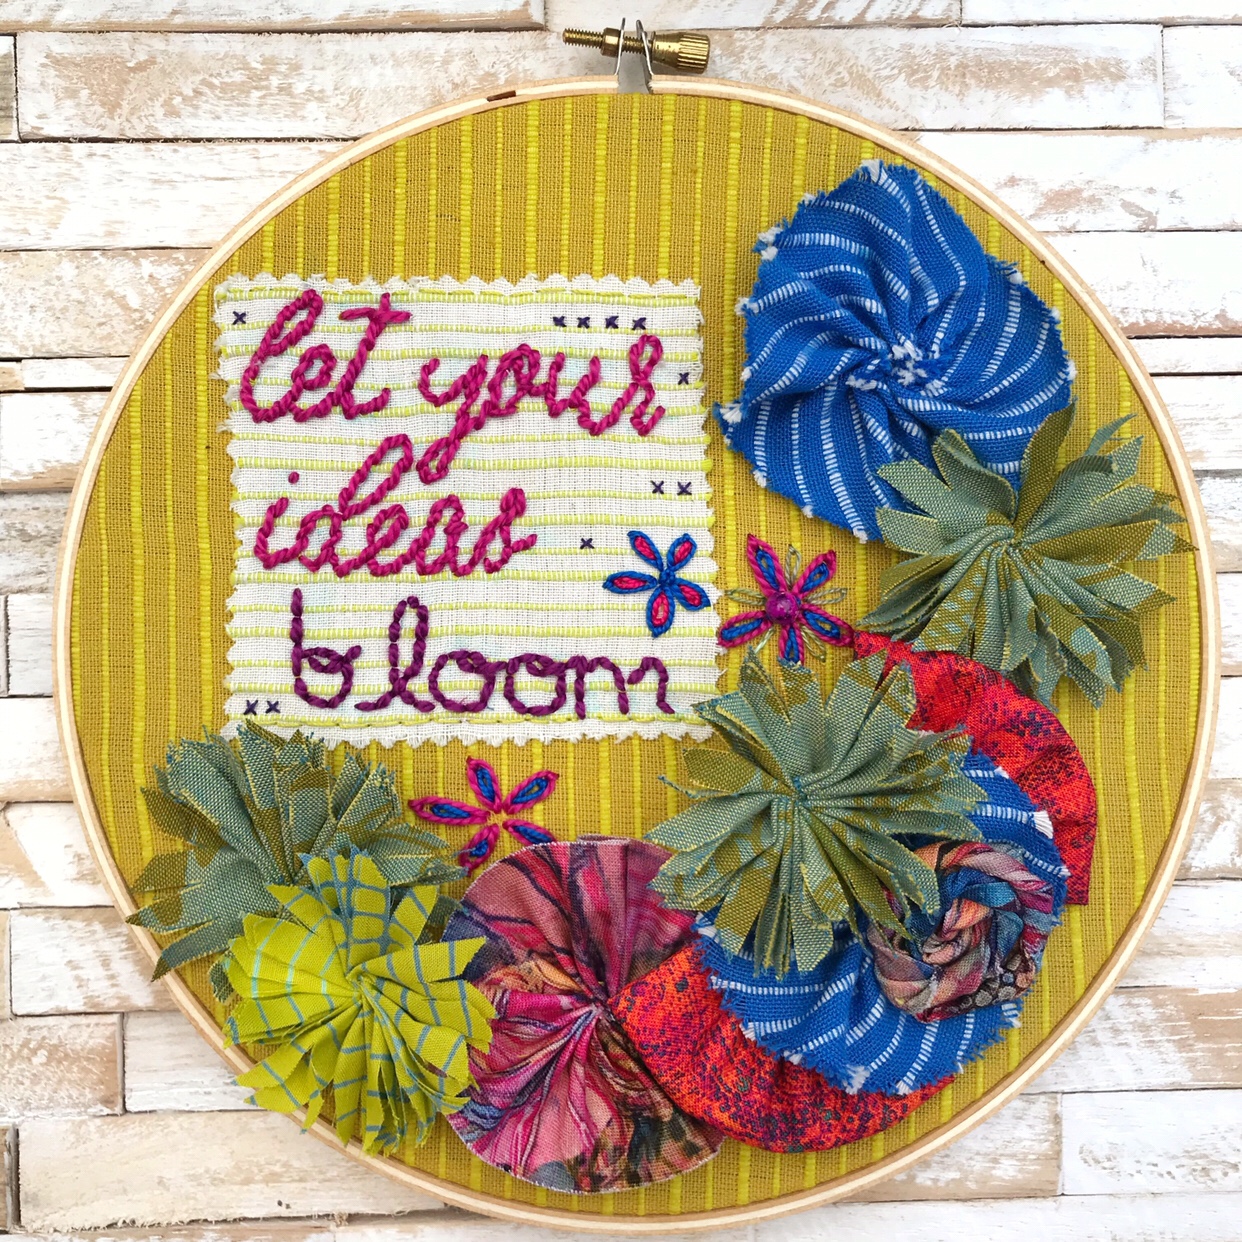
Each piece in the above hoop has been cut by my Cricut Maker according to the pattern. I just rearranged pieces and added some embroidery!

And speaking of embroidery, do you see those words?

My absolute favorite feature of using Design Space and my Cricut Maker is that I can create text and have it written directly into fabric with the washable pen!

So many fonts! So much versatility! I cannot gush enough about this function!

Since unboxing my Maker, I have used this function more than anything else. There’s not stopping me…I can add words to anything!

And there you have it..my first Simplicity pattern and I survived and actually went on to make it several times and enjoyed the process!

Now I can breathe a sigh of relief and pass some confidence on to you. Now, go….create something!


Fabrics provided by:

Flaurie and Finch (Blossom Batiks)

Andover Fabrics (Alison Glass Mariner Cloth and Golden Hour)

Threads I used:

Sulky 12 Wt Petites

Sue Spargo Eleganza


This is a sponsored conversation written by me on behalf of Cricut. The opinions and text are all mine.
Adventures in Cricut-ing

This week I’ve been procrastinating on a bigger project by working on several smaller, not-super-important-to-get-finished-right-away projects!!!

There are lots of features that I haven’t touched yet with my Cricut Maker and so this was the week to try two of them: writing with a washable fabric marker and using the bonded fabric blade to cut Heat n Bond-ed fabric.

Both were a success!

First of all, the washable fabric pen. I wanted to have several lines of text printed on fabric that I will then embroider. In Design Space, I was able to customize the text (by the way, the new feature to curve text is amazing!)

If you look super closely, you’ll see that I lost an i because I didn’t realize it wasn’t attached when I hit Go! That is easily fixable and will remind me next time to check what is printing before I actually print it!

I was also worried that the fabric pen would somehow bleed on the fabric and my words wouldn’t be clear, but that didn’t happen and they are crisp and clear and ready to stitch!

Here’s my Instagram story showing my first try!


So then on to the bonded fabric blade. I wanted to cut several flowers for this collage hoop:

Normally, I sketch out what I want to cut on Heat n Bond and then iron it to the fabric and cut from there. So this time I wanted to see if it would be any quicker to set-up a bunch of flower shapes in Design Space and then cut them all at once.

Using the bonded fabric blade, I ironed the Heat n Bond to the fabric and then placed the fabric face down (heat n bond side up) and cut my flowers.

I even timed my efforts to see how quickly these would cut! (1 minute and 7 seconds, in case you were wondering!!)

So there you have it! Now I should probably stop procrastinating and get on with my other projects!


This post does contain affiliate links. It also contains lots of opinions, all of which are mine!

Boho Stitch Along. Week 2.

Last week I began the Boho Stitch Along project that I’m going to take you through step by step so that you can see what is involved in an embroidery project using one piece of fabric. My hope is that you can see how simple this is and you will feel inspired to start your own project!

My first step, which I outlined last week, was to cut out the words “Magpie Dreams” with my Cricut Maker and adhere them to the fabric. The Dritz Spray Adhesive that I use works great for the first part of getting the letters to stick to the fabric, but that method is not a permanent way of adhering the letters. I planned to embroider the letters and whenever I adhere something with a spray, I make sure that I embroider that part first so that it does not begin to peel away from the fabric as I move the hoop around and embroider other sections.

I love the stem stitch for working with curves and adding beads. You can see a close up of my bead work. In some areas I added a bead to every stitch and in other areas I added it to every other stitch. And in some areas I just embroidered with thread. I hadn’t planned on the look that I was going for before I began stitching. I just started adding beads to the stitches to see what I liked!

The hoop that I am working with is 14″ and with a large hoop like this it can be tricky to hold the hoop while also embroidering. Add beads into the mix and you’ll feel like you need an extra pair of hands in no time!

I have typically managed to prop my hoop up on a pillow or a small table but it’s becoming increasingly cumbersome and so I was looking for something that could be my extra pair of hands!

I decided on this Universal Craft Stand after reading lots of reviews. Does anyone else get sucked into amazon reviews like I do?!

Let me just say…this stand is amazing. Seriously. It has a clamp to hold your work, so you are not tied to a fixed hoop size. The clamp is adjustable so I can also use it with my square frames that are thicker. And each section is adjustable, so there are lots of ways to adjust it to make it fit how you need to work!

(This is not an affiliate link…I just really like this stand and want to share it with you!)

So this week i’m going to finish up those words and hopefully start on either the birds or the feathers next week.

Where to begin? Boho Stitch Along: Week 1

I posted a picture on Instagram yesterday and received so many messages along the lines of things I’ve heard many times before, both on IG and at the workshops that I teach, basically: “I love what you do and would love to try this but I wouldn’t even know where to begin!”

So, to help those nervous, embroidery-loving enthusiasts among you, I decided I would take this hoop and show you my start to finish process. Warning: it’s probably going to be rambly and messy (welcome to the inside workings of my brain)!!! But that’s art, right?! At least it is for me and most likely will be for you too.

This is not going to be a quick finish. You’ve heard of Slow Stitching, right? This is that! If you followed along with the Boho Stitch Along last year, you’ll know that embroidering a large piece of fabric takes time. So, grab a piece of fabric that you love and have been wanting to embroider and just put it in a hoop (like I did) and go through this process with me!

I’ll share my work here weekly, along with tips and some fun ideas for adding extra bits to your project.

P.S. I hear there is an amazing embroidery book written by yours truly that can help you learn how to embroider! And if you have that one, I hear there is an equally awesome second embroidery book coming very soon, you know, if you’re interested!


Let’s get started!

First off, you will want to choose your fabric. Pick something that you like…you will be spending lots of time looking at every detail of the fabric!

I have chosen this gorgeous design by Kathy Doughty for Free Spirit Fabrics: Magpie Horizon. I love birds, feathers and this color palette, which made this an easy choice of fabric.

My cut of fabric is a fat quarter (which is a quarter yard of fabric, but cut in a square), so I began with unfolding it to decide what section of the fabric I wanted to include in my hoop. The Magpies fit perfectly into a 12″ hoop and so that was an easy decision.

Next step: threads! I have a lot of thread, so I chose 5 colors to get started. I’m not limited to only using those colors…I can add colors any time that I want, but this is a non-intimidating start to a project. Pick 5 colors that coordinate with your fabric.

These are all spools of Perle Cotton thread from Sue Spargo.

At this point, once my fabric is in the hoop and I have trimmed it (leaving about 1 inch all the way around), I prop it up while i’m working on other things and by doing that i’m getting familiar with the elements on the fabric i’ve chosen.

I did this yesterday and this morning I decided to add the words Magpie Dreams to this hoop. What are Magpies known for their love of? Shiny things! And what do I love to include in my embroidery? Shiny things! Beads, sequins, etc.

If you’ve been following along here, you’ll know that in the past I have raved about my Cricut Maker machine for cutting out words to add to embroidery. So that was my next step.

With Cricut’s Design Space app, I was able to type the words Magpie Dreams, change the font to something more swirly, and curve the words so that would fit along the bottom of the hoop. (That is a new feature and I used it for the first time today!)

Screen Shot 2018-04-13 at 11.19.10 AM

If you are new to Design Space, here are a few things i’ve learned while working with letters:

  • type the full set of words you want to use
  • choose your font
  • if you want to add a curve to the words, do it at this point
  • to make your letters connect, click “Ungroup” and it will make each letter something you can work with individually
  • play with the letters…move them around, make them bigger, smaller, etc.
  • when you like how they look, you will group them together again by clicking on the first letter and the Shift key. While still holding the Shift key, you will click on each letter in your group of words and it will then group everything you have clicked together.
  • I then attach them (the button at the bottom right side)
  • And I learned today how important the Weld button is. When you weld the letters, it groups them all together when cutting and you don’t get little bits of letters cut off.  (I may have had to do this 2 or 3 times before I realized the Weld button was going to save my project and sanity…I promised you messy, right?!)

Here’s what it looks like when I am ready to begin cutting the letters out of felt. I load up the mat with the felt pressed to it and the Maker does the rest!

So from there, I pick the words that have been cut out of the felt and I place them upside down and then spray them with the Dritz Spray Adhesive. I love this product because it lets you adhere something without using an iron and it is removable up until the point that you have stitched it to the fabric!

Also, this was an incredibly messy step. Seriously. Just picture me trying to get a photo of putting the words on the fabric while having felt bits stuck to my fingers because of the adhesive spray. (Notice there is no picture here of that step?!! There is a reason for that!)

So, I dealt with the mess and took a picture of the end result instead!

The words will stand out more once I stitch them, but i’m really liking where this project is headed!

And there you have it! By the time another week rolls around, I will have started to embroider on this piece and I will share with you what I have done.

In the meantime, if you have a piece of fabric you’ve been wanting to try this with, it’s probably time for you to pull it out and get started!


So to recap the steps for beginning your project this week:

  1. Choose your fabric and hoop size.
  2. Pick 5 matching threads.
  3. Become familiar with your fabric.
  4. Choose one area you want to begin stitching.
  5. Gather your embroidery tools: scissors, needles, etc.
  6. Pick one stitch that you want to try and just get started!


Note: There are affiliate links included in this post.

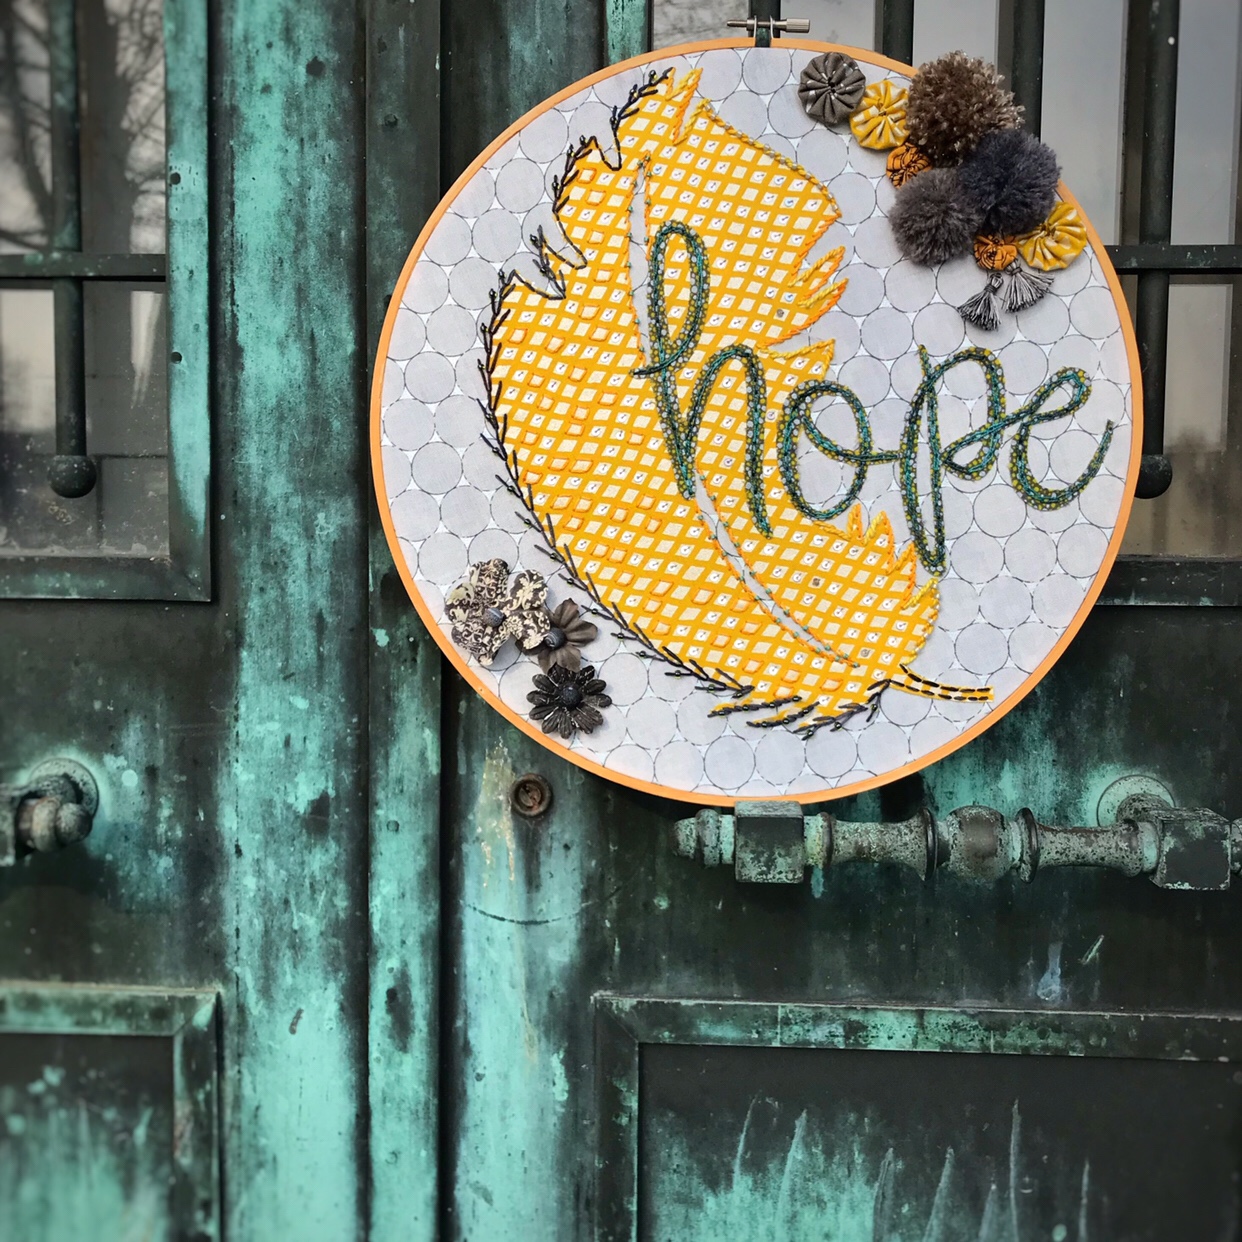
Hope is the thing with feathers

Hope is the thing with feathers
That perches in the soul,
And sings the tune without the words,
And never stops at all – Emily Dickinson

img_6211

In my Cricut Maker post from yesterday, I promised to share with you the project that I made with my new machine.

I have to be completely honest and tell you that I wasn’t sure how much I would use my Maker, because I do so much hand embroidery and I very rarely use quilting or sewing patterns.

BUT, I have been completely sold with the one aspect of this machine. Something that I can see myself using over and over again: the  FONTS!  All 370 of them!

Working with fabric and embroidery, I have never found a great way to add fonts into my work. Sure, I’ve done it, but it has never been quite as easy as it was using Design Space and my Cricut Maker.

If you’ve been following along with me for awhile, you’ll know that it’s not a secret that I love to stitch feathers! I also wanted to work on a project that would be simple enough to show you how easy it is to cut fabric and shapes with my Maker, but that you could also envision this stitched up with your favorite fabric combinations!

So here’s what the Design Space app looks like with a work in progress. You’ll see I have my word “hope” next to the feather that I’m also going to be using for the project. I was easily able to find a font that I liked, move and size each letter individually, and then attach them all together so that they would be cut out of one piece of fabric. An alternative to this would be to cut each letter out of a different fabric.

Screen Shot 2018-03-27 at 1.35.20 PM

Remember how I told you yesterday that I would share my behind-the-scenes flubs? Well, this was a major one. When I first started working with the idea of combining a feather and the Emily Dickinson quote from above, I had much smaller font and the letters were going to be cut out of the feather. Great idea, right?! Look how fabulous it would have been!

But, it wasn’t fabulous.

Letters are great for the Maker to cut out of fabric with the rotary blade….when they are big enough. My first try had letters that were less than an 1″. It was a mess. I tried to separate the letters from the feather and made the mess worse. You don’t believe me, do you?

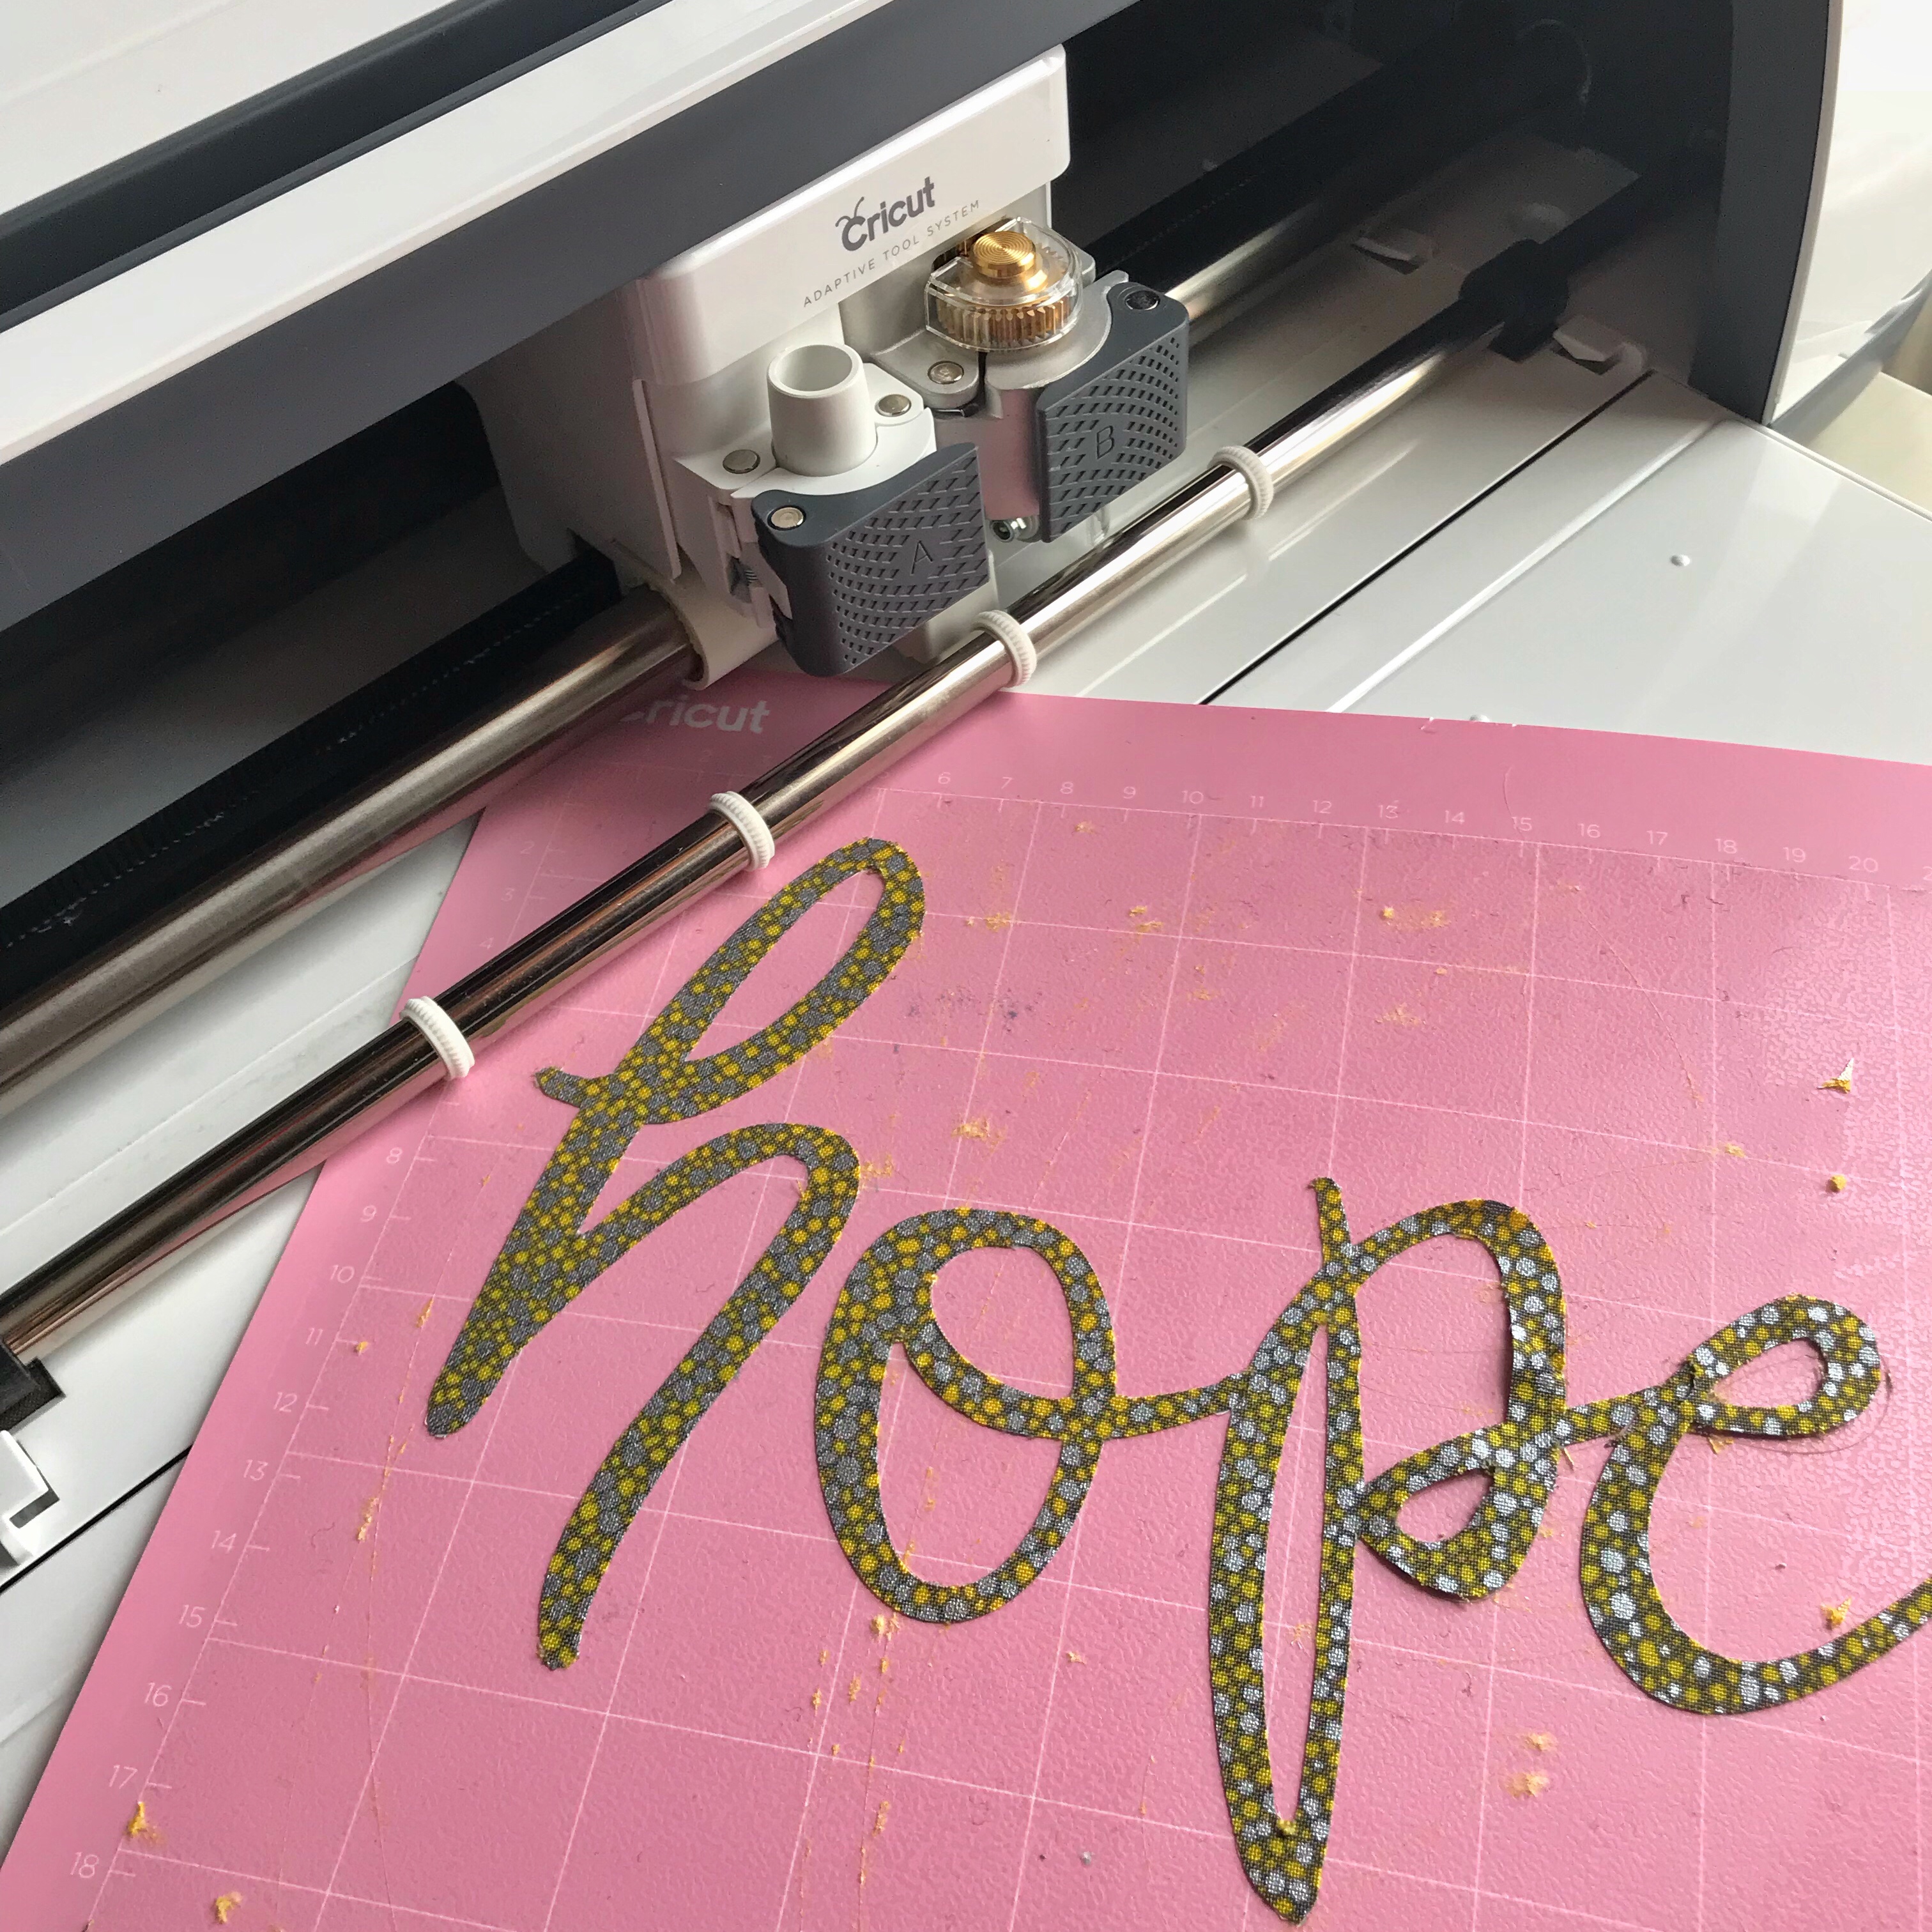
Well, here’s a picture to show just what a mess I made! Yes, it cut the words perfectly, but as I used the weeding tool (an awesome little Cricut tool!) to pull each one off the mat, the delicateness of the letters was not on my side and they shredded into an unusable mess of fabric!

So, I knew that if I wanted the letters to work, they would have to be bigger and bolder. I have no problem adding big and bold to my work, but I needed to re-work the words cut out of the feather idea.

My second try went brilliantly! I cut the word “Hope” out of one fabric, weeded the letters from the fabric and was ready to move onto phase 2 of my project: adding them to the feather that I had already cut out.

This pink mat that you see is the Fabric Mat which is designed to be used with the Maker. The Feather has been cut from the yellow fabric (all of the fabric you see here is by Jennifer Sampou)

And this shot shows the weeding tool I was talking about…it has a sharp edge and helps to pull the fabric pieces gently from the fabric/pattern/mat board. It isn’t strictly designed for fabric and can be super helpful when working with iron-on, vinyl, etc.

So there’s the feather, all cut out and ready to be attached! For both the feather and the words, I used this amazing (no, seriously!) product from Dritz Quilting. It is spray adhesive and can easily be found at your local craft store.

I sprayed the adhesive to the back side of the feather, pressed it into place with my hands on the background fabric and then did the same exact thing with the words. It is not a permanent hold, but rather a temporary one that keeps everything in place until you embroider your pieces to the fabric.

I can’t recommend this product enough!!! It is simple enough to stitch through and does not make your embroidery needles sticky…at all!

Are you ready to finally see my embroidered hoop?

img_6286

For this project, I wanted to show how a simple design, cut from the Maker, could be embroidered and embellished and personalized with your choice of fabrics and colors.

img_6133

I have been on a Pom Pom making spree and to make the ones that I sewed onto this hoop, I used the Boye Pom Pom Tassel Maker. It is fun to coordinate the colors of your fabric with a yarn and even more fun to use a variegated yarn (like I used in the above picture).

The flowers on the lower corner of the hoop are paper embellishments that I found in the scrapbooking section of my local Michaels. I like to mix and match textures and paper is something you might not think to add to a hoop made with fabric!

img_6224

So, a very simple project to make, made even simpler with the Cricut Maker!

If you are looking to replicate this project in Design Space, I used the Feather (#MC88B9C) from the Bohemian Wedding designs and the font is Chloe Whimsy.

You can easily change the size of both the feather and the letters to whatever hoop size you are working with. I used a 12″ hoop for this project.


This is a sponsored conversation written by me on behalf of Cricut. The opinions and text are all mine.
Cricut Maker Review

Back in November, I posted about my first time ever using a cutting machine: the Cricut Maker, and the hoop that I created with it. Since then, I’ve been creating other projects, getting better each time (!) and I wanted to share with you what I like about this machine.

Ok, so the Cricut Maker.

I should tell you that I have never used a cutting machine before I used this one. I thought what they could do was cool, but until now, I didn’t see much of a use for them, because the medium that I work in is fabric and thread and not so much paper and that’s what stopped me from exploring them any further.

However, this machine was designed to use a rotary blade that is meant to work with fabric!

With the addition of a knife blade, you can expand your materials to working with not just fabric, but thicker things like leather, balsa wood, chipboard and mat board. And switching to the fine point blade, you can make regular cuts on materials like as iron-on adhesive and vinyl. I absolutely love the the versatility of this machine!

“What’s that…you need a book-character themed costume for Read Across America week at school tomorrow?! Let me just pull out my iron-on adhesive and whip something up!”  Yes, this was an actual conversation from my house! And, yes, it was amazing to quickly use the Design Space app to make last minute Dog Man and Where’s Waldo themed shirts for my kids!

But back to cutting fabric!

The rotary blade does not require you to have your fabric backed with anything like Heat n’ Bond (although, I used that in my first project and it worked just fine!). The mat designed to be used with fabric is sticky, requiring you to simply press your fabric into place with your hands before inserting it into the machine. From there, the machine knows what to do!

But how does it know what to make? Well, using Cricut’s Design Space app, you can either use one of the hundreds of designs available in the library, or you can create your own image and go from there. Are you are quilter or sewer? Well, Cricut has teamed with both Riley Blake and Simplicity to create patterns that are available for your use as well! I love that you can work with the Design Space app both on a laptop or on your iPad/iPhone.

Since the first project that I created in November, I have used this machine a lot. I’ve played with Cricut’s adhesive vinyl to make fancy labels for my beading supplies, the rolls of iron-on material for shirts and tote bags and my rotary blade has been getting a serious work-out with the fabric i’ve been cutting!

I LOVE working with Cricut’s Iron-on and it’s what saved me on that last minute school project I told you about!!

I’m going to share my latest embroidery project with you tomorrow and don’t worry, i’ll even share my behind-the-scenes mess-ups as i’ve been learning my way around the Maker!

What is sharing without getting some of the the nitty gritty behind-the-scenes details, right?!

In the meantime, check out some of the tools I’ve been working with!

I have yet to use this Washable Fabric Pen, but i’m going to try my hand at using it for an embroidery pattern. I’ll post about it here when I finally get through my stack of WIPs!!!

Don’t forget to pop back tomorrow for my finished project!

This is a sponsored conversation written by me on behalf of Cricut. The opinions and text are all mine.
Cricut Maker

Recently, I discovered the brand new Maker machine from Cricut and I can’t wait to tell you how easy it was to make this hoop with the machine!

If i’m being completely transparent, i’d have to say that I never even looked at Cricut machines for my own use, because my focus is on fabric crafting rather than paper crafting and I thought Cricut machines were just for paper. Well, not so with the Maker machine…yes it can cut paper but also fabric, vinyl and even thin wood!

I was sold!

So, I received and unboxed my machine, set it up and then sat down to learn how to use Cricut’s Design Space app for the iPad (which can also be used on your computer and that’s actually where I set up my first project).

Since this was going to be my very first project ever, I wanted to keep it simple in case I really messed it up!!

I chose images from the design library: a pair of scissors and a swirly ribbon. This video shows a snippet of what the cutting process looks like:

I have the fabric backed with Heat ‘n Bond and that is being held in place on the pink Cricut adhesive fabric mat.

Once the cuts were made, I had three separate pieces that I then assembled onto my background fabric.

And then my favorite part, of course, the embroidery!

The fabrics that I used are from Alison Glass.

The threads that I used are Eleganza from Sue Spargo. This is the size 8 thread, but I doubled it up for stitching this piece.

And finally, I am asked all the time about the beads that I use…these are size 8 Japanese seed beads from Fusion Beads.

I stitched it up and have the perfect hoop for my stitching studio space! (say that three times fast!)

I’m thrilled with how simple it was to use the Maker machine and how quickly I was able to put together all of the pieces for this project. I’m thinking that for my next project, I might use my own design for a hoop. So, stay tuned, i’ll be sure to share it with you here!

And in the meantime, you can check out how others have been using their machines on Cricut’s Instagram page!


The Maker machine and supplies have been provided to me by Cricut. The opinions, photos and videos above have been provided by me.