Boho Embroidery on YouTube

To coordinate with the release of my first fabric embroidery project, Boho Gardens: In the Conservatory, I’ve been stitching up some helpful videos and adding them to my YouTube channel!

Just a reminder: I’m currently accepting pre-orders for this project! The first batch of orders went out this week and the next batch will be shipping soon! You can send me an Instagram message or email me at bohostitchery@gmail.com to get in on the next shipment! These will eventually find their way into my Etsy shop once I have them in stock.


You can learn the Woven Picot stitch, which is great for adding dimension in the form of leaves.

For a twist on the Chain stitch, you can learn the Hungarian Braided Chain stitch, which gives you a thicker, braid-like line that can be added anywhere you would use the chain stitch.

And if you want to go all out with embellishments, you can learn one of my favorite stitches: the Feather stitch with a bonus lesson on how to add Lazy Daisies, seed beads and the Colonial Knot (which I prefer to the French Knot!)


To keep up to date with my videos, which I am constantly adding to, you can subscribe to my YouTube channel and you will receive a notification when I publish something new!

Happy stitching!


Beaded Color Wheel

As an avid bead and button collector, I’m always looking for fun ways to use the supplies that I have. And maybe, just maybe, I’m always looking for an excuse to add to my collections!

I recently stitched one of my patterns, the Fractured Color Wheel, entirely in buttons.

This project took a little over two weeks and I worked on it almost exclusively during that time, but I didn’t track how many hours that I spent on it. A project like this is thought-consuming to me and so the time doesn’t even matter…I can hardly wait to return to it while I’m working on other things!

It is heavy…perhaps one of the heaviest hoops that I have ever stitched! In fact, I had to take it to the grocery store to weigh it on the produce scale and it came in at a whopping 1 lb, 8oz. That might not sound super heavy, but comparing it to most of my hoops (which probably don’t even reach 1 lb), it’s h e a v y!

Here’s the non-beaded, fabric-only version:


To convert this color wheel to an all-beaded wheel rather than a fabric one is very simple!

Choose a background fabric that is simple and light (it makes it easier to trace your pattern onto a light color). Your fabric will be so loaded up with beads and buttons and sequins by the end, that you won’t see it, so don’t use your favorite piece on this project!

Choose the color wheel size that you want to work with (the pattern offers three sizes). I chose to fit my color wheel into a 12-inch hoop.

Print out the pattern and place your fabric on it (pattern facing up, front side of the fabric facing up).

Using a light source (window or Lightbox) and a water soluble pen, trace the pattern onto the fabric. Again, your marks will not need to be washed off because they will be completely covered.

Once the pattern has been traced, fit the fabric into an embroidery hoop and tighten your fabric. And then let the fun begin!

With my fabric pen, I wrote the colors that I wanted to be in each portion of the color wheel. I then began with the biggest pieces…the buttons.

It helped to choose the buttons for each color and then stitch them in place before beginning with the beads. This helps you to visually focus on what color is placed in what spot, but it also helps to have the largest pieces in place first.

Once I had the large buttons in place, I began adding beads and sequins. Large beads first and the smallest beads last (the smallest beads help to fill in any areas that have white peeking through.

Continue adding your embellishments until you can’t see white through the hoop anymore. Tighten your fabric in the hoop once again and then follow the directions in the pattern for finishing the hoop. And you’re done!


One note about thread: I used <a href=”http://Sulky 12 Wt. Cotton Petites Thread” target=”_blank” rel=”noopener”>Sulky 12 wt Petites which is my favorite beading thread. I did not want to use a stranded thread because it’s a little tricky when you are working with lots of beads and I didn’t want to deal with tangles. Having a spool is really helpful. It’s also strong enough to handle all of this beading!

One other note: if you are stitching on heavy beads, it is helpful to stitch through the bead several times. The same thing goes for buttons. You are going to be spending lots of time on this, make sure your beads and buttons are on the fabric nice and tight so that if an accident happens, your beads don’t go scattering everywhere! And hopefully an accident doesn’t happen!

The embroidery stand that I used is also really helpful with a heavy embroidery project. You can find it here. I like that this stand is adjustable into several positions and it never feels like it’s going to be top-heavy when a project is secured into it.


And that’s it! With this post, I’m sending along to you the confidence to take on a project like this…it really is a beginner-friendly project! And it spotlights all of those special embellishments that you’ve been hoarding…I mean, collecting!!!

Have fun stitching and beading and be sure to tag me on Instagram if you take on this project!


Note: some links in this post are affiliate links. I will never recommend something to you that I have never personally tried and that I don’t stand behind for the use intended! 

Bluprint + Embroidery

If you’ve been wanting to take my Bluprint embroidery class, but haven’t yet, now is the time to check it out! All classes on Bluprint are under $20 right now but this special sale is only good through the 27th, so now is your chance!!


And speaking of Bluprint and embroidery, you may have seen my unboxing last week on Instagram of one of the brand new Craft Subscription boxes. In the box, I received the Sage Florals embroidery pattern with everything that I need to get started right away.

I promised some tips on transferring an embroidery pattern, especially when transferring onto a darker fabric. I received a DMC Embroidery Pencil in white and that is the perfect pencil for transferring patterns. I like that you don’t need to press hard to make marks on your fabric.

So before you begin to transfer a pattern, I find it helpful to iron the fabric first. You want a smooth surface to transfer onto. After ironing, you’ll need your pattern and a light source. Sometimes my light source will be a window and sometimes it is my Lightbox. For this pattern, I chose the Lightbox.

Here’s a super fast video of my transfer process. You’ll notice that I turn the Lightbox off and on several times because that is the only way to check that I am transferring all of the lines. Also, I’m not super exact with my transferring. Because I know that I’m probably going to play with the pattern, I’m not very worried that everything is transferred exactly. However, if you are not a rule breaker (like me!!), then you’ll want to take your time and be more precise that I am!

Now, I’m off to finish up several more projects and then I’m going to embroider this project!

Stay tuned for the reveal of a beaded project that I just finished stitching and am absolutely in love with!

Cricut Maker + Teacher Appreciation Week

Believe it or not, I like to clear my to-do list (or at least put it aside for the day!) and sometimes work on projects that do not involve embroidery!

For Teacher Appreciation Week (May 6-10, 2019) this year, I decided to try my hand at a project that involves my Cricut Maker, several rolls of vinyl and every green Sharpie marker I could find!!

I’ve mentioned it here and here and now again in this post…that one of my very, very favorite things about the Cricut Maker is the ability to do whatever I want with fonts! I’ve embroidered fabric words that my Maker has cut, used it to print directly on fabric and this time, I’ve cut words out on vinyl.

Full disclosure before I even walk you through this project: if I could do it all again, I would absolutely be using the Cricut Transfer Paper to make the whole vinyl transfer process go more quickly. I had a stack of nine chalkboards all ready to be vinyl-ed up and it was a time consuming process that I’m pretty sure the transfer paper would have helped to speed up!

That being said, I absolutely love how these projects turned out! And I loved using my Maker with vinyl. This is an easy peasy project!

I picked up a stack of hanging chalkboards from Michaels:

This patterned vinyl might be my favorite ever!

Here are the Cricut materials I used for this project:

Natalie Malan, Orchard Vinyl

Premium Vinyl, True Brushed Sampler

Weeding Tool Set

18 x 24 Lilac Self-Healing Cutting Mat

TrueControl Kit

Cutting Ruler

Step One: Sun on Chalkboard

So I knew that I wanted to have a sun peeking out from the corner of the chalkboard. I began with a paper shape that I cut and placed in the corner.

When I was happy with the dimensions of the sun, I cut the pieces out of cardstock and then pulled out my new TrueControl knife. If you have only ever used X-Acto knives before (like me!), then you are in for a pleasant surprise.

The end of this knife is padded just enough to keep your fingers from hurting if you are making a lot of cuts. I must use tons of pressure when I am cutting with a knife like this and end up with sore fingers when I’m done cutting!

However, my fingers did not hurt when I had finished making lots of tiny little cuts! I easily cut out nine sun shapes and rays of light and then attached them to the chalkboard corners.

Aren’t they sunny and cheerful?!

Step Two: Vinyl Good Vibes Only

Since I use my Maker for font based projects about 99% of the time, I can give you a few tips I’ve picked up along the way.

These letters do not come automatically connected. To connect them, you have to pick a font (in this case, it needed to be a script font) and type out your message. Next you have to separate all of the letters and then move them individually to connect them.

Play around with your fonts. Some connect and look better than others. You’ll notice that I used Retro Script as my font. It’s a nice chunky font that connects well and looks bold when cut out.

BEFORE CUTTING! You need to use the WELD button to connect the font and have it cut as one piece on the vinyl. If you just choose the Attach feature, you will see a little cut-out where you have attached each letter. Don’t make my mistakes!! Use WELD and your vinyl project will turn out much better (and with less headaches and wasted material!!)

Screen Shot 2019-04-25 at 9.19.41 AM

My Maker is set-up and loaded with the vinyl:

If you do a lot of vinyl based projects, I cannot recommend the weeding tool set enough. My very favorite piece is the weeding tool all the way to the left in the below picture.

My vinyl words and sun are all in place!

Step Three: Sharpie Leaf Vines

I had first wanted to paint each of the chalkboards. However, as I worked on this project, I thought that a leaf and vine detail would look fun running up the sides and across the bottom of the project. Each one would look different, too.

I needed to use three different types of Sharpie markers for this project. You can find them all here.

  • A Fine point sharpie for drawing and filling in the leaf shape. Keep in mind that there will be a small amount of bleeding from the marker onto the wood when you draw your shape. Keep going, though. Make all of your leaf shapes and fill them in.
  • Next step is outlining them with a metallic Sharpie. This will add definition around each leaf with the added bonus of covering up any leaves that bled onto the wood. The Metallic does not bleed.
  • Finally a white Fine Point Acrylic Sharpie. I added small dotted details onto the leaves. You’ll see that some I let fade into the leaf for dimension and some I repeatedly drew so that they stood out more against the leaf color.

Have fun mixing and matching your colors…I used several yellows to create a citron leaf color (one of my favorites!)

And there you have it: the finished chalkboard!

My final step before gifting these to our amazing teachers, will be to further personalize them by writing each of their names in the lower left corner with my white acrylic Sharpie.

I’m super happy with how these turned out and cannot wait for Teacher Appreciation Week to arrive!

Be sure to share any pictures with me if you take on a project like this for your teachers!


This post does contain affiliate links. It also contains lots of opinions, all of which are mine!
Clover Fabric Yo-Yo Maker

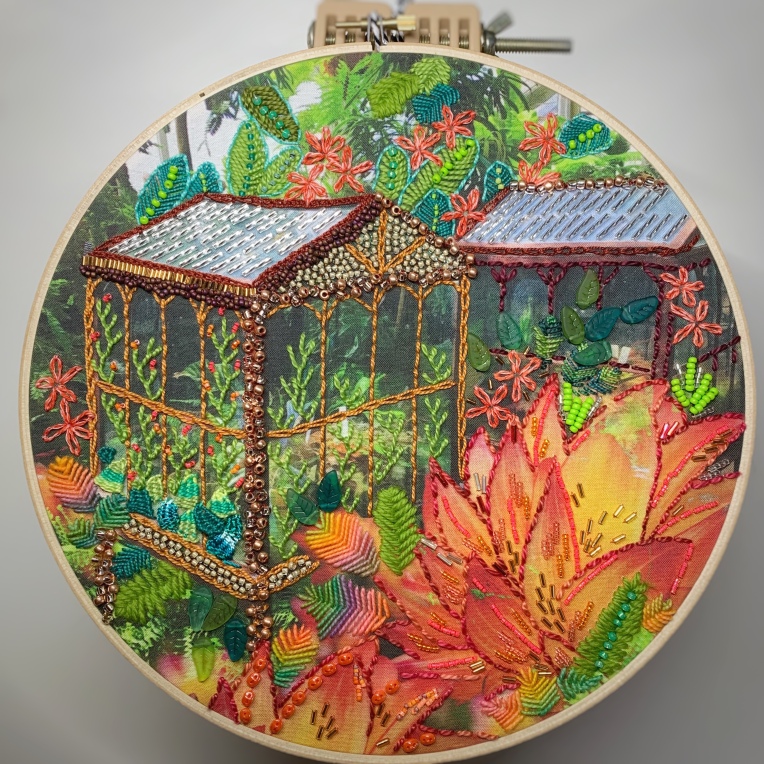
I have been working on a series of Boho Crazy Hoops, which are inspired by crazy quilts and incorporate loads of texture. Part of that texture is in the form of fabric yo-yos, which are addictively fun to make.

After posting pictures of these yo-yos, i’ve been asked a lot how to make them, so, without further ado, here are the super-simple-step-by-step-fabric-yo-yo instructions for you!

Supplies needed:

  • Clover Round Yo-Yo Maker (for this sample, I have used the Large size)
  • Sulky 12 Wt Petites thread (or similar weight thread, this one is about the weight of 2 strands of embroidery floss)
  • Scissors
  • Needle
  • Fabric (in this example, I used a shiny, slippery, metallic-y fabric…I suggest starting with something nice and simple like a cotton weight fabric!!)

Now that you have your supplies, you are ready to make some yo-yos!

Separate the Clover yo-yo maker and sandwich the fabric in between the layers of the maker. You’ll notice on the directions that it tells you to line up these lines with the little notches on the other side. That is important!

This is the backside of the fabric and the backside of the yo-yo maker.

See the little notches around the outside edge? Those are what will line up with the lines on the other side of the disk. This is the front side of the maker and fabric and it is what you will be looking at while you stitch.

Trim your fabric, leaving about 1/2″ of fabric all the way around.

Here’s a close up of the thread. This is the thread that I use for all of my beadwork and yo-yo making! I love that it comes on a spool and that I don’t have to divide threads before stitching.

It’s time to get stitching!

Thread your needle and knot the end of your thread.

Bring your needle and thread up through the right side of a slot (it doesn’t matter which slot you start with) and then take the needle and thread down on left side of the slot)

Continue this all the way around until you have stitched in each slot. When you stitch your way around and you have arrived back at the first slot on the yo-yo maker, you are going to stitch that one again.

It’s time to take your fabric out of the yo-yo maker. Just pop the sections apart and gently pull your fabric off of the disk.

With your needle and thread still attached, you are going to pull the fabric tight and you’ll see that it starts to bunch up. Continue doing this until you have a lovely little yo-yo shape.

You will need to adjust the fabric yo-yo until it looks symmetrical all the way around.

When it looks good to you, tie off your stitch. I like to make a small stitch and knot it, just to make sure the yo-yo is secure and won’t come apart. Trim your thread and you have made your first yo-yo!

Wasn’t that fun?! Now picture making these to coordinate with fabrics that you are embroidering!