Boho Embroidery Stitch Along Tour

Today I am (excitedly!) kicking off 10 weeks of the Boho Embroidery Stitch Along tour with some of my favorite makers!

Each week of the Stitch Along Tour, I will feature a maker who has stitched up a project from my newest book: Boho Embroidery: The Pattern Collection. I’m most excited to share with you the variety of ways that the patterns from my book can be used. Each pattern in the book can be used in one of two ways: either as a fabric collage design or as a straightforward embroidery pattern. My goal in writing this book, was to create a patterns that could be as unique as each person who picked up a copy of the book and felt the urge to create!


To kick off…or rather, stitch off, the Stitch Along (!), I wanted to share with you one of my favorite patterns from the book: the Steampunk Bee.

Here is the Steampunk Bee hoop in all of its steampunk fabulousness! This pattern allows you to have fun with things like gears and watch parts and whatever else you might feel the urge to add.

BUT, what if you wanted to use this pattern as an embroidery sampler?

Well, now you can!

Here is the pattern worked up with just seven embroidery stitches: six of the embroidery stitches that you can find in this book (and one bonus stitch from the first book!)

  • Scalloped Buttonhole Chain Stitch
  • Spanish Knotted Feather Stitch
  • Lattice Stitch
  • Woven Filling Stitch
  • Wheatear Stitch
  • Bunched Couching
  • Feather Stitch (from Boho Embroidery

I used a combination of Koigu KPPM yarn and Eleganza Perle Cotton in sizes 5 and 3 to stitch this up. The beads in the Lattice Stitch are size 8 seed beads and I buy them from Fusion Beads…they come in so many colors!!

The beauty of a project like this, is that you could choose to stitch it with the stitches that I used here or you can pick completely different stitches and colors and you will create a hoop that is all you!

Each of the patterns in this book can become a pattern for you to use as a stitch sampler, just like this!

I can’t wait to see what you all will create!


So, be to check out what each of the makers has stitched up for their week on the Stitch Along and follow along for lots of Boho inspiration!

Also, check out these hashtags to see lots of behind the scenes pictures from the Stitch Along:

#bohoembroiderypatterncollection

#bohoembroiderystitchalong

Boho Embroidery Stitch Along Tour Schedule:

Sept 14: stitch-off with Nichole wildboho

Sept 21: stitch with Kristen @bobbypinbandit

Sept 28: stitch with Jessica @euphoria_jessica

Oct 5: stitch with Anne @lolliandgrace

Oct 12: stitch with Lee @maychappell

Oct 19: stitch with Sarah @hisarahwatson

Nov 9: stitch with Cheri @tinkerellen

Nov 16: stitch with Felie @london_and_granger

Nov 23: stitch with Tamara @tamaramakeshandmade

Nov 30: stitch with Jessica @blueskycrafter

Boho Stitch Along. Week 3

To catch up, you can check out each week of the Boho Stitch Along right here!


Before I show you what I’ve been working on for my Boho Stitch Along this week, I wanted to share my upcoming classes for the summer! If you’ll be on the East Coast from June-September, you just might be able to catch a Boho Embroidery class!

Here is my summer schedule:

June 16, 2018: Finch Knitting and Sewing Studio, Leesburg, VA

July 6, 2018: (Just for TEENS!), Pennington Quilt Works, Pennington, NJ

July 6, 2018: Pennington Quilt Works, Pennington NJ

August 5, 2018: Sew Inspired Quilt Shop & Studio, Simsbury, CT

August 11, 2018: Alewives Fabrics, Damariscotta, ME

September 29, 2018: The Old Country Store, Lancaster, PA


So this week, besides a mad cleaning of my studio (more on that below), I focused on the center medallion of my project.

Using a combination of straight stitches and beads, I have almost completed this medallion!

The center of the center is a small mirror that I attached with a variation of the Shisha Stitch (I cover this stitch in my upcoming book!)

For next week, I plan on finishing up the center and then moving on to the feathers above the center medallion.

I’ll also be stitching some projects for Quilt Market and so i’m not sure how much i’ll be able to tackle…maybe it’s overly ambitious to think i’ll be moving onto the feathers! We’ll just have to see what the week brings!

The thread that I love to use for beading and embroidery is from Sulky and is called Sulky Petites. It is a 12 wt thread, which is about the thickness of 2 strands of a dividable floss would be. I love the variety of colors that it comes in and I can always find a match to the beads and fabric that i’m working with!

The beads that I used on the center are size 11 seed beads and are smaller than the size 8 beads that I used on the words “Magpie Dreams” from last week. I find my beads online and my favorite shop is Fusion Beads.

The adorable bird needle minder is from Alison Glass.


I have a tiny stitching studio in my home and the size forces me to constantly stay on top of how organized my projects are! When I finished writing my second book in the Fall, I transitioned right into Quilt Con prep and then in the February, attended Quilt Con. Before I knew it, Spring had arrived and I had a lot of chaos to deal with in my studio.

This week I decided I needed to tackle my space before starting on the next big project. Today finds me feeling much more organized and with room to breathe and work in my area!

I was also super excited to set up my brand new Daylight Company Slim Line LED Table Lamp. I have great afternoon lighting in my space, but morning and evening is a different story! I’ve been working with an Ott-Lite bulb in an ordinary desk lamp from Target. I have gone through 3 different Ott-Lites, each covered by warranties, and this bulb has been temporary solution until I found a lamp that I loved and that wouldn’t die on me when I needed it most!

Enter the Slim Line LED Table Lamp. I finished the Great Studio Clean-Up of 2018 yesterday and that was when my new lamp arrived. Hello perfect timing!

By last night, I was all set up and wanted to document just how awesome the light is and how i’ve probably been killing my eyes with my previous lamp!

Here’s the before (notice the Ott-Lite bulb sticks out further than the lamp shade?!):

And just look at the after with my new Daylight Company lamp!

I can clearly see every single thread color now!

A special thanks to Sariditty and Daylight Company for this lamp and if you want a coupon to save 20% off of your lamp purchase, use SARIDITTY18 at checkout!

Boho Stitch Along. Week 2.

Last week I began the Boho Stitch Along project that I’m going to take you through step by step so that you can see what is involved in an embroidery project using one piece of fabric. My hope is that you can see how simple this is and you will feel inspired to start your own project!

My first step, which I outlined last week, was to cut out the words “Magpie Dreams” with my Cricut Maker and adhere them to the fabric. The Dritz Spray Adhesive that I use works great for the first part of getting the letters to stick to the fabric, but that method is not a permanent way of adhering the letters. I planned to embroider the letters and whenever I adhere something with a spray, I make sure that I embroider that part first so that it does not begin to peel away from the fabric as I move the hoop around and embroider other sections.

I love the stem stitch for working with curves and adding beads. You can see a close up of my bead work. In some areas I added a bead to every stitch and in other areas I added it to every other stitch. And in some areas I just embroidered with thread. I hadn’t planned on the look that I was going for before I began stitching. I just started adding beads to the stitches to see what I liked!

The hoop that I am working with is 14″ and with a large hoop like this it can be tricky to hold the hoop while also embroidering. Add beads into the mix and you’ll feel like you need an extra pair of hands in no time!

I have typically managed to prop my hoop up on a pillow or a small table but it’s becoming increasingly cumbersome and so I was looking for something that could be my extra pair of hands!

I decided on this Universal Craft Stand after reading lots of reviews. Does anyone else get sucked into amazon reviews like I do?!

Let me just say…this stand is amazing. Seriously. It has a clamp to hold your work, so you are not tied to a fixed hoop size. The clamp is adjustable so I can also use it with my square frames that are thicker. And each section is adjustable, so there are lots of ways to adjust it to make it fit how you need to work!

(This is not an affiliate link…I just really like this stand and want to share it with you!)

So this week i’m going to finish up those words and hopefully start on either the birds or the feathers next week.

Where to begin? Boho Stitch Along: Week 1

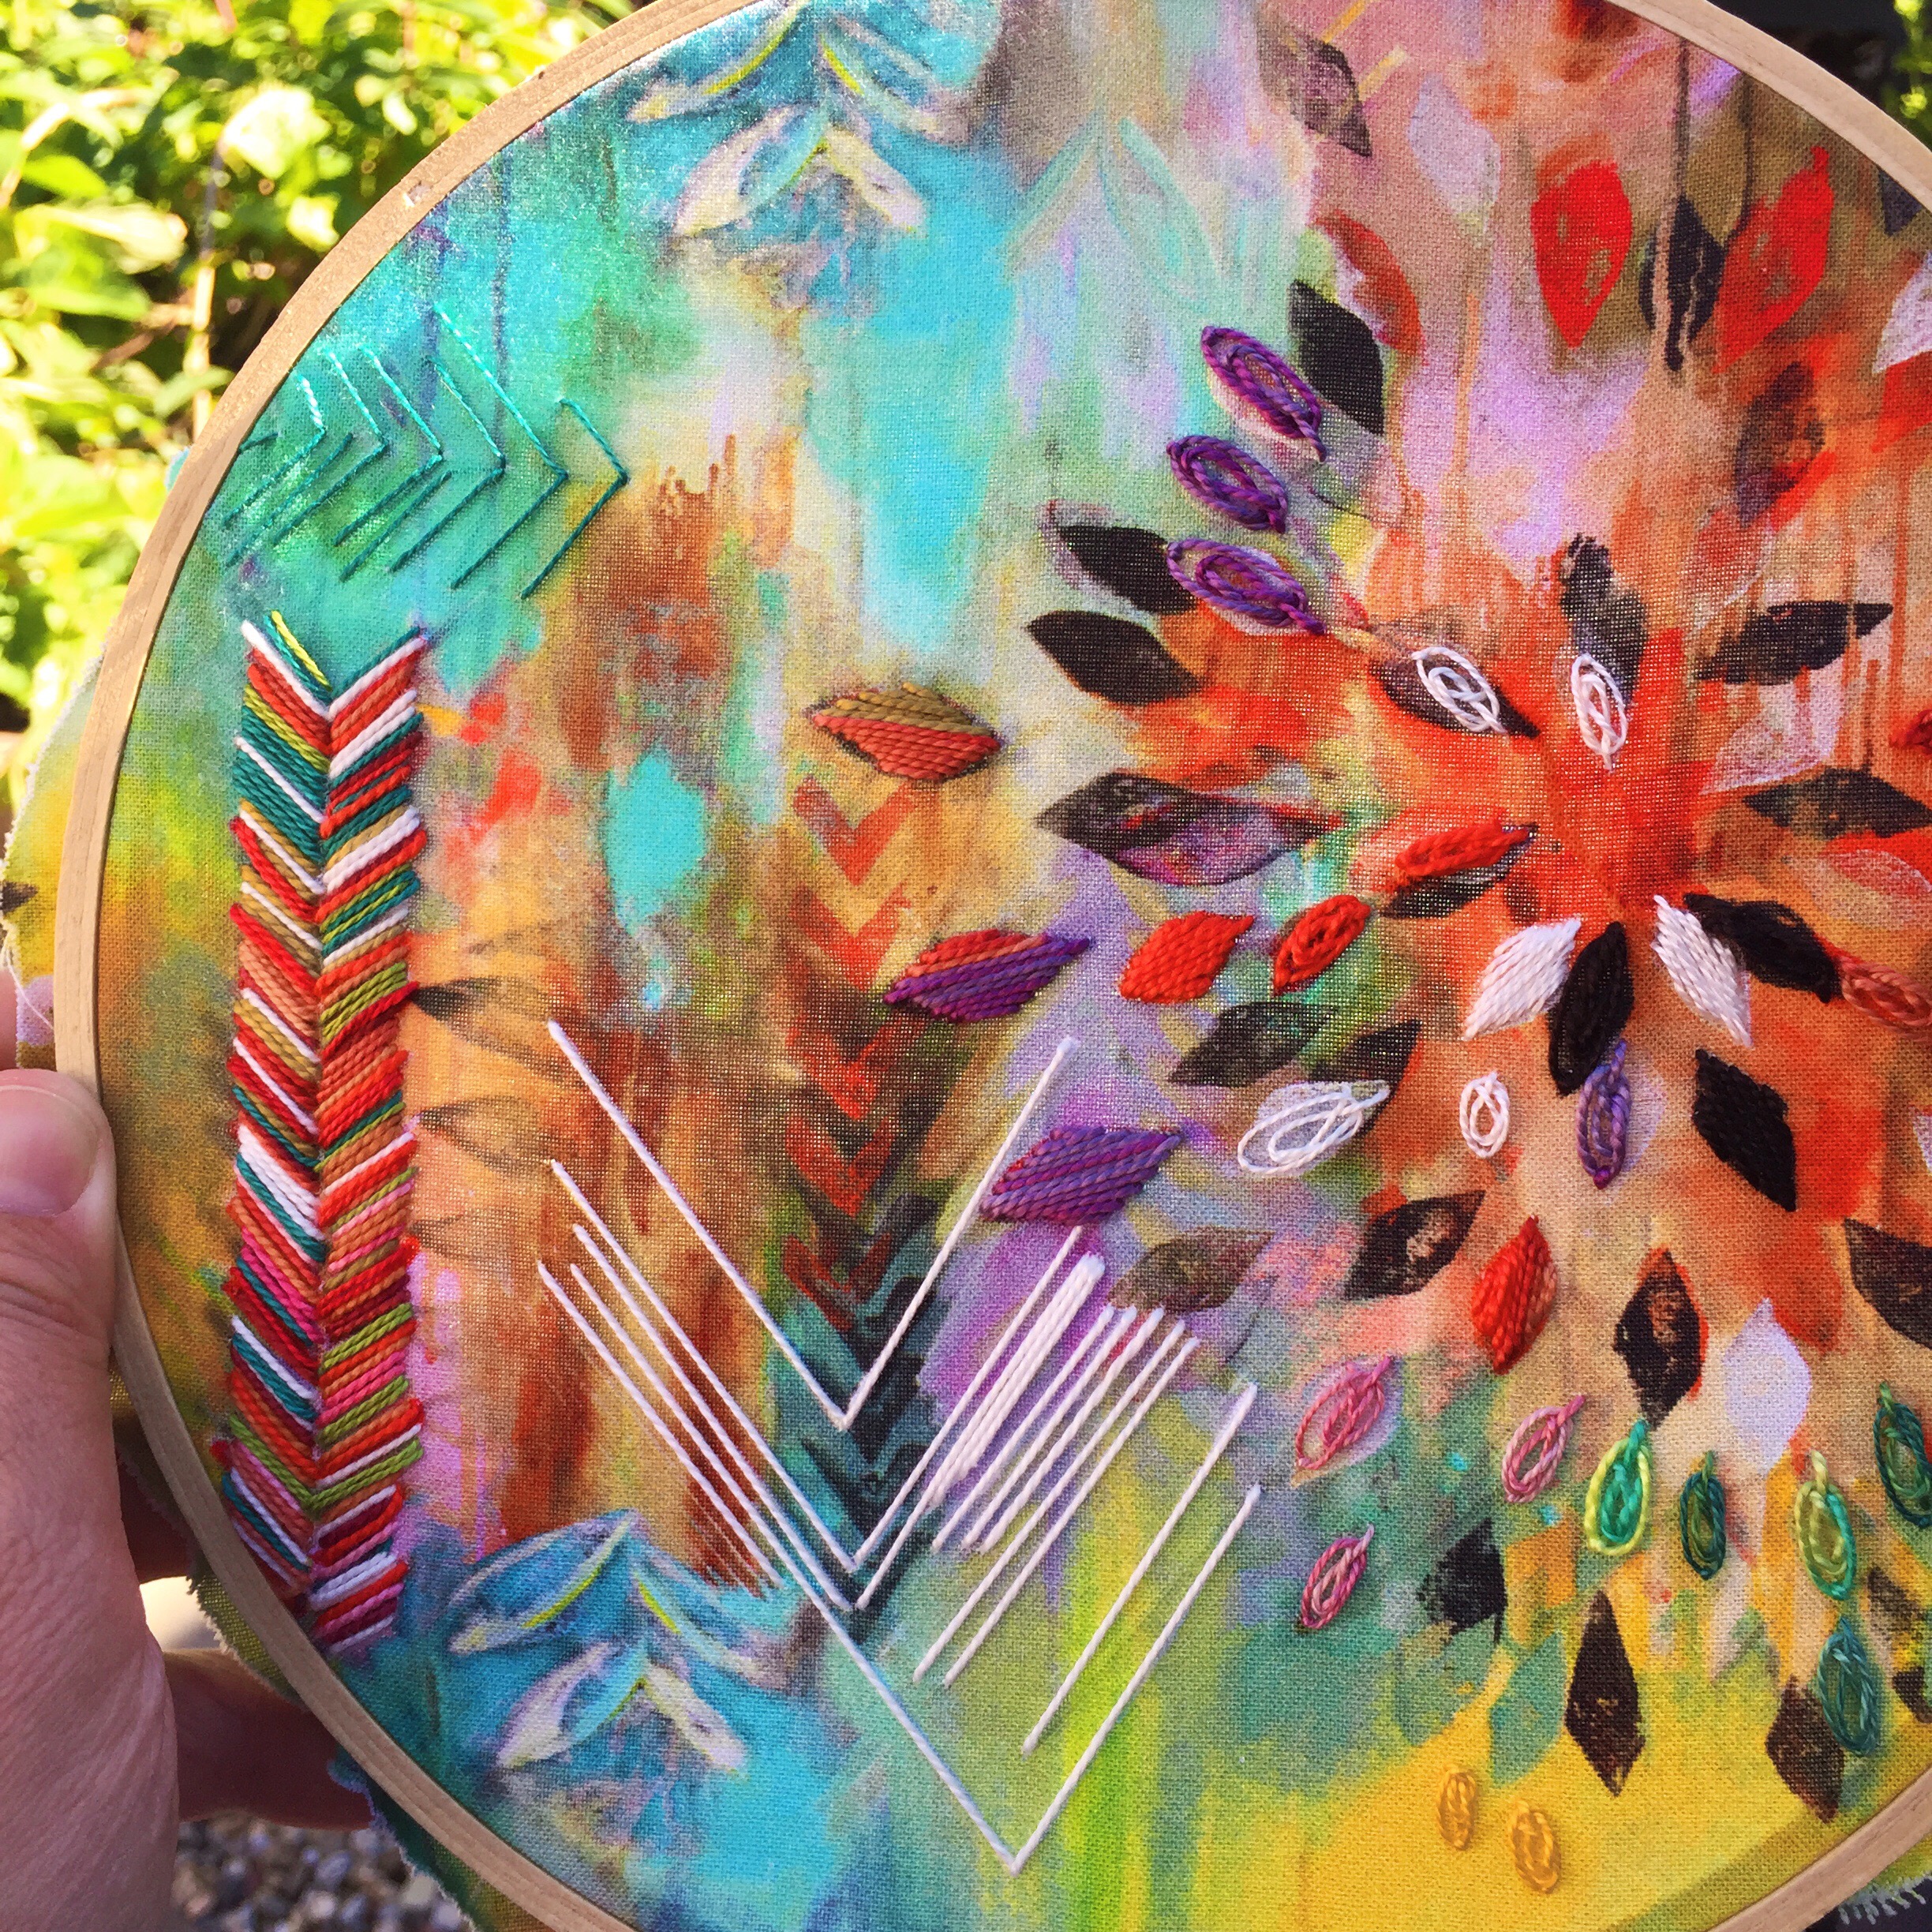
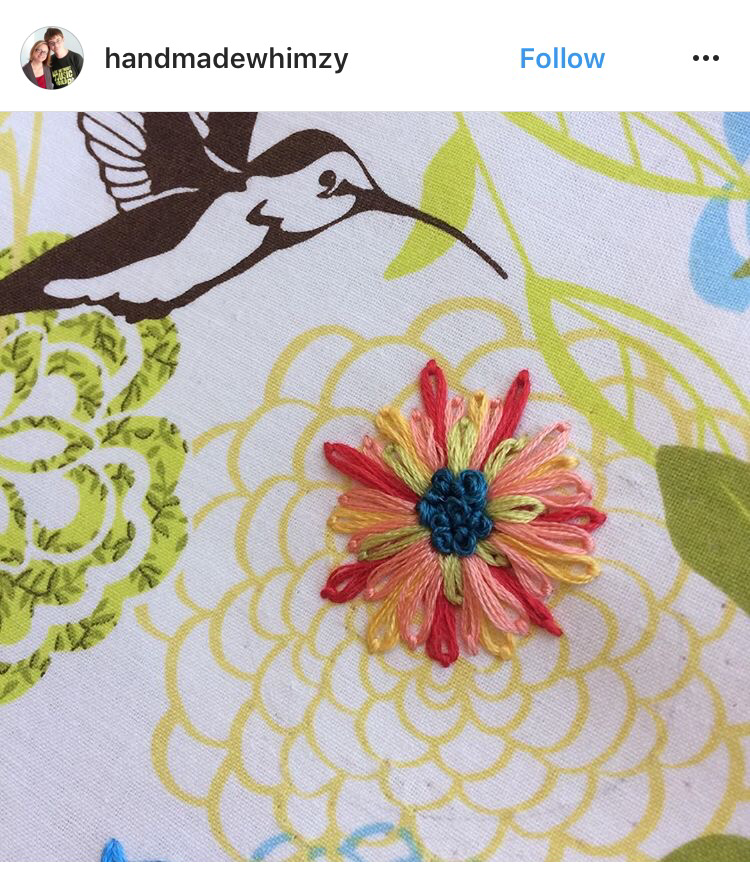
I posted a picture on Instagram yesterday and received so many messages along the lines of things I’ve heard many times before, both on IG and at the workshops that I teach, basically: “I love what you do and would love to try this but I wouldn’t even know where to begin!”

So, to help those nervous, embroidery-loving enthusiasts among you, I decided I would take this hoop and show you my start to finish process. Warning: it’s probably going to be rambly and messy (welcome to the inside workings of my brain)!!! But that’s art, right?! At least it is for me and most likely will be for you too.

This is not going to be a quick finish. You’ve heard of Slow Stitching, right? This is that! If you followed along with the Boho Stitch Along last year, you’ll know that embroidering a large piece of fabric takes time. So, grab a piece of fabric that you love and have been wanting to embroider and just put it in a hoop (like I did) and go through this process with me!

I’ll share my work here weekly, along with tips and some fun ideas for adding extra bits to your project.

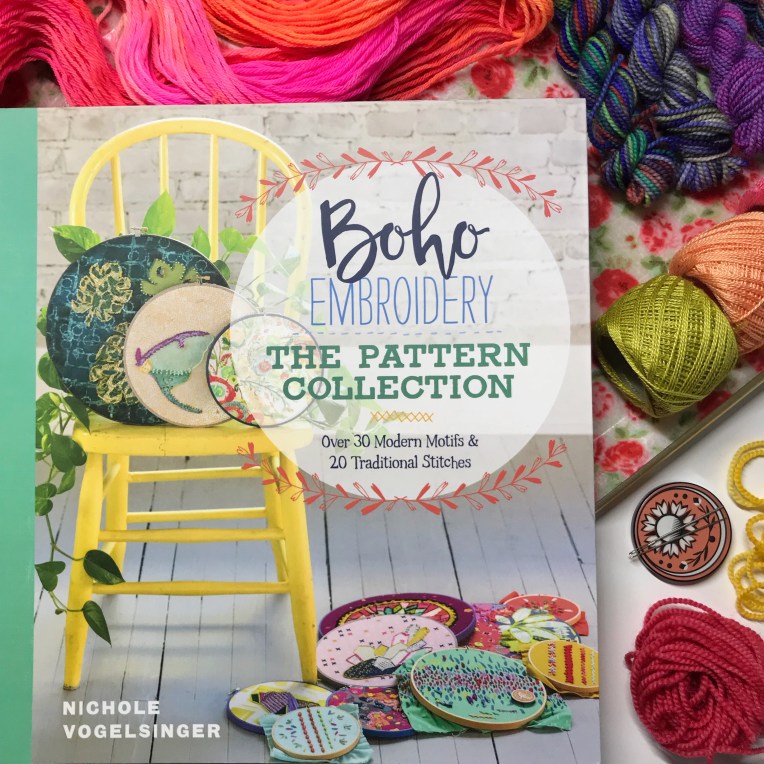
P.S. I hear there is an amazing embroidery book written by yours truly that can help you learn how to embroider! And if you have that one, I hear there is an equally awesome second embroidery book coming very soon, you know, if you’re interested!


Let’s get started!

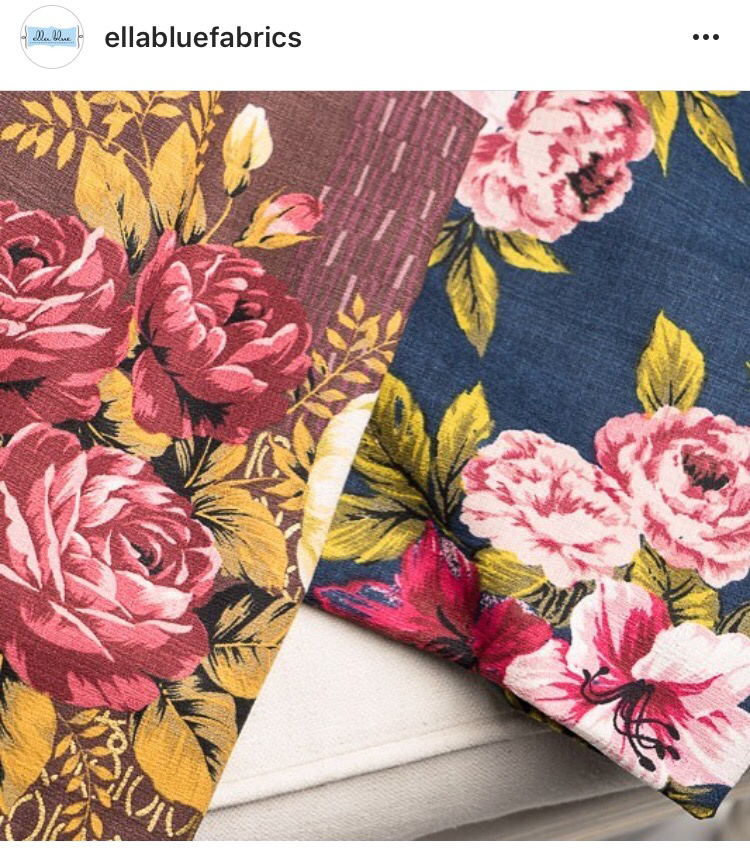
First off, you will want to choose your fabric. Pick something that you like…you will be spending lots of time looking at every detail of the fabric!

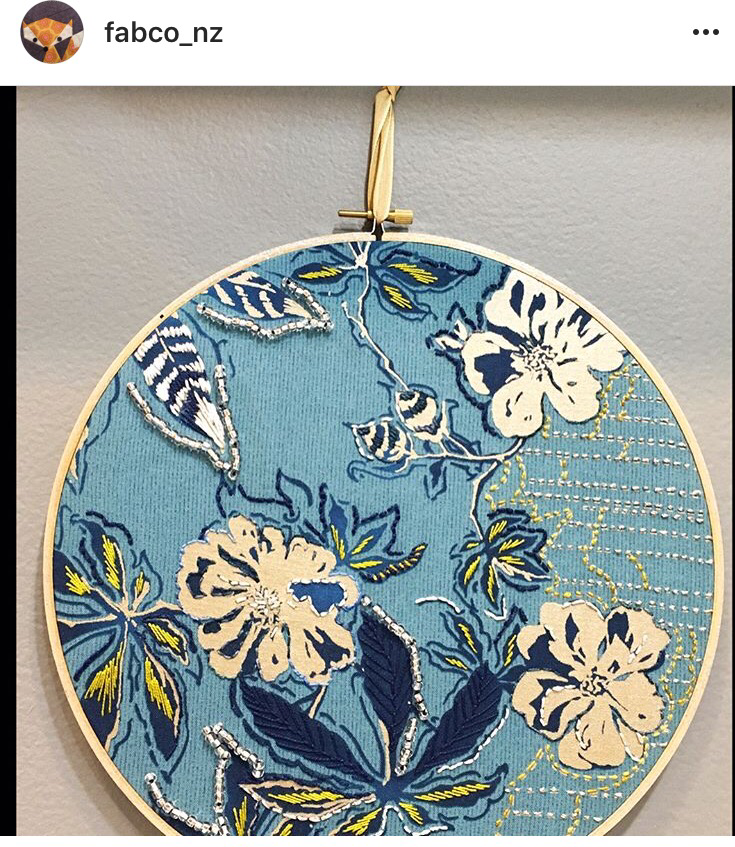
I have chosen this gorgeous design by Kathy Doughty for Free Spirit Fabrics: Magpie Horizon. I love birds, feathers and this color palette, which made this an easy choice of fabric.

My cut of fabric is a fat quarter (which is a quarter yard of fabric, but cut in a square), so I began with unfolding it to decide what section of the fabric I wanted to include in my hoop. The Magpies fit perfectly into a 12″ hoop and so that was an easy decision.

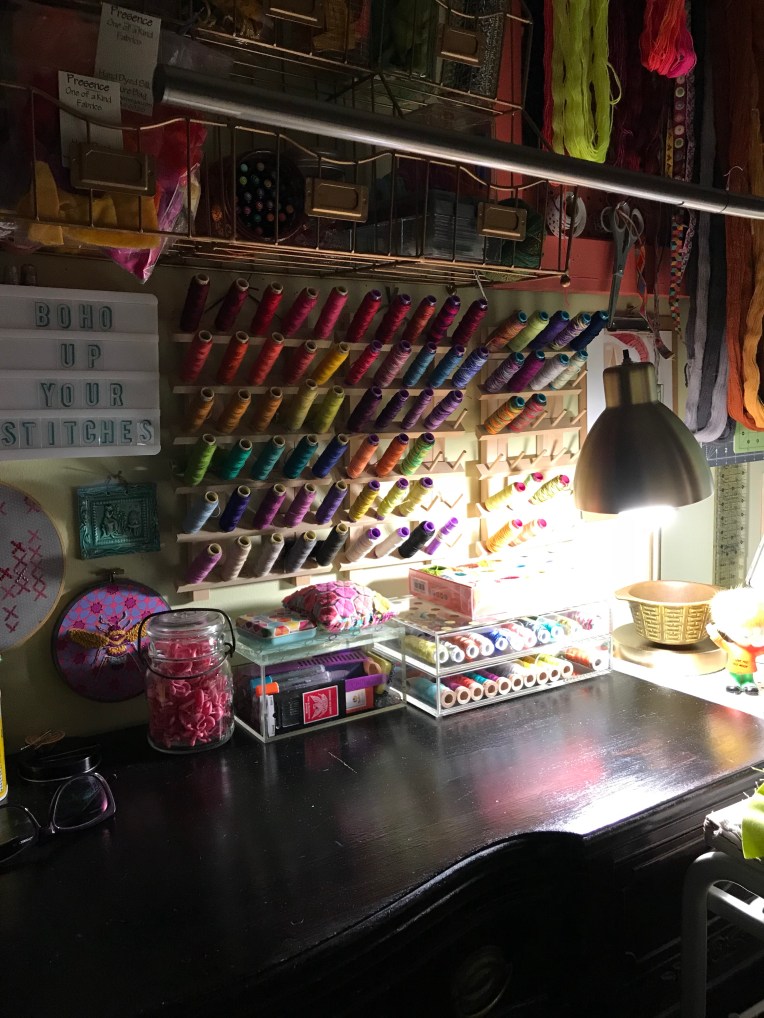
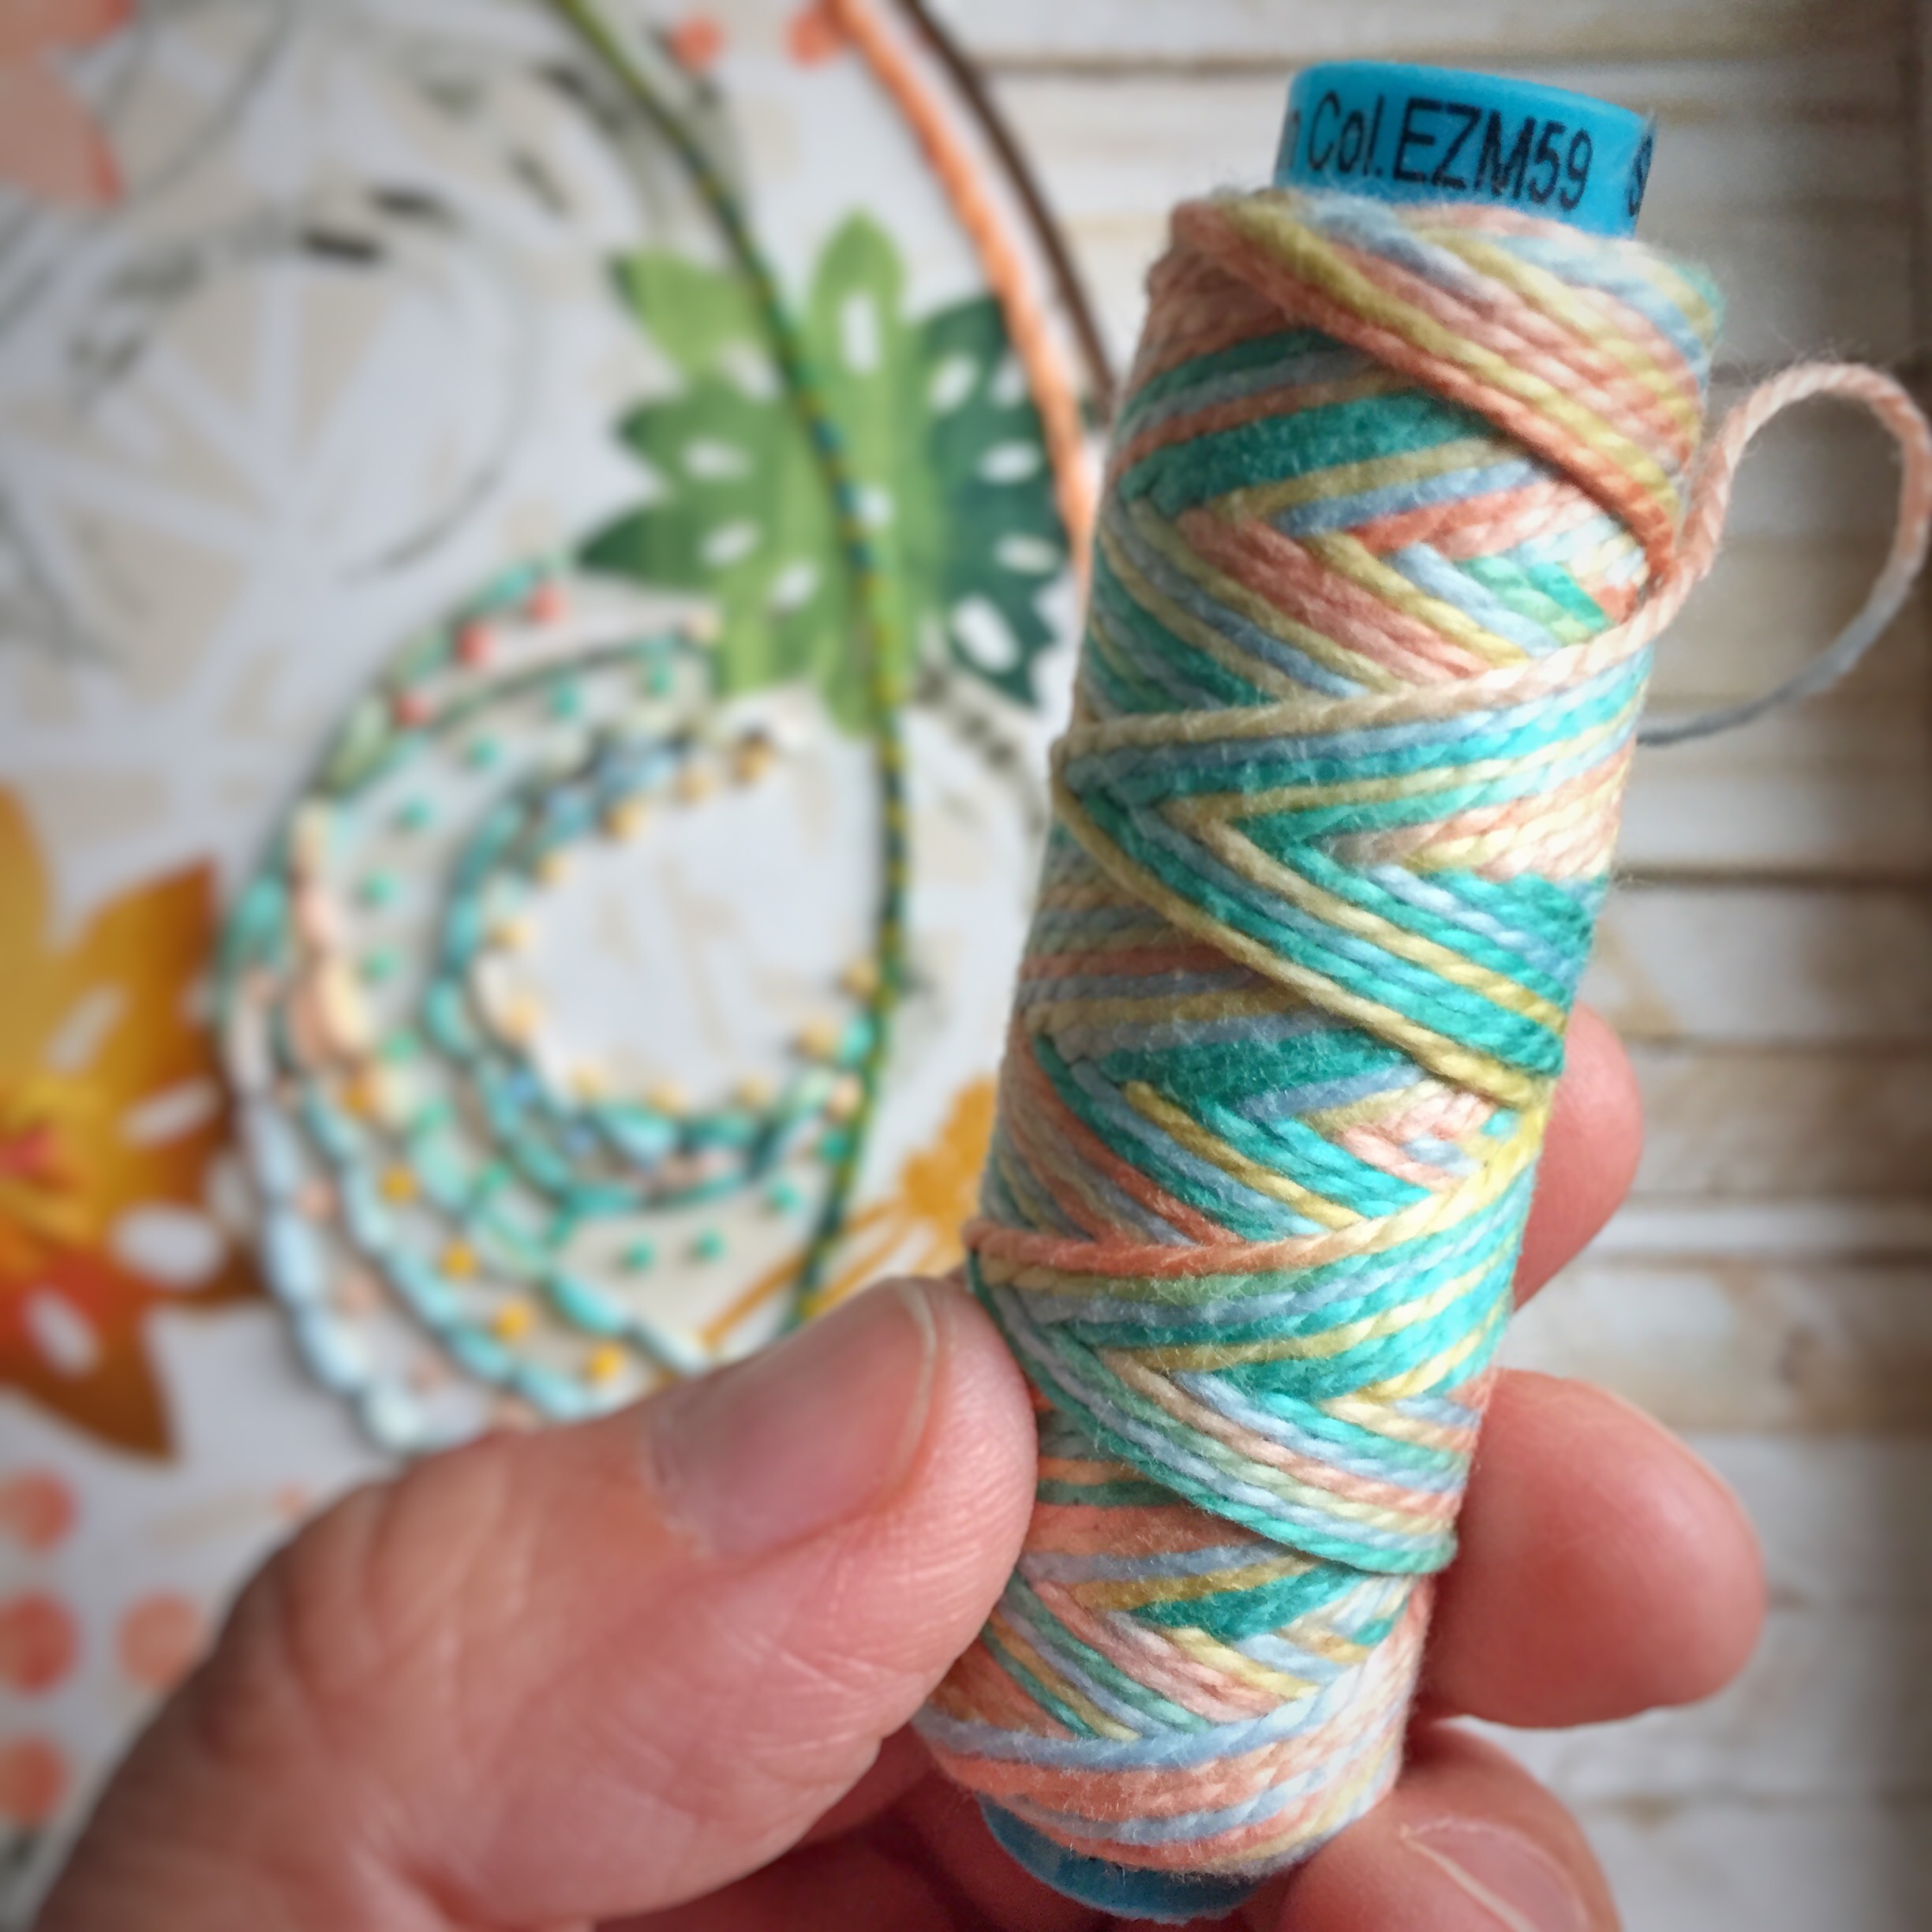
Next step: threads! I have a lot of thread, so I chose 5 colors to get started. I’m not limited to only using those colors…I can add colors any time that I want, but this is a non-intimidating start to a project. Pick 5 colors that coordinate with your fabric.

These are all spools of Perle Cotton thread from Sue Spargo.

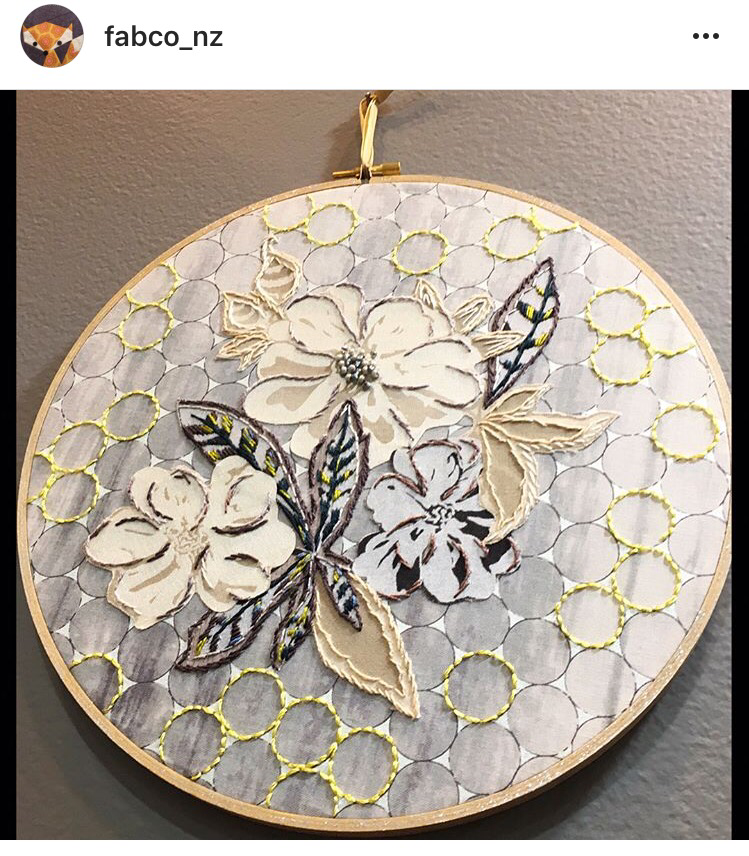
At this point, once my fabric is in the hoop and I have trimmed it (leaving about 1 inch all the way around), I prop it up while i’m working on other things and by doing that i’m getting familiar with the elements on the fabric i’ve chosen.

I did this yesterday and this morning I decided to add the words Magpie Dreams to this hoop. What are Magpies known for their love of? Shiny things! And what do I love to include in my embroidery? Shiny things! Beads, sequins, etc.

If you’ve been following along here, you’ll know that in the past I have raved about my Cricut Maker machine for cutting out words to add to embroidery. So that was my next step.

With Cricut’s Design Space app, I was able to type the words Magpie Dreams, change the font to something more swirly, and curve the words so that would fit along the bottom of the hoop. (That is a new feature and I used it for the first time today!)

Screen Shot 2018-04-13 at 11.19.10 AM

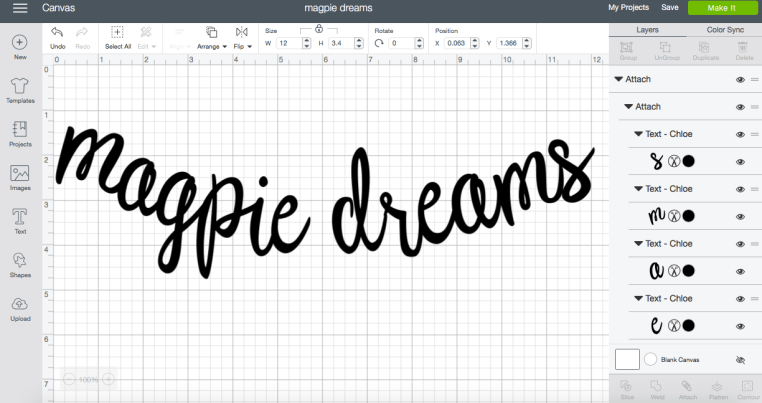
If you are new to Design Space, here are a few things i’ve learned while working with letters:

  • type the full set of words you want to use
  • choose your font
  • if you want to add a curve to the words, do it at this point
  • to make your letters connect, click “Ungroup” and it will make each letter something you can work with individually
  • play with the letters…move them around, make them bigger, smaller, etc.
  • when you like how they look, you will group them together again by clicking on the first letter and the Shift key. While still holding the Shift key, you will click on each letter in your group of words and it will then group everything you have clicked together.
  • I then attach them (the button at the bottom right side)
  • And I learned today how important the Weld button is. When you weld the letters, it groups them all together when cutting and you don’t get little bits of letters cut off.  (I may have had to do this 2 or 3 times before I realized the Weld button was going to save my project and sanity…I promised you messy, right?!)

Here’s what it looks like when I am ready to begin cutting the letters out of felt. I load up the mat with the felt pressed to it and the Maker does the rest!

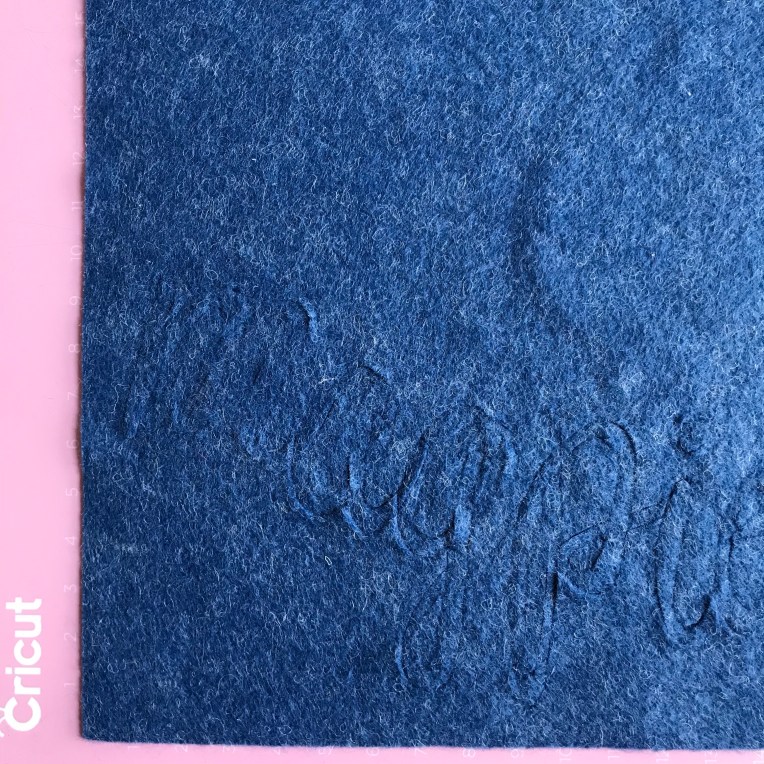
So from there, I pick the words that have been cut out of the felt and I place them upside down and then spray them with the Dritz Spray Adhesive. I love this product because it lets you adhere something without using an iron and it is removable up until the point that you have stitched it to the fabric!

Also, this was an incredibly messy step. Seriously. Just picture me trying to get a photo of putting the words on the fabric while having felt bits stuck to my fingers because of the adhesive spray. (Notice there is no picture here of that step?!! There is a reason for that!)

So, I dealt with the mess and took a picture of the end result instead!

The words will stand out more once I stitch them, but i’m really liking where this project is headed!

And there you have it! By the time another week rolls around, I will have started to embroider on this piece and I will share with you what I have done.

In the meantime, if you have a piece of fabric you’ve been wanting to try this with, it’s probably time for you to pull it out and get started!


So to recap the steps for beginning your project this week:

  1. Choose your fabric and hoop size.
  2. Pick 5 matching threads.
  3. Become familiar with your fabric.
  4. Choose one area you want to begin stitching.
  5. Gather your embroidery tools: scissors, needles, etc.
  6. Pick one stitch that you want to try and just get started!


Note: There are affiliate links included in this post.

Boho Stitch Along. Week no. 26

Welcome back for Week no. 26! If you are just beginning a piece for the #BohoSAL, check out my previous posts here. And if you are new to embroidery and want to learn the basics, check out my embroidery book, Boho Embroidery for everything you need to get started!


Well, we’ve reached the halfway point in our Boho Stitch Along! If you have been stitching since this began in January, that means you have a fair amount of stitching time under your belt!

I’ve been going back and forth between several hoops, but this week I pulled out my Flora Bowley fabric hoops. If you haven’t checked her out, you absolutely must do it now! Her art is inspiring and colorful and just fabulous. And rumor has it, she has a new fabric line coming out soon from Red Rooster Fabrics.

I began this hoop back in March and have gradually been adding some Oyster Stitches and Satin Stitches in those little petals.

This is another one of her fabrics and I just started this one today. I love anything with birds, and so when I saw this fabric, I knew I needed to stitch it! Here are the beginnings of my stitches.

Hope your summer is off to a great start and happy stitching!

Boho Stitch Along. Week no. 24

Welcome back for Week no. 23! If you are just beginning a piece for the #BohoSAL, check out my previous posts here. And if you are new to embroidery and want to learn the basics, check out my embroidery book, Boho Embroidery for everything you need to get started!


The school year has been winding down this week and because of the craziness that comes along with that, the time that I had to work on my Boho Stitch Along pieces seemed slightly non-existent!!

I was able to spend five minutes here and there and along with my Owl piece that i’ve been sharing on Instagram, I was able to pick up my Fibs and Fables (Anna Maria Horner) piece again.

While rummaging through my bead drawers (yes, plural!!) I found a few Swarovski crystals that matched this fabric perfectly! I added them along with some lazy daisy stitches in this section here.


My next step will be to add some shades of green, whether that is thread or beads, when I pick this one up again!

This update will be short and sweet as i’m looking forward to some more slightly unstructured time now that summer is here!

Before I leave you, check out this beautiful version of my Fractured Color Wheel pattern (that I’ll be teaching at Quilt Con!) You can see more pictures over on @handmadewhimzy ‘s feed.

Happy stitching!

Boho Stitch Along. Week no. 23

Welcome back for Week no. 23! If you are just beginning a piece for the #BohoSAL, check out my previous posts here. And if you are new to embroidery and want to learn the basics, check out my embroidery book, Boho Embroidery for everything you need to get started!


I picked up my Urban Artifacts hoop again this week after not stitching it for awhile. It’s like coming back to a comfortable old friend! I haven’t shown a full view of this hoop since I started stitching it back in January, so here is where I am so far:
I worked a little bit of couching this week and added some beads to coordinate with the variegated thread that I used.

This thread is beautiful. It is called “Fly a Kite” and is a mix of buttercup, spearmint, ice and bluejay blue colors and is from a Limited Edition color pack (which, P.S. it looks like is still available!) from Sue Spargo. I typically do not use much size 3, the largest perle cotton size, but I don’t know….i’m really liking the thickness of this size to stitch with.


As far as other stitchy happenings this week, if you checked out my Instagram stories, you’ll remember I was stitching up a Liberty pincushion from a kit that I bought from Nicole at Modern Handcraft. Have you seen her Hexie pincushions yet?! If not, check them out! I love, love everything that she makes!

I bought this kit ages ago and am so proud of myself for finally finishing this thing! And, bonus, it is just adorable in my workspace!


And lastly, I was really excited to attend Book Expo America, the largest book fair in North America, this week. I was there for a Boho Embroidery book signing. It was great to meet so many librarians who will be using my embroidery book as part of their summer program series and giveaways at their libraries.

My color/texture loving self could not get enough of this display! Made from recycled paper, each round of paper was hand lettered and illustrated by both artists and visitors to the booth. It was truly stunning and this picture only captures a small section of the display!

Between fan-girling at Book Expo (I saw Mo Willems from a distance!) and my book signing, I had a small window of time to run over to Purl Soho and geek out over the displays of Liberty fabrics and wall of yarns.

And spotted some wool Ellana in action too!

What a whirlwind day in the city!

Hope your week went well and don’t forget to check out the beautiful hoops being stitched up in the #Bohosal pool!


Boho Stitch Along. Week no. 22

Welcome back for Week no. 22! If you are just beginning a piece for the #BohoSAL, check out my previous posts here. And if you are new to embroidery and want to learn the basics, check out my embroidery book, Boho Embroidery for everything you need to get started!


I am just loving this Outback Wife fabric SO MUCH. The fabric has so much texture pre-stitching and is slightly heavier than a quilting cotton, so it can withstand the weight of the beads and threads that I am adding! Here it is, in my garden….doesn’t it look like it belongs with the peachy-orange irises?!


And speaking of Outback Wife fabric, did you see the two limited edition color ways that were released at Quilt Market? I will be stalking my favorite fabric shops for yardage to be available because I think I need more!!!

Here is a picture of the limited edition colors from Ella Blue Fabrics:


We have so beautiful floral inspired hoops that are in the #BohoSAL feed and I thought I would share some of my favorites this week!

This is a lovely piece by @locowispsnwips and you can check out her feed for lots of detail shots!!

@beckymac1 has perfectly matched her Eleganza to this gorgeous floral and I can’t wait to see more pictures of this hoop as she makes progress!

 I just love hummingbirds and so when I saw this hoop from @handmadewhimzy, I knew I had to feature it! And I love how she is changing the flower with her embroidery!

Such perfect little stitches from @quilterathart and lots of other beautiful embroidery on her feed!


And that’s a wrap! Have a fabulous week and happy stitching!

Boho Stitch Along. Week no. 21

Welcome back for Week no. 21! If you are just beginning a piece for the #BohoSAL, check out my previous posts here. And if you are new to embroidery and want to learn the basics, check out my embroidery book, Boho Embroidery for everything you need to get started!


For the moment, I can stitch just to stitch and not to meet a deadline, which is really an enjoyable thing…when it happens!

So this week, working with my Gertrude Made fabrics for my #BohoSAL piece, I began to add beads galore to my Boho Stitch Along piece. With a piece like this, I had no specific plan of what I was going to stitch, what stitches to use, etc. I knew I wanted to add a running stitch along the background, so that’s where I began. While I was working on the running stitch, it gave me time to really look at the fabric and decide what my next move would be! Plus, I have all of these great beads in shades of green and I just knew I had to add them somewhere!!

img_9927


In other news, it’s Spring Quilt Market time! I’m not there, but several of my hoops made the journey to St. Louis

I was really excited to be asked to work with the beautiful Shimmer On fabric by Jennifer Sampou for Robert Kaufman.

Here’s a full view of the booth:

img_9929

And here are a few close ups of the hoops that I made:
img_9880-1

img_9882
img_9883

I was also asked to make a hoop for Sue Spargo’s booth using my favorite Eleganza threads. Here’s a view of her booth in all it’s colorful gorgeousness and also a close up of the hoop that I made using Heather Bailey’s “Hello Love” fabrics:

img_9908

I was also thrilled to create a few projects for Andover Fabrics using the upcoming Chroma Handcrafted fabrics from Alison Glass.

img_9914

img_9930

img_9931
img_9932

And last but not least, here is the Alexander Henry booth and that citron owl hoop is one I was commissioned to make awhile back. I love that hoop! It is complete with a pink tulle skirt and lots of metallic threads throughout!

Well, that’s a wrap!

Don’t forget to check out the tag #Bohosal to see what our other stitch along friends have been up to lately!

Hope you all had a great week and happy stitching!