Beaded Color Wheel

As an avid bead and button collector, I’m always looking for fun ways to use the supplies that I have. And maybe, just maybe, I’m always looking for an excuse to add to my collections!

I recently stitched one of my patterns, the Fractured Color Wheel, entirely in buttons.

This project took a little over two weeks and I worked on it almost exclusively during that time, but I didn’t track how many hours that I spent on it. A project like this is thought-consuming to me and so the time doesn’t even matter…I can hardly wait to return to it while I’m working on other things!

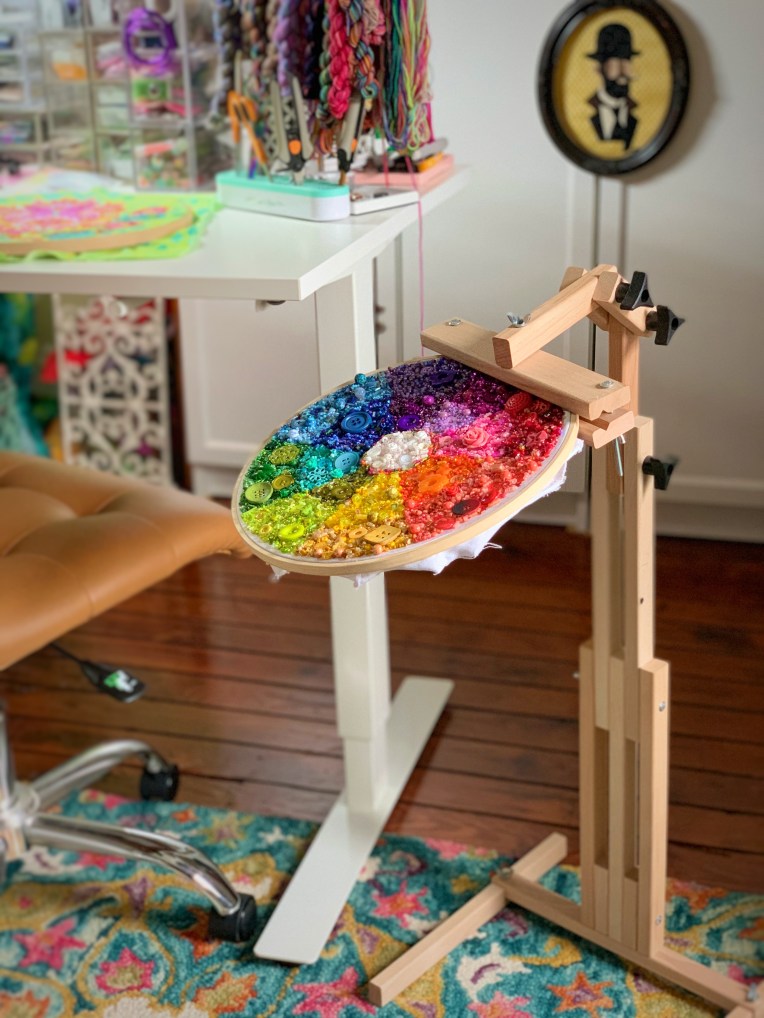
It is heavy…perhaps one of the heaviest hoops that I have ever stitched! In fact, I had to take it to the grocery store to weigh it on the produce scale and it came in at a whopping 1 lb, 8oz. That might not sound super heavy, but comparing it to most of my hoops (which probably don’t even reach 1 lb), it’s h e a v y!

Here’s the non-beaded, fabric-only version:


To convert this color wheel to an all-beaded wheel rather than a fabric one is very simple!

Choose a background fabric that is simple and light (it makes it easier to trace your pattern onto a light color). Your fabric will be so loaded up with beads and buttons and sequins by the end, that you won’t see it, so don’t use your favorite piece on this project!

Choose the color wheel size that you want to work with (the pattern offers three sizes). I chose to fit my color wheel into a 12-inch hoop.

Print out the pattern and place your fabric on it (pattern facing up, front side of the fabric facing up).

Using a light source (window or Lightbox) and a water soluble pen, trace the pattern onto the fabric. Again, your marks will not need to be washed off because they will be completely covered.

Once the pattern has been traced, fit the fabric into an embroidery hoop and tighten your fabric. And then let the fun begin!

With my fabric pen, I wrote the colors that I wanted to be in each portion of the color wheel. I then began with the biggest pieces…the buttons.

It helped to choose the buttons for each color and then stitch them in place before beginning with the beads. This helps you to visually focus on what color is placed in what spot, but it also helps to have the largest pieces in place first.

Once I had the large buttons in place, I began adding beads and sequins. Large beads first and the smallest beads last (the smallest beads help to fill in any areas that have white peeking through.

Continue adding your embellishments until you can’t see white through the hoop anymore. Tighten your fabric in the hoop once again and then follow the directions in the pattern for finishing the hoop. And you’re done!


One note about thread: I used <a href=”http://Sulky 12 Wt. Cotton Petites Thread” target=”_blank” rel=”noopener”>Sulky 12 wt Petites which is my favorite beading thread. I did not want to use a stranded thread because it’s a little tricky when you are working with lots of beads and I didn’t want to deal with tangles. Having a spool is really helpful. It’s also strong enough to handle all of this beading!

One other note: if you are stitching on heavy beads, it is helpful to stitch through the bead several times. The same thing goes for buttons. You are going to be spending lots of time on this, make sure your beads and buttons are on the fabric nice and tight so that if an accident happens, your beads don’t go scattering everywhere! And hopefully an accident doesn’t happen!

The embroidery stand that I used is also really helpful with a heavy embroidery project. You can find it here. I like that this stand is adjustable into several positions and it never feels like it’s going to be top-heavy when a project is secured into it.

And that’s it! With this post, I’m sending along to you the confidence to take on a project like this…it really is a beginner-friendly project! And it spotlights all of those special embellishments that you’ve been hoarding…I mean, collecting!!!

Have fun stitching and beading and be sure to tag me on Instagram if you take on this project!


Note: some links in this post are affiliate links. I will never recommend something to you that I have never personally tried and that I don’t stand behind for the use intended! 
All Things Embroidery

So many of you have reached out to me with questions on various embroidery and beading tools and so, to help you out, I’ve been tweaking my Amazon storefront and have broken all of my suggestions into lists: Books for Inspiration, Boho Embroidery Essentials and Boho Beading Essentials.

Everything that I have included in my lists, are things that I personally have used (or read!) over and over and over again and I can without a doubt recommend these items to you! If you ever have suggestions for me to try out, or questions, don’t hesitate to ask! For now hopefully these lists will help you as you build up your Boho Embroidery toolkit!


Thread Round-Up

As someone who works with lots of threads and always on the lookout for new colors and textures to try, it is one of my favorite questions when I am asked: “what threads do you recommend?”

So here’s a quick thread round-up for you if you are thinking of starting an embroidery project and want to try something new!


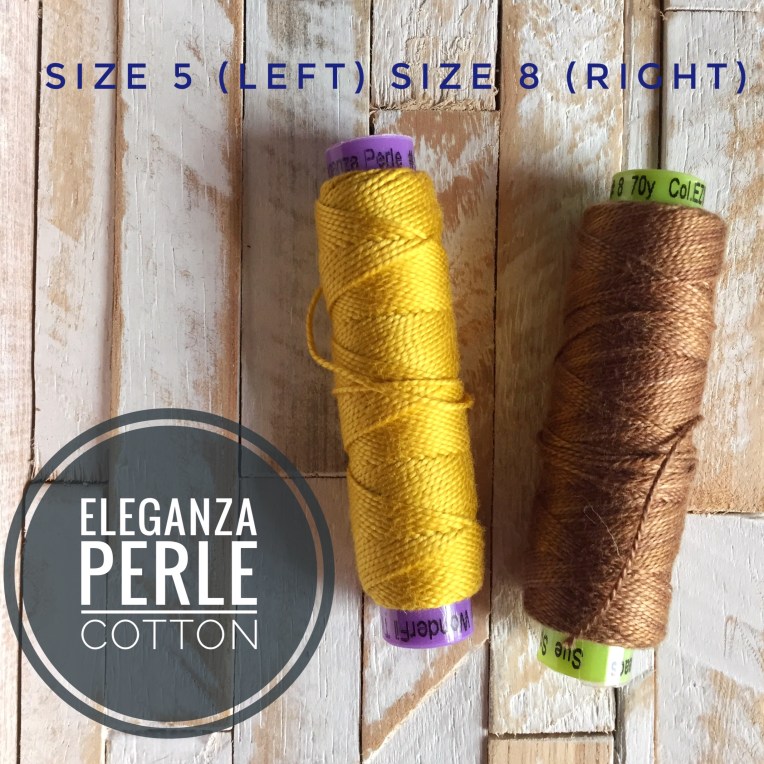
Hands down, my favorite everyday embroidery thread is Eleganza Perle Cotton. A collaboration with Wonderfil Specialty Thread, these colors from Sue Spargo are rich and saturated and match any project I am working on.

In the picture below, you will notice that size 5 is slightly thicker than size 8. With Perle Cotton, you do not need to separate threads, like you might typically do with regular floss. This is meant to be used directly off the spool, which might partially be why I like it so much!

You also get a lot of thread for your money with these spools! The size 5 comes in 40 yard spools and the size 8 comes in 70 yard spools.

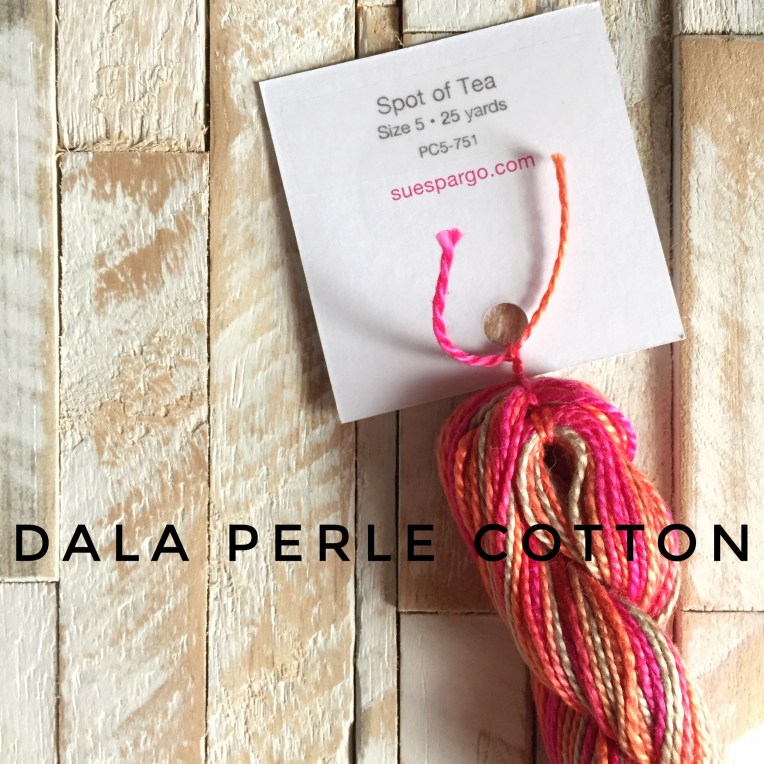
This Dala Perle Cotton also comes from Sue Spargo, only this one is hand-dyed in small batches by her daughter, Kelly. The colors in these variegated threads are also incredible!

If you are used to using thinner threads but want to add a bit more texture to your work, I suggest giving this particular brand a try. It is easy to work with, does not need to be separated and also adds lovely visibility to your stitches. And notice the twist in the threads? That adds to the texture of your work and gives it a bit of shine. If you are going to be spending lots of time adding your embroidery to a project, you definitely want those stitches to stand out, right?!

Have you ever worked with wool yarn or thread in your embroidery? If you haven’t, these are my two favorite brands of wool yarn to use in my hand stitched projects.

On the left is Koigu Needlepoint Yarn which I picked up on a recent trip to Purl Soho in NYC. It comes in 11 yard hanks and is the weight of a fingering yarn. It does not need to be separated like regular embroidery floss. I have found that even though it looks thicker, it threads through Milliner’s Needles easily and I haven’t had any problems using it in my embroidery.

The Ellana wool thread on the spool is from Sue Spargo. Compared to the spools of Eleganza Perle cotton, this thread is thinner and wispier. I like to use it double stranded, but if you are looking to add delicate texture, then you can certainly use it as a single strand. This also comes 70 yards to a spool and the color selection cannot be beat! I could seriously find a use for every single color in this collection!!!

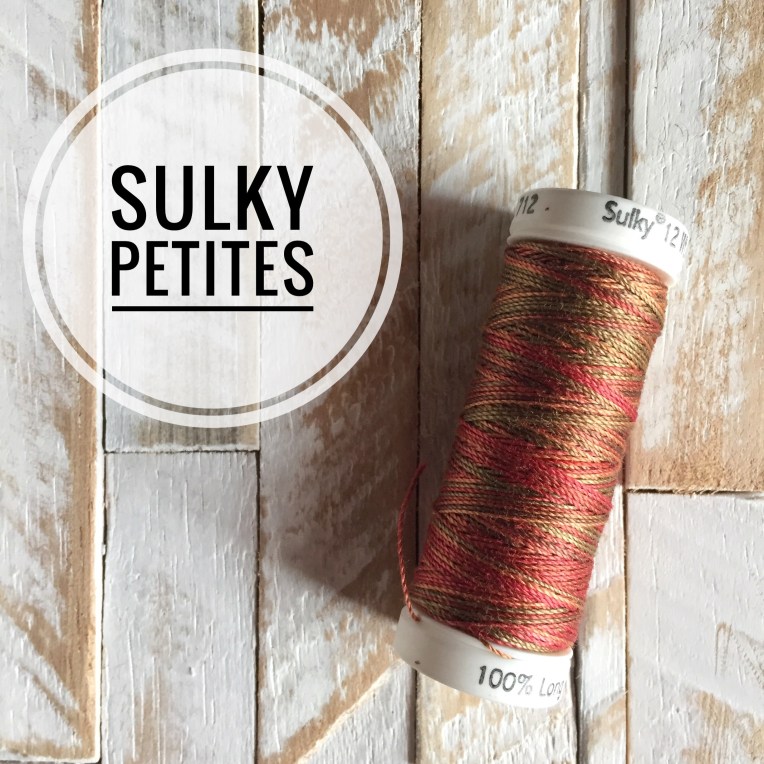
My favorite threads for adding beads to my work are these Sulky Petites and Sulky Blendables. When compared to a DMC type floss, these are the weight of 2-strands of floss. Each spool is 50 yards. I like using these to add beads because the colors are subtle enough to blend with my work and I rarely have problems with the thread tangling. This is a nice, lightweight addition to my embroidery toolbox!

Boho Stitch Along. Week no. 12

Welcome back for Week no. 12! If you are just beginning a piece for the #BohoSAL, check out my previous posts here. And if you are new to embroidery and want to learn the basics, check out my embroidery book, Boho Embroidery for everything you need to get started!


I’m continuing along with my Flaurie and Finch “Shiny Objects” hoop this week for the Boho Stitch Along and first of all, I promised the thread sources that I used in this hoop! From left to right they are:

Lion Brand bonbons, Sue Spargo Eleganza Perle Cotton and Silk n’ Colors from The Thread Gatherer.

I love the variety of textures that these threads lend to this project!

These are the Lion Brand Yarn bonbons which I found at Joann but Amazon also has them in all of the colors. I’ve found that the colors in store vary and they can be tricky to find (usually hanging somewhere in the yarn department but sometimes closer to embroidery supplies).

I originally picked them up because they are cute and tiny (and yes, I fall for stuff like that all the time!) but I wasn’t sure how they would work with embroidery. It turns out they work awesome! I use a Milliner’s Needle and easily embroider with this thicker-than-floss-thinner-than-yarn bonbon!

This week I also picked up, but didn’t test out yet, this Dritz Non-Stick Pressing Sheet. I have found that when I am working with Batik fabric, my usual Heat n Bond method does not always work great…sometimes leaving behind the texture of the Heat n Bond on the fabric itself. Hopefully this extra layer will help with that problem. I’ll let you know when I actually try it out!

And lastly, we had quite the snow/sleet storm this week and, eager for winter to be gone already, it made me pull out this neon Cotton + Steel hoop that I had prepped awhile back and stitch it up!

I echoed the shapes from the background fabric (a Cotton + Steel print from Alexia Abegg) and layered several other fabrics from the same line before embroidering in my most neon colors! A painted neon hoop completed it and it’s finally available in my shop!

Have a great week stitching!

-nichole

Boho Stitch Along. Week no. 10

Welcome back for Week no. 10! If you are just beginning a piece for the #BohoSAL, check out my previous posts here. And if you are new to embroidery and want to learn the basics, check out my embroidery book, Boho Embroidery for everything you need to get started!


I’m so enjoying taking my time on this Anna Maria Horner Fibs and Fables hoop. This week, I started one of my clouds. I’m not sure what my plan is for all of the clouds yet, but I feel like this is a really fun start for this piece!

Let’s see what our stitch along friends are up to this week, shall we?!


Check out the tools that @stitchalongwithjen keeps nearby for her stitching project! I’m all about Elmer’s Washable Glue for just about everything!!!

I love the what @andreatebs is doing here. To achieve perfectly spaced stitches, she is using Tiger Tape. I have never used this, going the route of chalk or pen lines and a ruler, but I am now curious and want to give this technique a try!

Melissa is working with some teeny tiny Dandelyne hoops…my favorite mini hoop designer!!! These are beautiful earrings!

I love watching this one by Ann take shape. And how about that adorable needle minder?!

Another fabulous work in progress by @yondergirlie with a fabulous pair of scissors (I have and love those!) and her floss on a wood bobbin!!

And it looks like @belladar58 has new threads from @thethreadgatherer on those adorable mini spools!!!

I am asked a lot about needles and so (hopefully) midweek, i’ll be doing a needle round up! Stay tuned and until then, happy stitching!

-nichole

Boho Stitch Along. Week no. 1

I don’t know about you, but I’m incredibly excited to dive in to a project that does not have deadlines, rules or requirements! The Boho Stitch Along (or #BohoSAL on social media) is just that sort of project. In my previous Stitch Along post, you’ll see the Cotton + Steel hoop that I was stitching in 2016. This was my in-between-projects-in between-deadlines-car-stitching-day-tripping-mind-relaxing embroidery piece.

As 2016 drew to a close, I thought it would be fun to begin a new piece and add stitches to it every week. And I thought it would be even more fun to invite others to stitch along with me. This is the perfect project for a beginning embroiderer who is just learning to stitch or an experienced embroiderer who is looking to add new stitches to an existing stitch repertoire.

Now on to my fabric reveal!

I will be working on two hoops. My first hoop will be a large, 12″ sized project using a print from Leslie Tucker Jenison’s upcoming line, “Urban Artifacts” for RJR Fabrics. When I first saw this fabric line at Quilt Market in October, I was just blown away. Hearing Leslie talk about how she created each design in the fabric made me love it even more. Her creativity is inspiring. And any fabric that uses bees in the selvage is a winner in my book!


My second hoop is much smaller (for portability, because car stitching!) I chose a Cotton + Steel print by Melody Miller because my 2016 C+S hoop could use some company!

My thread choices will be mostly Sue Spargo Eleganza Perle Cotton in sizes 8, 5 and 3. And check out my newest favorite stitching accessories in the above picture: Alison Glass Needleminders and Tula Pink Micro Tip Snips.

I’m excited to start stitching and I can’t wait to check out all of your fabric choices!

As the Boho Stitch Along goes along, I will be posting more of my favorite stitching accessories, tips, stitching videos and other how-tos.

Share your pictures with the #BohoSAL and enjoy this collaborative and creative environment!

Secret Tool Stash

I have a secret tool stash. There, my secret is out. Just don’t tell my husband, because he doesn’t know about them. Well, he kind of does, but he doesn’t know where I stash them.

I move things around a lot, hang things and then change my mind and hang them again. I staple fabric to things, then change my mind, pull out staples and re-staple different fabric. I do a lot of this hanging, re-hanging, stapling and re-stapling when he is at work. I can only do this when I have my tools and the aforementioned husband might not be the best at putting tools back where they belong. Hence, my secret tool stash.

image

I have a very old chair (and extremely comfortable) chair in my studio that I recovered once when I bought it about 4 years ago. I decided on a whim that it needed freshening and after a quick trip to JoAnn, I had a yard of navy fabric that screamed “new chair cover!”

This was one of the easier chair recovers I’ve done. It was simply undoing staples, removing the old fabric and stapling new fabric onto the seat.

image

15 minutes later and I had a new seat! And some re-stashed tools, safe until next time.

image