As an avid bead and button collector, I’m always looking for fun ways to use the supplies that I have. And maybe, just maybe, I’m always looking for an excuse to add to my collections!
I recently stitched one of my patterns, the Fractured Color Wheel, entirely in buttons.

This project took a little over two weeks and I worked on it almost exclusively during that time, but I didn’t track how many hours that I spent on it. A project like this is thought-consuming to me and so the time doesn’t even matter…I can hardly wait to return to it while I’m working on other things!
It is heavy…perhaps one of the heaviest hoops that I have ever stitched! In fact, I had to take it to the grocery store to weigh it on the produce scale and it came in at a whopping 1 lb, 8oz. That might not sound super heavy, but comparing it to most of my hoops (which probably don’t even reach 1 lb), it’s h e a v y!
Here’s the non-beaded, fabric-only version:

To convert this color wheel to an all-beaded wheel rather than a fabric one is very simple!
Choose a background fabric that is simple and light (it makes it easier to trace your pattern onto a light color). Your fabric will be so loaded up with beads and buttons and sequins by the end, that you won’t see it, so don’t use your favorite piece on this project!
Choose the color wheel size that you want to work with (the pattern offers three sizes). I chose to fit my color wheel into a 12-inch hoop.
Print out the pattern and place your fabric on it (pattern facing up, front side of the fabric facing up).
Using a light source (window or Lightbox) and a water soluble pen, trace the pattern onto the fabric. Again, your marks will not need to be washed off because they will be completely covered.
Once the pattern has been traced, fit the fabric into an embroidery hoop and tighten your fabric. And then let the fun begin!
With my fabric pen, I wrote the colors that I wanted to be in each portion of the color wheel. I then began with the biggest pieces…the buttons.
It helped to choose the buttons for each color and then stitch them in place before beginning with the beads. This helps you to visually focus on what color is placed in what spot, but it also helps to have the largest pieces in place first.
Once I had the large buttons in place, I began adding beads and sequins. Large beads first and the smallest beads last (the smallest beads help to fill in any areas that have white peeking through.
Continue adding your embellishments until you can’t see white through the hoop anymore. Tighten your fabric in the hoop once again and then follow the directions in the pattern for finishing the hoop. And you’re done!
One note about thread: I used <a href=”http://Sulky 12 Wt. Cotton Petites Thread” target=”_blank” rel=”noopener”>Sulky 12 wt Petites which is my favorite beading thread. I did not want to use a stranded thread because it’s a little tricky when you are working with lots of beads and I didn’t want to deal with tangles. Having a spool is really helpful. It’s also strong enough to handle all of this beading!
One other note: if you are stitching on heavy beads, it is helpful to stitch through the bead several times. The same thing goes for buttons. You are going to be spending lots of time on this, make sure your beads and buttons are on the fabric nice and tight so that if an accident happens, your beads don’t go scattering everywhere! And hopefully an accident doesn’t happen!
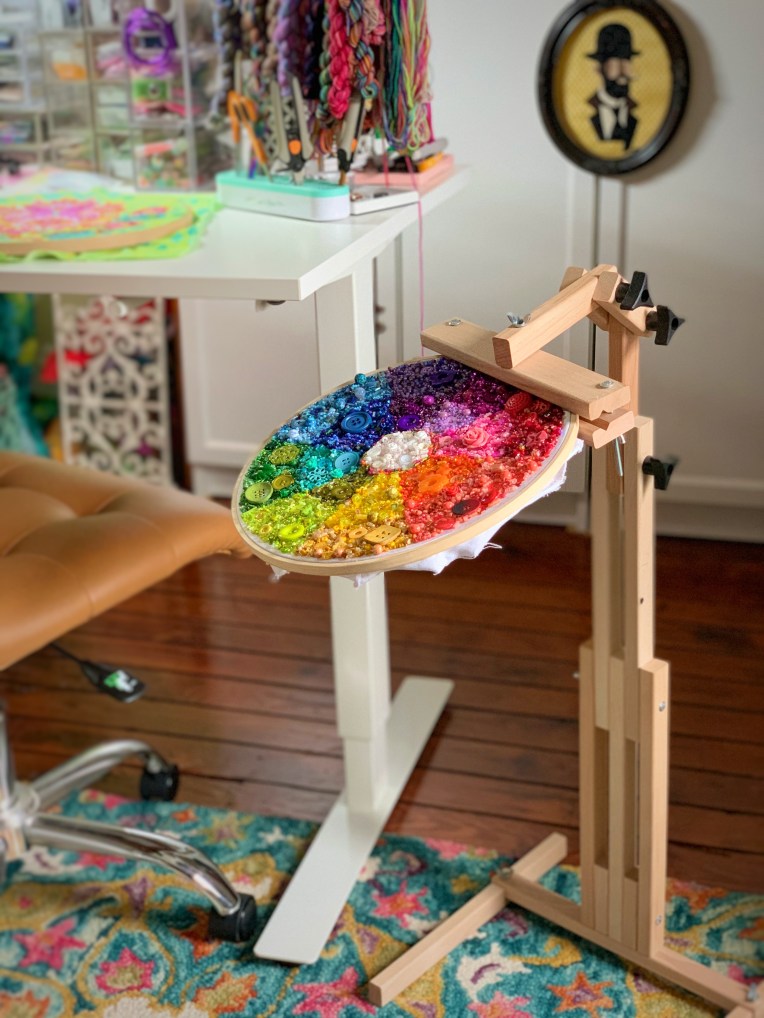
The embroidery stand that I used is also really helpful with a heavy embroidery project. You can find it here. I like that this stand is adjustable into several positions and it never feels like it’s going to be top-heavy when a project is secured into it.
And that’s it! With this post, I’m sending along to you the confidence to take on a project like this…it really is a beginner-friendly project! And it spotlights all of those special embellishments that you’ve been hoarding…I mean, collecting!!!
Have fun stitching and beading and be sure to tag me on Instagram if you take on this project!
Note: some links in this post are affiliate links. I will never recommend something to you that I have never personally tried and that I don’t stand behind for the use intended!
